Arlecchino FAQ
Leifa, Emiliabyss, Ac1d, Kol
Last updated on Apr 24, 2024
Credits:
- Leifa - Lead, Author (Character Overview, Talents), Rotation Mapping
- Emiliabyss - Lead, Calcs (Weapons - Overload Team), Author (Weapons, Artifacts, Constellations)
- Raikh - Calcs (Weapons – Vaporize Team)
- NoootNooot - Calcs (Artifacts, Constellations – Overload Team)
- Snowclipsed- Calcs (Artifacts, Constellations – Vaporize Team)
- Ac1d - Calcs, Author (Energy Recharge)
- Kol - Author (Teambuilding)
- June - FAQ Verification
- SirVaughan - Calc Verification
All calculations can be accessed through the Arlecchino Mastersheet.
Pre-TC is volatile and, as always, perpetually subject to change until release (and sometimes later!). Please note that these are theoretical suggestions. Everything described in this FAQ is a good faith analysis based on the little information about the character’s kit that we know. Team calcs, additionally, are not established yet, and as with everything in TC, the content in this FAQ should be taken with a grain of salt.
Character Overview
Authored by Leifa

Arlecchino is a 5-star Pyro Polearm character whose kit relies on stacking large amounts of Bond of Life to deal damage. Her Elemental Skill applies a Blood-Debt Directive to enemies, which can be absorbed by using her Charged Attack to gain Bond of Life. Blood-Debt Directives will upgrade after 5s, allowing Arlecchino to gain extra Bond of Life upon absorbing them. Her Elemental Burst absorbs any Blood-Debt Directives nearby, and heals Arlecchino based on both her current Bond of Life and ATK, cleansing any Bond of Life in the process. When Arlecchino has 30% or more Bond of Life, her Normal attacks will be converted to Pyro DMG, whilst dealing increased damage based on the Bond of Life's value.
Arlecchino will primarily be played as an on-field DPS, using her Skill to apply Blood-Debt Directive to enemies, swapping out briefly, then absorbing any Directives with her Charged Attack in order to gain Bond of Life. Arlecchino’s Utility Passive blocks any incoming healing other than her own, meaning she will be extremely fragile if played without a shielder due to her only healing after cleansing her Bond of Life with her Elemental Burst.
Talents
Authored by Leifa
Leveling Priority
NA >> Burst = Skill

Analysis
Arlecchino’s extra Bond of Life scaling increases with her Normal Attack Talent, making it the main priority to level for her personal damage. Her Elemental Burst and Skill have rather low scalings overall, with two Skills being about equal to her Burst in terms of multipliers. Additionally, Arlecchino’s healing does not increase with Elemental Burst Talent levels. Because of their low damage contribution, they can be leveled later if players wish. Even with Constellations, most of Arlecchino’s damage comes from additional scalings added from her C1, C2 and C6 rather than the Talent levels themselves.
Normal Attack: Invitation to a Beheading
 Arlecchino’s Normal Attacks have a bit more to them than other characters. Upon obtaining a Bond of Life equal or greater than 30% of her Max HP, she will enter the Masque of the Red Death state, converting her attacks to Pyro and enhancing her Normal Attack’s damage based on her current Bond of Life. When hitting enemies with Normal Attacks, she will consume 7.5% of her current Bond of Life. Additionally, each Normal Attack hit will reduce her Elemental Skill’s cooldown by 0.8s, allowing her to reliably use her Skill every rotation without relying on her Burst to reset its cooldown.
Additionally, holding her Charged Attack for longer allows her to glide swiftly along the ground for 5s at the cost of Stamina. With this, Arlecchino can float across water and up mountains with ease, aiding in exploration.
Elemental Skill: All Is Ash
 Her Elemental Skill sends out spikes in front of her before dashing to an enemy with a cleave, dealing AoE Pyro DMG. Enemies hit by her Elemental Skill will be marked by a Blood-Debt Directive, dealing damage up to 2 times every 5s. Upon using her Charged Attack or Elemental Burst, Arlecchino will absorb any nearby Blood-Debts from enemies, gaining 65% Bond of Life for each Blood-Debt absorbed, up to a maximum of 145% per Skill cast. Although her Skill doesn’t do much damage by itself, it is the crux of Arlecchino’s kit, allowing her to gain massive amounts of Bond of Life. It also generates 5 Pyro Particles with a 30s cooldown, although this cooldown will be a lot shorter in reality with her Normal Attack’s ability to reduce her Skill cooldown.
Elemental Burst: Balemoon Rising
 Arlecchino’s Elemental Burst deals damage in an AoE in front of her, whilst absorbing any nearby Blood-Debts to heal her based on her current Bond of Life and ATK. Although her Burst absorbs nearby Blood-Debts to grant her Bond of Life, her healing first cleanses her current Bond of Life before actually healing her, meaning it can not be used as an alternative to her Charged Attack. Thankfully, her Burst also resets her Elemental Skill’s cooldown, allowing her to still gain Bond of Life in a rotation, alongside an additional 5 Pyro Particles. Although it contains her only source of survivability, its long cast time and low damage result in it not being a meaningful ability for damage, and it should generally only be cast when needing to heal. For players that can ignore her Elemental Burst, this will result in pre-existing Bond of Life being carried through to her next rotation, increasing the damage dealt by her Normal Attacks.
A1 Passive: Agony Alone May Be Repaid
 5s after a Blood-Debt Directive is applied to an enemy, it will upgrade to a Blood-Debt Due. Upon absorbing a Blood-Debt Due, it will instead grant Arlecchino 130% Bond of Life. Additionally, once an enemy with a Blood-Debt dies, Arlecchino will immediately gain 130% Bond of Life. As a result of this, Arlecchino’s rotations will generally involve her using her Skill to apply her Blood-Debts, then swapping out until it has upgraded, where she will then swap back in to absorb it with a Charged Attack. Thankfully, enemies dying whilst Arlecchino is off-field will still grant her Bond of Life due to this Passive’s secondary effect, however, it is still bound by the 145% maximum Bond of Life instated by her Skill.
A4 Passive: Strength Alone Can Defend
 For every 100 ATK over 1000, Arlecchino will gain 1% Resistance to both Elemental and Physical DMG, up to a maximum of 20%. Despite helping with her survivability, this Passive generally won’t help considerably in keeping players alive. Furthermore, she is unable to realistically cap out this Passive without the help of Bennett, which allows her to easily reach over 3000 ATK.
Utility Passive: The Balemoon Alone May Know
 Rather than a general Utility Passive, Arlecchino instead sacrifices her ability to receive healing from teammates in exchange for an extra 40% Pyro DMG Bonus. This allows her to be used alongside healers without losing any Bond of Life which would decrease her overall damage. This Passive also only works during combat, allowing players in the Overworld to heal her freely if they dislike not being at full HP.
Constellation
Constellation 1 - "All Reprisals and Arrears Are Mine to Bear..."
 Masque of the Red Death is further enhanced, the value of the increase is 100%. Additionally, Arlecchino's interruption resistance is increased when she performs Normal or Charged Attacks while affected by the Masque of the Red Death
A humongous buff to Arlecchino’s damage, outperforming the difference between her signature weapon and the next best option. C1 is a high priority regardless of what team composition Arlecchino is used in. She also gains full interruption resistance for her Normal and Charged attacks, meaning they cannot be interrupted. Keep in mind that this effect is only active while she is attacking and leaves her vulnerable while moving.
Overloaded DPS% Increase vs. C0: 26.7%
Vaporize DPS% Increase vs. C0: 27.3%
Rating: 4.5/5
Constellation 2 - "All Reward and Retribution, Mine to Bestow..."
 Blood-Debt Directives are now already Blood-Debt Due when first applied.
When Arlecchino absorbs such a Due, she unleashes Balemoon Bloodfire in front of her, dealing 900% of her ATK as AoE Pyro DMG and increasing her All Elemental RES and Physical RES by 20% for 15s. This effect can trigger once every 10s.
You must first unlock the Passive Talent "Agony Alone May Be Repaid."
A minor DPS increase. Roughly 8% is still potent, but it feels a bit underwhelming compared to R1. Can reduce the DPS loss of having to urgently heal during her rotation since Burst is no longer locked to specific windows. The additional 20% Resistance on top of her A4 Passive also helps to make Arlecchino quite tanky, reducing the impact of taking damage during her rotations.
Overloaded DPS% Increase vs. C1: 8.9%
Overloaded DPS% Increase vs. C0: 38.0%
Vaporize DPS% Increase vs. C1: 8.2%
Vaporize DPS% Increase vs. C0: 37.8%
Rating: 2.5/5
Constellation 3 - "You Shall Become a New Member of Our Family..."
 Increases the Level of Normal Attack: Invitation to a Beheading by 3.
Maximum upgrade level is 15.
Arlecchino loves using her Normal Attacks, so this is a potent Constellation for her. The DPS increase that results from this is about what would be expected of a typical Constellation.
Overloaded DPS% Increase vs. C2: 17.6%
Overloaded DPS% Increase vs. C0: 62.3%
Vaporize DPS% Increase vs. C2: 15.5%
Vaporize DPS% Increase vs. C0: 59.1%
Rating: 3/5
Constellation 4 - "You Shall Love and Protect Each Other Henceforth..."
 When Arlecchino successfully absorbs a Blood-Debt Directive, Balemoon Rising's CD will decrease by 2s and 15 Energy will be restored to her. This effect can occur once every 10s.
Purely a quality-of-life Constellation. This makes it more feasible to Burst every rotation when you need the extra healing. There is no actual damage increase from this, and even if using her Burst every rotation becomes viable, her Burst does not contribute significantly to her damage profile.
If you choose to Burst every rotation, this is actually a roughly 0.2% decrease in DPS, but this decrease is so insignificant that the extra survivability is still useful.
Overloaded DPS% Increase vs. C3: 0%
Overloaded DPS% Increase vs. C0: 62.3%
Vaporize DPS% Increase vs. C3: 0%
Vaporize DPS% Increase vs. C0: 59.1%
Rating: 1/5
Constellation 5 - "For Alone, We Are as Good as Dead..."
 Increases the Level of Balemoon Rising by 3.
Maximum upgrade level is 15.
Arlecchino’s Burst is not especially important for her damage, so the increase here is negligible; almost non-existent. This is because Arlecchino only uses her Burst once every other rotation anyways. With C4 in-hand, maybe an once-per-rotation Burst can be squeezed in, but even then, this is probably her weakest Constellation.
Overloaded DPS% Increase vs. C4: 0.1%
Overloaded DPS% Increase vs. C0: 62.5%
Vaporize DPS% Increase vs. C4: 0.2%
Vaporize DPS% Increase vs. C0: 59.4%
Rating: 1/5
Constellation 6 - "From This Day On, We Shall Delight in New Life Together."
 The DMG of Balemoon Rising is increased by Arlecchino's ATK multiplied by 700% of Arlecchino's current Life Bond percentage.
For 20s after Arlecchino uses All is Ash, both her Normal Attacks and Elemental Burst gain 10% increased CRIT Rate and 70% increased CRIT DMG. This effect can be triggered up to once every 15s.
A massive 90 CV added onto Arlecchino plus a greater multiplier based on Bond of Life is nothing to sneeze at. It’s unfortunate that you have to go through C4 and C5 to get this Constellation. Skill -> Burst now becomes a powerful tool to instantly clear a wave in certain Abyss layouts.
Overloaded DPS% Increase vs. C5: 25.3%
Overloaded DPS% Increase vs. C0: 103.7%
Vaporize DPS% Increase vs. C5: 24.9%
Vaporize DPS% Increase vs. C0: 99.1%
Rating: 4/5
Energy Recharge Requirements
Authored by Ac1d
Arlecchino has a Burst that is detrimental to her damage output. However, it is needed to stay alive when used without a shielder like Zhongli since she can only be healed by her Burst while in combat. In general, it is advised to delay using her Burst as much as possible in order to avoid losing damage, although certain situations might call for it to be used more frequently. In those situations where she needs to use her Burst in every rotation, she can require up to 160% ER, but for general play she is perfectly fine with 100% ER.
| Scenario | ER Requirements | ER Saved per Favonius Trigger (Caught) | ER Saved per Favonius Trigger (Not Caught) |
|---|---|---|---|
| All teams, Burst every other rotation | 100% | 0% | 0% |
| Second Pyro, Burst every rotation | 140%–150% | 17% | 10% |
| Triple Pyro, Burst every rotation | 120% | 12% | 8% |
| Double Hydro, Burst every rotation | 150% | 19% | 12% |
Arlecchino’s ER requirements will vary based on your team and rotation. For a more accurate estimate, please use the Energy Recharge Calculator.
For more details on how Favonius weapons will affect your team, please use Ac1d’s Favonius Mastersheet.
Artifacts
Authored by Emiliabyss
Artifact Stats
Sands of Eon: ATK% / EM
Goblet of Eonothem: Pyro DMG%
Circlet of Logos: CRIT
Arlecchino’s build style is straightforward. Simply build as much CRIT as possible while maintaining a 1:2 ratio between CRIT Rate and CRIT DMG, then build ATK% if you don’t intend to use Amplifying Reactions for damage, otherwise use EM.
Even in Vaporize playstyles, ATK% and EM are comparable, though EM remains the better choice overall until you exceed 150 EM. Between ATK% and EM, in these cases, go for the best substats if you don’t want to keep farming.
Substats: CRIT% > ATK%
Artifact Sets
4pc Fragment of Harmonic Whimsy
 A hyper-specific artifact set, meaning the main character you’re going to be farming this for is Arlecchino. It is roughly 5%+ better than 4pc Gladiator’s Finale.
4pc Gladiator’s Finale
 If you’ve been playing Genshin Impact for a long time, you are bound to have a good number of strong Gladiator pieces laying around, since they drop from nearly every Boss fight in the game. Its emphasis on buffing Normal Attacks is particularly good for Arlecchino.
2pc Pyro DMG%/ATK%/EM (Vaporize) Combinations
 Pyro DMG% will go further for Arlecchino than ATK% and EM 2pc bonuses will, but these differences are so small that you should probably just go with the 2pc combinations with the best substats. These combinations are roughly 10%+ less effective than Harmonic Whimsy.
Weapons
Authored by Emiliabyss
Crimson Moon’s Semblance
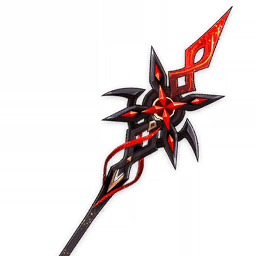 One of the best signature weapons for its designated character we’ve seen in a while, being more than 15% above the next best option at the same refinement, whether you use her in Vaporize teams or Overloaded teams. It’s disappointing that the weapon will rarely be the best choice for a non-Arlecchino character. Not recommended as a general-use pull, but certainly recommended for Arlecchino if you can spare the Primogems, as it also grants more healing due to high ATK and extra Bond of Life. All other R5 5-star weapons are worse than Crimson Moon’s R1 performance, though C1 provides the greater damage boost if you had to choose only one.
Primordial Jade-Winged Spear / Staff of Homa (Below 50% Max HP)
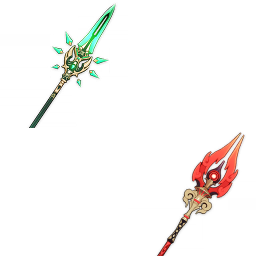 Jade Spear is great for Arlecchino due to its synergy with rapid Normal Attacks and a generically strong standard banner 5-star weapon thanks to its CRIT Rate stat and high Base ATK, the latter of which allows greater healing for comfort.
R1 Homa surpasses this weapon only when you can keep Arlecchino below 50% Max HP. It’s assumed here that Arlecchino will not consistently be under 50% HP. When Above 50% HP, R1 Homa is comparable to R5 Deathmatch.
Staff of the Scarlet Sands (Vaporize)
 A comfortable choice when building CRIT Rate on artifacts proves to be challenging. In Overloaded teams, it is within 1% of Primordial Jade-Winged Spear, but just under 3% better than it in Vaporize teams when using EM Sands.
Deathmatch R5 (General Single-Target) / Ballad of the Fjords R5 (Where EM Matters)
 Deathmatch (at any refinement), in Overloaded teams, is the only legitimate 4-star weapon option for Arlecchino and surpasses some 5-star options as well. Ballad of the Fjords excels in teams where EM matters, so long as you can maintain its 3-element requirement. Deathmatch assumes single-target scenarios in all calcs.
Calamity Queller
 Arlecchino is off-field for just long enough to gain the full stacks she needs from Calamity Queller to compete with other options. It will rarely be the best choice for your account to use Calamity Queller over lower refinements of Deathmatch or R5 White Tassel, since the CRIT stats on Deathmatch and White Tassel make artifact farming much easier.
Vortex Vanquisher is slightly worse than this when constantly shielded, but when unshielded, even White Tassel is a better option.
White Tassel R5 or Deathmatch R1
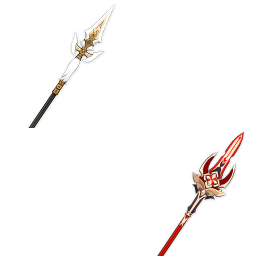 White Tassel, a 3-star weapon, is stronger than every 4-star weapon besides Deathmatch and, in Vaporize teams, Ballad of the Fjords. White Tassel’s damage is 2% (Vaporize) and 4% (Overloaded) lower than R1 Deathmatch in single-target scenarios, and Deathmatch requires swiping for Battle Pass. White Tassel’s effects are straightforward, give CRIT Rate to make artifact farming easier, and synergizes with Arlecchino’s Normal Attack-heavy playstyle. White Tassel, however, falls off significantly if you are not within Bennett’s Burst circle.
Teambuilding
Authored by kol
Bennett
 Bennett is a particularly notable teammate for Arlecchino, providing an incredibly powerful ATK buff for Arlecchino and other teammates who can snapshot, which greatly increases the damage output of Arlecchino and her team. The difference in damage between having and not having Bennett’s buff cannot be understated; while Arlecchino teams can be effective even without him, the majority of her strongest teams — in every team archetype — feature him. His one major drawback is that his buff is limited to the stationary circle of his Burst’s range.
Overloaded
 Arlecchino | Chevreuse | Electro | Flex
Chevreuse’s potent buffs — enabled exclusively by compositions of only Pyro and Electro characters — allow Arlecchino’s Overloaded teams to deal high amounts of primarily raw damage. Players can choose a high-risk, high-reward playstyle by exchanging defensive units for significantly higher damage, although safer team compositions can be fairly strong as well. As Overloaded may knock lighter enemies out of Bennett’s circle, Overloaded teams are most effective against heavy enemies.
Teammates
Electro Options:
- Fischl: Fischl offers significant single-target damage, high particle generation, and consistent Electro application to trigger Chevreuse’s buffs, all while requiring little field time. She is a strong candidate for Arlecchino’s Overloaded teams.
- Yae: Yae can be run by herself in a similar role as Fischl, although she generates fewer particles and occupies more field time than Fischl. Alternatively, she can be run alongside Fischl in the Flex position to provide additional off-field damage. It is typically not worth the setup and field time to cast Yae’s Burst in Arlecchino teams.
Flex Options:
- Bennett: As described in his section above, Bennett provides a powerful ATK buff for Arlecchino, as well as Fischl and/or Beidou if they are on the team.
- Thoma/C4 Yanfei/Dehya: Thoma, C4 Yanfei, and Dehya provide shields or damage mitigation, and interruption resistance. Running a defensive unit can make playing Arlecchino a more comfortable experience.
- Xiangling/Beidou: Xiangling and Beidou both can take advantage of Chevreuse’s buffs and offer significant off-field damage. Beidou also provides substantial damage reduction and interruption resistance — as well as a small shield at C1 — that makes her an effective defensive option. Due to the nature of her Burst, Beidou’s effectiveness is reduced greatly in single-target scenarios.
Vaporize
 Arlecchino | Hydro | Flex | Flex
Arlecchino’s Vaporize teams typically focus on amplifying her damage through Vaporize and other buffs. Only Yelan and Xingqiu provide the Hydro application necessary for Arlecchino to consistently Vaporize her attacks. The other two slots are more flexible, offering an assortment of buffs, personal damage, and/or defensive utility depending on the characters.
Teammates
Hydro Options:
- Yelan: Yelan provides consistent off-field Hydro application, excellent single-target personal damage, and a ramping DMG% buff.
- Xingqiu: Xingqiu plays the same role as Yelan, but he offers a substantial amount of interruption resistance instead of a buff. He can also be run alongside Yelan in one of the Flex slots, where he and Yelan will provide Hydro Particles for each other.
Flex Options:
- Bennett: As described in his section above, Bennett’s powerful ATK buff increases Arlecchino’s damage significantly.
- Sucrose/Kazuha: Sucrose and Kazuha can both hold 4pc Viridescent Venerer to reduce enemy Pyro RES, and provide grouping and their own potent buffs, with Sucrose buffing team EM and holding Thrilling Tales of Dragon Slayers, and Kazuha buffing Elemental DMG%.
- Fischl/Yae: Fischl and Yae both provide significant personal damage, high particle generation, and off-field Electro application, allowing Arlecchino to trigger Overloaded. Note that Yae does not typically Burst in Arlecchino teams.
- Zhongli/Layla/Diona: Zhongli, Layla, and Diona are all viable shielders for Arlecchino’s Vaporize teams who can increase her survivability and comfort of gameplay. Zhongli additionally provides universal RES Shred, while Diona and especially Layla can allow Arlecchino to occasionally Melt her attacks on Freezable enemies. Note that Diona and Layla can actually reduce Arlecchino’s Vaporize count on enemies that are not Freezable.
- Xianyun: Xianyun enables a Plunging Attack playstyle wherein Arlecchino weaves Plunging Attacks that are amplified by Vaporize and Xianyun’s buffs into her attack sequence, creating the potential for significant AoE damage. Although Furina is typically not recommended for Arlecchino teams due to her inability to provide consistent Hydro application and anti-synergistic mechanics, she can be worth running in Xianyun teams, alongside either Yelan or Xingqiu.
- Chiori: Without C1, Chiori needs a Geo Construct to maximize her Skill damage, so she is best paired with Zhongli, where she can take advantage of his Skill’s Stone Stele and Geo Resonance to deal substantial off-field damage. Said Geo Resonance also provides Arlecchino a 15% DMG Bonus.
- Yun Jin: Arlecchino’s reliance on Normal Attacks to deal much of her damage allows her to take advantage of Yun Jin’s Normal Attack-specific buffs.
Mono Pyro
 Arlecchino | Bennett | Anemo/Flex | Flex
Mono Pyro compositions focus on increasing non-reaction damage, by taking advantage of increasing Pyro particle generation across the team to lower ER requirements and Pyro RES Shred from 4pc Viridescent Venerer. Bennett is a staple in the team, as he provides Pyro particles and substantially boosts Arlecchino’s damage through his powerful ATK buff.
Teammates
Anemo Options:
- Kazuha: On top of holding 4pc Viridescent Venerer, Kazuha provides grouping and a Pyro DMG% Bonus.
- Sucrose/Heizou: As Catalyst users, both Sucrose and Heizou can equip Thrilling Tales of Dragon Slayers to provide an ATK% buff for Arlecchino, as well as the Pyro RES Shred from 4pc Viridescent Venerer.
- Lynette: Lynette can provide a small ATK% buff in addition to holding 4pc Viridescent Venerer.
Flex Options:
- Zhongli: Zhongli’s hefty shield provides universal RES Shred, and creates for a more comfortable and safe gameplay experience. He can also hold 4pc Archaic Petra to buff Arlecchino’s Pyro DMG%, although collecting the Crystallize Shards necessary to obtain the buff can be difficult.
- Chiori: Without C1, Chiori needs a Geo Construct to maximize her Skill damage, so she is best paired with Zhongli, where she can take advantage of his Skill’s Stone Stele and Geo Resonance to deal substantial off-field damage. Said Geo Resonance also provides Arlecchino a 15% DMG Bonus.
- Xiangling: Xiangling snapshots Bennett’s ATK buff onto her Burst to deal substantial off-field damage. She benefits both from Pyro RES Shred from an Anemo unit holding 4pc Viridescent Venerer, and from reduced ER requirements thanks to the combined Pyro particle generation of 3 Pyro units.
- Yun Jin: Arlecchino’s reliance on Normal Attacks to deal much of her damage allows her to take advantage of Yun Jin’s Normal Attack-specific buffs.


