Chevreuse FAQ
Leifa, Whalien
Last updated on Jun 4, 2025
Credits:
- Leifa - Lead, Author, Calcs | Writing: Everything | Calcs: Everything
- .whalien - Author | Writing: Teambuilding
- Acacia - Consultation
- lizz71 - Consultation
- ashen_flame - Writing Verification
- sirvaughan - Calcs Verification, Framecounting
For all Chevreuse Calcs you can reference: Chevreuse Mastersheet by Leifa
Pre-TC is volatile and, as always, perpetually subject to change until release (and sometimes later!). Please note that these are theoretical suggestions. Everything described in this FAQ is a good faith analysis based on the little information about the character’s kit that we know. Team calcs, additionally, are not established yet, and as with everything in TC, the content in this FAQ should be taken with a grain of salt.
Character Overview
Authored by Leifa

Chevreuse is a 4-star Pyro Polearm character aligned with Ousia whose kit involves providing large amounts of buffs to teams centered on the Overloaded reaction. Chevreuse’s A1 Passive reduces the Pyro and Electro RES of enemies, with the restriction of using only Pyro and Electro teammates. Her Elemental Skill fires a shot from her gun, dealing damage to an enemy and providing a slow healing effect to the on-field character. After a teammate triggers an Overloaded reaction, this shot becomes empowered, dealing increased damage and activating her A4 Passive to grant a teamwide ATK buff based on her Max HP. At C6, any characters healed by Chevreuse will gain a Pyro and Electro DMG Bonus buff, increasing the potency of her supportive capabilities.
Chevreuse will be played primarily as a supportive teammate, swapping on-field to use her Elemental Skill and Burst quickly, then leaving to let her teammates utilize the buffs she provides. Although her A4 Passive and C6 don't require Pyro and Electro teammates to activate, she is unable to reduce the Resistance of enemies with her A1 without these team restrictions.
Talents
Authored by Leifa
- Leveling Priority: Elemental Skill > Elemental Burst >> Normal Attack

Analysis
Chevreuse’s buffs are unrelated to her Talent levels, however her healing scales with her Elemental Skill, making that the first priority for some extra comfort. Her Normal Attacks are unused, making her Elemental Burst next in line for leveling. Although her Burst Talent levels are extra damage, Chevreuse is not dealing a large amount of damage in a majority of teams and sometimes does not cast her Elemental Burst at all, meaning this can also be ignored if players aren't using it.
Talent Overview
Normal Attack: Line Bayonet Thrust EX
Chevreuse performs a 4-hit attack string. However, her kit doesn’t require using them at all, meaning they can be safely ignored.
Elemental Skill: Short-Range Rapid Interdiction Fire
When tapped, Chevreuse’s Elemental Skill fires a quick shot from her musket, dealing AoE Pyro DMG. When held, Chevreuse enters an Aiming Mode, locking onto a target in her crosshair to fire a more precise shot, dealing increased Pyro DMG with a slight increase to her interruption resistance. If an Overloaded reaction has been recently triggered, her Hold Skill will become enhanced, firing an Overcharged Ball for even higher DMG upon its next use. After casting her Skill, the current active character will receive a healing over time effect for 12 seconds, triggering once every two seconds and scaling off of her Max HP. This healing typically ranges from around 3,000 - 4,000 per tick when using her Burst, and around 5,000 when not, making her a good defensive slot in for teams. Chevreuse’s Skill generates 4 particles with a cooldown of 15 seconds, meaning she will generally only get one set of particles per rotation. Because of the extra benefits granted by her enhanced Hold Skill, there is little reason to use her Tap Skill in combat.
Elemental Burst: Ring of Bursting Grenades
Chevreuse’s Elemental Burst fires an explosive grenade, dealing AoE Pyro DMG and exploding into 8 smaller cluster shells, which detonate after a short period. These cluster shells have inward knockback, meaning enemies will be hit towards the center of her Elemental Burst’s explosion. However, these cluster shells will only apply Pyro on the 1st and 4th hits and explode relatively quickly compared to other bomblets, such as Klee or Kirara’s, which stick around after being created, making it unreliable as a form of off-field Pyro application. Although her Burst costs 60 Energy to cast, it’s not required to activate any of her buffs, meaning players will generally prefer to stack HP / Healing Bonus for healing and buffs rather than ER / ATK% / CRIT for Burst damage.
A1 Passive: Vanguard’s Coordinated Tactics
When the team is only composed of Pyro and Electro characters, Chevreuse reduces the Pyro and Electro RES of opponents hit by Overloaded by 40% for 6 seconds. Although this means her teams are unable to run teammates of a different Element, such as an Anemo character for grouping, she is able to reliably shred the Resistances of two Elements at once and from off-field, compared to 4pc Viridescent Venerer which requires an on-field Swirl Reaction. This also allows her to shred the Resistance of enemies in scenarios where 4pc VV can not, such as on enemies with innate auras.
A4 Passive: Vertical Force Coordination Upon firing an Overcharged Ball, Chevreuse increases the ATK of Pyro and Electro teammates by 1% for every 1,000 Max HP she has, maxing out at 40% ATK. These effects will be maxed out at 40,000 HP, meaning players generally want to build her fully on HP rather than damage stats.
Utility Passive: Double Time March
Chevreuse decreases the sprinting Stamina consumption of party members by 20%, allowing for more dashes before Stamina is fully depleted, helping with both survivability and convenience.
Constellations
Authored by Leifa
DPS% increases assume an average of her personal damage increases between both damage and healing-oriented builds. Although their increases are similar, please check the Chevreuse Mastersheet for specifics.

Constellation 1 - Stable Front Line's Resolve
-
When the active character with the "Coordinated Tactics" status (not including Chevreuse herself) triggers the Overloaded reaction, they will recover 6 Energy. This effect can be triggered once every 10s.
-
You must first unlock the Passive Talent "Vanguard's Coordinated Tactics."
Although this Constellation may look good on paper, in reality it’s difficult to control which characters trigger Overloaded and when, requiring near-perfect timing to proc this effect twice for a typical 20-second rotation. Although it may help some characters, the Energy provided from this Constellation is not to be relied on, but treated as an extra bonus for the on-field character that receives this effect.
DPS% Increase vs. C0: 0%
Healing% Increase vs. C0: 0%
Rating: 1/5
Constellation 2 - Sniper Induced Explosion
After Holding Short-Range Rapid Interdiction Fire and hitting a target, 2 chain explosions will be triggered near the location where said target is hit. Each explosion deals Pyro DMG equal to 120% of Chevreuse's ATK. This effect can be triggered up to once every 10s, and DMG dealt this way is considered Elemental Skill DMG.
After Chevreuse uses her Hold Skill, her bullet will explode into two smaller explosions with inward knockback, applying an extra instance of Pyro and dealing Pyro DMG. Unfortunately, her personal damage isn’t particularly high, leading to this Constellation being quite underwhelming. However, the two extra hits can be useful to trigger effects such as Favonius Lance’s passive.
DPS% Increase vs. C1: 17.08%
DPS% Increase vs. C0: 17.08%
Healing% Increase vs. C1: 0%
Healing% Increase vs. C0: 0%
Rating: 1/5

Constellation 3 - Practiced Field Stripping Technique
Increases the Level of Short-Range Rapid Interdiction Fire by 3.Maximum upgrade level is 15.
C3 increases the levels of Chevreuse’s Elemental Skill, increasing her healing and slightly increasing her damage.
DPS% Increase vs. C2: 5.67%
DPS% Increase vs. C0: 23.73%
Healing% Increase vs. C2: 19.43%
Healing% Increase vs. C0: 19.43%
Rating: 2.5/5

Constellation 4 - The Secret to Rapid-Fire Multishots
After using Ring of Bursting Grenades, the Hold mode of Short-Range Rapid Interdiction Fire will not enter cooldown when Chevreuse uses it. This effect is removed after Short-Range Rapid Interdiction Fire has been fired twice using Hold or after 6s.
After casting her Elemental Burst, Chevreuse is granted the ability to use her Hold Skill an extra two times, allowing up to three quick and consecutive Skill casts. Unfortunately, these extra Skill uses don’t generate particles due to her 10-second cooldown on particle generation. Additionally, this Constellation doesn’t reset her Skill’s cooldown, meaning Chevreuse will be unable to use her C4 if she uses her Skill before her Burst. In a 25-second rotation, it is possible for Chevreuse to cast her Burst and 1 Skill early on, then come back 10 seconds later for another Skill cast, allowing her to generate up to 8 particles per rotation. While only a few rotations can actually accommodate this, those that can may find it helpful to funnel the extra particles to another teammate.
DPS% Increase vs. C3: 35.18%
DPS% Increase vs. C0: 67.25%
Healing% Increase vs. C3: 0%
Healing% Increase vs. C0: 19.43%
Rating: 1/5
DMG Build Rating: 3/5

Constellation 5 - Enhanced Incendiary Firepower
Increases the Level of Ring of Bursting Grenades by 3.Maximum upgrade level is 15.
C5 increases the levels of Chevreuse’s Elemental Burst, slightly increasing her personal damage.
DPS% Increase vs. C4: 6.57%
DPS% Increase vs. C0: 78.23%
Healing% Increase vs. C4: 0%
Healing% Increase vs. C0: 19.43%
Rating: 0/5

Constellation 6 - Esteem for the Innocent
After 12s of the healing effect from Short-Range Rapid Interdiction Fire, all nearby party members recover HP equivalent to 10% of Chevreuse's Max HP once.
After a party member is healed by Short-Range Rapid Interdiction Fire, they gain a 20% Pyro DMG Bonus and Electro DMG Bonus for 8s. Max 3 stacks. Each stack's duration is counted independently.
Chevreuse’s C6 provides a 20% DMG Bonus to any characters she heals, stacking up to 3 times for a maximum of 60% Pyro and Electro DMG Bonus. This effect can take some time to stack up due to her slow healing intervals but is a potent buff for any Chevreuse team. Additionally, after 12 seconds of healing from her Skill, Chevreuse heals the entire party, helping for extra survivability and granting them a stack of her DMG Bonus buff, increasing the team’s overall damage output further. Keep in mind, the results here are for personal damage, the teamwide damage increase is ~10% overall.
DPS% Increase vs. C5: 0%
DPS% Increase vs. C0: 78.23%
Healing% Increase vs. C5: 96.66%
Healing% Increase vs. C0: 134.87%
Rating: 4/5
ER Requirement
Authored by Leifa
In general, Chevreuse’s ER Requirements are quite high, ranging from 175% - 205%. Thankfully, she is able to run weapons such as Favonius Lance to benefit the team’s Energy or the Fontaine craftable Polearm, Rightful Reward. Rightful Reward can lower her ER Requirements by ~25% - 50% depending on refinements, and even further if she’s able to trigger its passive twice per rotation. However, Chevreuse’s Burst isn’t required to activate any of her buffs, meaning players can choose to ignore ER% stats and focus on offensive or supportive stats if they aren’t interested in its inward knockback, or don’t need to activate artifact set bonuses such as Noblesse Oblige. When run with Raiden, her ER Requirements plummet to around 105% - 135%, allowing her to further focus on offensive or supportive stats depending on how players want to build her, whilst easily Bursting every rotation.

Energy requirements will vary based on your team and rotation. For a more accurate estimate, please use the Energy Recharge calculator linked here.
For more details on how Favonius weapons will affect your team, please use Ac1d’s Favonius Mastersheet linked here.
Artifacts
Authored by Leifa
Artifact Stats
Sands of Eon: HP%
Goblet of Eonothem: HP%
Circlet of Logos: HP% / HB%
If players require the use of Chevreuse’s Elemental Burst, her ER Requirements should be met first before looking for other stats. Chevreuse prefers to stack as much HP% as possible, helping her to reach 40,000 HP to maximize her A4 Passive. After that, she is able to focus on other stats that benefit her healing, such as a Healing Bonus Circlet. In Raiden teams, Chevreuse’s ER Requirements are low enough that she can aim for more offensive substats, such as CRIT and ATK%.
Substats: ER% until requirement (if Bursting) > HP until ~40,000 > HB% > HP% > Flat HP
Artifact Sets
 4pc Song of Days Past (SDP)
4pc Song of Days Past is a new artifact set releasing in 4.3, granting five instances of Flat DMG Bonus to the on-field character based on the total healing recorded after 6 seconds. This effect works the same way as Shenhe’s Icy Quill effect, resulting in the additive stacks being used up quicker in AoE compared to single-target. On top of this, other characters may accidentally use up these stacks during a rotation if it triggers during their field time. However, Chevreuse is able to max out the set’s effect with her C6 and can be a viable alternative in some teams already running other supportive sets. For players ignoring her Elemental Burst, Chevreuse can max out this set’s effect twice in a rotation, due to the increased healing from additional HP and Healing Bonus stats.
 4pc Noblesse Oblige (NO)
4pc Noblesse Oblige further increases the buffs Chevreuse grants, providing a 20% ATK buff to the party, although it requires building ER% for her Elemental Burst.
 4pc Maiden Beloved (MB)
4pc Maiden Beloved Further increases Chevreuse’s healing, granting the team an extra 20% Incoming Healing Bonus after she casts her Elemental Skill or Burst.
 4pc Ocean-Hued Clam (OHC)
4pc Ocean-Hued Clam can be considered for some extra damage when building for Chevreuse’s healing. Although she doesn’t max out the Sea-Dyed Foam, it deals an equal amount of damage in AoE, compared to Song of Days Past being more single-target oriented.
 4pc Tenacity of the Millelith (TotM)
4pc Tenacity of the Millelith increases Chevreuse’s healing with its 20% HP (2pc effect), whilst also granting a short teamwide 20% ATK buff upon hitting an enemy with her Skill. TotM can be considered when running Chevreuse with teammates who are able to quickly snapshot the 4pc effect.
 2pc HB/HP/ER Combos
2pc combinations of Maiden Beloved, Ocean-Hued Clam, Song of Days Past, Tenacity of the Millelith, Vourukasha’s Glow and Emblem of Severed Fate will generally provide higher healing than the aforementioned 4pc set bonuses (outside of 4pc Maiden Beloved), but lack the extra team utility.
Weapons
Authored by Leifa
 Black Tassel
Chevreuse’s weapon of choice for maximizing both her healing and her buffing, allowing her to run both a Healing Bonus Circlet and Energy Recharge Sands if players want to consistently use her Burst. Being a 3-star weapon also makes it extremely affordable for all players.
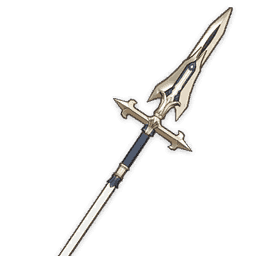 Favonius Lance
Favonius weapons are generally a good choice on any supportive teammate, helping to lower all party member’s ER Requirements. This can also help Chevreuse to Burst more frequently whilst focusing fully on HP substats to improve her healing.
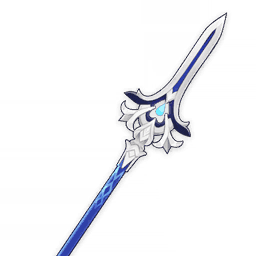 Rightful Reward
A craftable weapon from Fontaine, providing HP% from its substat and flat Energy upon being healed. With C6’s teamwide healing, Chevreuse is guaranteed to trigger this once per rotation, due to the weapon passive working off-field, lowering her ER Requirements and allowing her to run a Healing Bonus Circlet. However, a C0 Chevreuse may struggle to trigger this without a secondary healer, due to her Elemental Skill’s healing being slightly delayed after casting. For players who don’t care for Chevreuse’s Burst, this weapon provides much less HP% than Black Tassel, making it weaker across the board.
Any other HP% or ER% Polearm
Any weapon that provides Chevreuse with HP% or Energy Recharge can be useful to help her reach ~40,000 HP to maximize her buff, whilst being able to Burst every rotation. However, ER% weapons outside of Favonius Lance become useless when not utilizing Chevreuse’s Burst, shrinking her total number of available weapons.
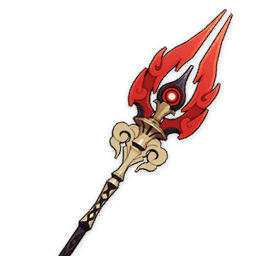 Staff of Homa
An offensive weapon choice that provides a small amount of HP% to help with Chevreuse’s healing and buffing. Its passive also converts HP into ATK for the wielder, increasing Chevreuse’s damage on a support-oriented build, or increasing her supportive capabilities when built for damage. Keep in mind, this weapon doesn’t provide any Energy Recharge, meaning players will need to gain ER% elsewhere for her to consistently Burst in an offensive scenario.
Team Building
Authored by Leifa and Whalien
Although Chevreuse teams utilize the Overloaded reaction, this is only as a catalyst to activating her buffs, meaning characters will prefer to be built for raw damage rather than solely on Elemental Mastery. These periodic Overloaded triggers are required to keep up her A1 Passive, meaning either off-field Elemental application or quickly swapping between characters is recommended for maximum uptime. In solo Pyro scenarios or teams with no off-field Pyro Application (such as Chevreuse and Bennett), a Pyro Skill can be used before your Electro DPS’s field time, in order to maximize the uptime on her A1. In a lot of teams, Chevreuse will be replacing an Anemo character, due to her teambuilding restriction of only Pyro and Electro teammates, whilst providing Resistance Shred on par with 4pc Viridescent Venerer. If players are struggling with Chevreuse as their only healer, characters like Beidou or Dehya can be used for extra defensive utility.
Most teams will not have much use for Chevreuse’s Elemental Burst, instead preferring to funnel her Skill into another Pyro teammate. Its unique inward knockback may be useful in AoE scenarios to help group enemies without an Anemo character; however, its strength compared to other forms of grouping is questionable.
Currently, Chevreuse does not have many teams that can satisfy her team constraints without giving up some form of extra utility. For example, pairing Chevreuse with Bennett gives a strong buffing duo, but leaves limited options for making the most of her kit. If Xiangling is chosen to consolidate off-field Pyro Application, the last slot is forced to be an Electro character, preferably one with on-field presence, in order to activate Chevreuse’s buffs effectively. If players choose a character like Fischl, the 4th team slot is open for choice, but may struggle with uptime on Chevreuse’s A1 RES Shred due to no off-field Pyro if an Electro on-fielder is chosen. On top of this, Chevreuse is unable to make use of grouping provided by Anemo characters without deactivating her A1 Passive. Despite these teambuilding restrictions, she has some use in teams without utilizing all of her buffs, being able to provide up to 60% DMG Bonus to Pyro and Electro teammate at C6 unconditionally, and 40% ATK if used with at least one Electro teammate.
Raiden
Chevreuse | Raiden | Pyro | Pyro/Electro

Raiden Overloaded teams have a mix of high damage and great flexibility, allowing for a great selection of off-fielders in the 4th slot. Xiangling will generally be used alongside Bennett in this team thanks to her consistent off-field Pyro application and high damage, but Electro off-fielders such as Fischl, Sara and Yae can be used instead, at the sacrifice of some uptime on Chevreuse’s A1 Passive. Compared to an Anemo character, Chevreuse can apply her RES Shred on multiple waves, allowing for 100% RES Shred uptime during Raiden’s field time. Due to the low ER Requirements in Raiden teams, Chevreuse can be built for some damage rather than pure utility without sacrificing much overall team damage.
Teammates :
- Pyro Options: Xiangling, Bennett
- Flex Options: Bennett, Yae, Sara, Fischl
Yoimiya
Chevreuse | Yoimiya | Fischl | Bennett / Raiden

Yoimiya Overloaded teams are a viable alternative to her current options whilst being less reliant on shields. In Vaporize teams, Yoimiya wants to Vaporize both her N3 and N5, resulting in her being unable to dodge easily. In Overloaded teams, which hits apply Pyro aren’t as important, meaning she can reliably dodge without sacrificing much damage. On top of this, the knockback provided by Overloaded can help reduce pressure against lighter enemies, further reducing Yoimiya’s shield reliance. Raiden and Yoimiya can also be used together in longer rotations, due to both providing on-field and off-field application via Raiden’s Skill and Yoimiya’s Burst.
Lyney
Chevreuse | Lyney | Fischl | Dehya / Bennett

Lyney Overloaded teams prefer to play shorter rotations compared to other teams and are able to keep a consistent Pyro aura for his A4 Passive, whilst also getting consistent Overloaded reactions to trigger Chevreuse’s A1. Dehya is also a viable alternative to Bennett, providing interruption resistance, utility that is greatly appreciated on Bow characters.
Other Options
Chevreuse | Pyro / Electro | Flex | Flex

Most other on-fielders do not benefit greatly from Chevreuse’s buffs compared to their original teams, but can be played if you so choose. Please note that Razor should be played with C6 Bennett if there is no other off-field Pyro application, allowing Razor to trigger Overloaded by himself on-field.
Hu Tao VV Vape
Chevreuse | Hu Tao | Xingqiu | Anemo

In Hu Tao VV Vape teams, there isn’t much competition for the 2nd Pyro slot, namely Amber with Elegy for buffs or Thoma and Yanfei for shielding. As Chevreuse isn’t reliant on a 5-star weapon to perform well in this team, she works as an offensive buffer with slight healing for defensive utility. However, C6 is required for this due to not having an Electro teammate to trigger her Overcharged Ball. Although Bennett works as a 2nd Pyro for this team, Chevreuse’s lower healing benefits Hu Tao’s A4 Passive, which wants Hu Tao to stay below 50% HP. Chevreuse’s lower healing also allows Hu Tao to equip 4pc Marechaussee Hunter for a large 36% CRIT Rate when her HP changes. For more consistent uptime on this passive, players can ignore HP% on Chevreuse entirely, instead aiming for either Energy Recharge or offensive stats. This will allow Chevreuse to provide further buffs from artifact set bonuses, such as 4pc Noblesse Oblige or 4pc Instructor.
Lyney Mono Pyro
Chevreuse | Lyney | Dehya / Bennett | Flex

An alternative to Lyney’s Overloaded team with Chevreuse, allowing for a flex teammate, such as an Anemo character or Zhongli. As Lyney teams tend to use shorter rotations than most teams, Chevreuse can continue to ignore her Burst, allowing her to focus on her healing. Ignoring ER% can allow Chevreuse to equip 4pc Song of Days Past, maxing out the set’s buff twice. Because of Lyney’s large amounts of DMG Bonus and CRIT, the effects of 4pc Song of Days Past are greatly amplified when compared to other characters. Players can further buff this damage with Kazuha for his A4 DMG Bonus buff, or Zhongli for his shielding and 4pc Archaic Petra’s DMG Bonus buffs.


