
Dehya FAQ

Emiliabyss, Athena, NatC, Kuro_kami, Leifa
Last updated on Jun 4, 2025
Credits:
- Emiliabyss#1641 - Lead, Author || Weapons
- Athena#2444 - Calcs (Constellation, DMG reduction comparison, C6), Writing: Constellations
- NatC#9175 - Author, Calcs (Artifacts, Constellations)
- Leifa#1359- Writing: Teambuilding
- Kuro_kami91#6652 - Writing: Teambuilding
- Sew#2409 - Calcs (Weapons)
- snowy#4028 - Calcs (C6)
- jrm.spirit#2671 - Framecounting
For all Dehya Calcs you can reference: Dehya Mastersheet by Emiliabyss, NatC, Sew, Athena and Snowy, Dehya C6 Calculations by Snowy and Frames Mastersheet by jrm.spirit
Pre-TC is volatile and, as always, perpetually subject to change until release (and sometimes later!). Please note that these are theoretical suggestions. Everything described in this FAQ is a good faith analysis based on the little information about the character’s kit that we know. Team calcs, additionally, are not established yet, and as with everything in TC, the content in this FAQ should be taken with a grain of salt.
Character Overview
Authored by Emiliabyss

Dehya is a Pyro Claymore wielder who can play two main roles: an on-field DPS alongside Bennett, Kazuha, and Xiangling, or an off-field Burgeon reaction DPS, similar to Thoma.
As an on-field DPS, Dehya’s team compositions are fairly strict, and she needs lots of Energy Recharge — at least 200% ER — in order to deal adequate damage. She is heavily dependent on buffs from teammates in order to deal comparable damage to other Pyro on-field DPSs. Klee is a good comparison, though Dehya also has utility in the form of off-field damage mitigation and Pyro application. Dehya takes between 8 and 11 seconds on-field.
As an off-field reaction DPS, Dehya ignores her Burst completely and instead focuses purely on Elemental Mastery and her Skill in order to deal damage through Burgeon. The Burgeon playstyle deals comparable damage to the on-field DPS alternative, assuming you can trigger at least eight Burgeon reactions across a maximum of seven instances of Pyro application. The benefit of this is that Dehya does not need to level her Talents at all, and she spends very little time on-field (~2 seconds). The drawback, however, is that she is currently outmatched by Thoma, a 4-star character.
The main reason to use on-field Dehya over off-field Dehya is her scaling with Constellations. Off-field Dehya does not benefit nearly as much from them. Regardless of which playstyle you choose, you can expect, in ideal team, buff, and gear arrangements (according to KQM standards), roughly 13,000 damage-per-second from Dehya. For context, an entire team needs to deal at (the very) least 40,000 damage-per-second in order to clear Spiral Abyss. This means your other three characters need to deal the remaining 60-70% of the required damage, and with such restricted compositions, you are limited to supporting teammates that also have exceptional damage output.
Unfortunately, there are many restrictions to Dehya’s kit that leave much to be desired. One reason that other Elemental Reactions such as Vaporize and Melt are not mentioned is because Dehya, during her Burst, cannot trigger Burst waves from characters like Xingqiu, Yelan, or Beidou, and she has no single “nuke” attack that can take advantage of Melt. This confines her to either Burgeon or no reactions at all (Mono-Pyro teams with an Anemo character).
In Dehya’s current state, there are no aspects of her kit that are either unique in effects (Xingqiu and Beidou also have DMG Reduction and Interruption Resistance, and shields are often just better) or the best in effectiveness (strictly outclassed in Burgeon teams thanks to Thoma), with the exception of modest off-field self-healing. In terms of meta, it is ill-advised to spend Primogems on Dehya. However, pulling for Dehya because you like her design, personality, or some other non-meta conditions is perfectly fine.
Talents
Authored by Emiliabyss
Leveling priority (on-field): Burst > Skill > Normal Attack

Leveling priority (off-field): Skill > Burst > Normal Attack
Talent Overview
Some, but not much, of Dehya’s scaling includes HP, and since Dehya needs all the stats she can get, it may be advised to level her to 90.
Dehya’s multipliers on her Normal Attacks are lower than Xinyan’s (a 4-star Pyro Claymore wielder), with the same number of hits. Knowing this, it is not advised to use Dehya’s Normal Attacks at all. Instead, decide whether you will play Dehya on-field or off-field, and then level the corresponding Talents as listed above.
Dehya’s Skill has two uses that deal different amounts of damage. The first Skill use deals damage and creates a “Fiery Sanctum,” a field that attacks in coordination with your teammates, similar to Albedo’s Skill. The rate of coordinated attacks is once every 2.5 seconds, and while slow Pyro application is good to ensure you Burgeon instead of trigger Burning, 2.5 seconds is too slow and offers too few instances of Pyro application to be exploitable. The second Skill use deals more damage and can move the Fiery Sanctum to a new location without affecting its total 12s field time. This is what makes Burgeon Dehya viable. While her Skill is active, she also acts as a true bodyguard, taking a portion (from 30-50%) of her teammates’ damage across ten seconds.
Dehya’s Burst lasts about four seconds, though with the initial cast animation and the finishing blow animation, it’s more like eight or nine. Dehya throws aside her Claymore in order to bludgeon enemies with her fists. By mashing the attack button, you can get up to ten punches within the Burst’s duration. The finishing attack is not particularly strong, so in tight rotations, it may be beneficial to swap out of Dehya before the final attack to save two seconds of field time. There are no other special effects on Dehya’s Burst: just damage.
With a 70 Cost Burst and 18s CD, Dehya’s Energy Recharge requirements are massive at 200% or more with a Favonius weapon on the team and multiple Pyro teammates, and without exceptional payoff.
Dehya’s First Ascension Passive reduces the damage she actually takes (which is good!) and offers limited Interruption Resistance to her teammates, ensuring they can use their Talents quickly and swap off without much worry.
For her Fourth Ascension Passive, once Dehya is at 40% HP or lower, she will instantly recover 20% of her HP, and then another 6% of her HP at 2s intervals, up to a maximum of 10 seconds (five 6% HP healing bursts, for a total of 30%). The Passive can activate once every 20 seconds, and it ensures Dehya can continue mitigating her team’s damage in subsequent rotations.
Finally, her Utility Passive grants the team 10% Movement Speed in the overworld during daytime.
Constellations
Authored by Athena and NatC

C1 - The Flame Incandescent
- Dehya's Max HP is increased by 20%, and she deals bonus DMG based on her Max HP when using the following attacks:
-
Molten Inferno's DMG will be increased by 3.6% of her Max HP.
-
Leonine Bite's DMG will be increased by 6% of her Max HP.
This Constellation gives Dehya more HP as well as additional HP scaling to her Skill and Burst, greatly increasing Dehya’s on-field damage output. In addition, the value of HP% becomes similar to ATK%, which allows players to slot in HP% Sands to gain survivability without losing damage. Overall a great stopping point for anyone who plans to use Dehya on-field. The bonus HP is also helpful for Dehya’s tanking ability from Redmane’s Blood.
On-field DPS Increase from C0: 35%
Rating: 4/5

C2 - The Sand-Blades Glittering
- When Dehya uses Molten Inferno: Raging Flame, the duration of the recreated Fiery Sanctum field will be increased by 6s. Additionally, when a Fiery Sanctum exists on the field, DMG dealt by its next coordinated attack will be increased by 50% when active character(s) within the Fiery Sanctum field are attacked.
A very situational (iffy) Constellation, encouraging your on-field character to take damage in order to increase Molten Inferno damage. This, however, may put your on-field character in danger even with Dehya’s damage mitigation. Additionally, it may be hard to guarantee that your characters will be attacked constantly to proc the bonus damage without forcefully extending your rotation.
The bonus duration is a decent quality of life bonus that adds 2 more coordinated attacks that deal damage, create more Pyro particles and gives her practically 100% uptime on her damage mitigation if played on-field. Do note that this Constellation does not increase the Interruption Resistance duration from her Ascension 1 Passive.
On-field DPS Increase from C0: 62%
On-field DPS Increase from C1: 20%
Rating: 3/5

C3 - A Rage Swift as Fire
- Increases the Level of Leonine Bite by 3. Maximum upgrade level is 15.
A nice bonus if you prefer using Dehya on-field.
On-field DPS Increase from C0: 77%
On-field DPS Increase from C2: 9%
Rating : 3/5

C4 - An Oath Abiding
- When Flame-Mane's Fist and Incineration Drive attacks unleashed during Leonine Bite hit opponents, they will restore 1.5 Energy for Dehya and 2.5% of her Max HP. This effect can be triggered once every 0.2s.
Decreases Dehya’s Energy requirements by approximately 20% (30% at C6), which allows for more offensive substats. It also keeps Dehya healthy by healing her while she is on-field punching her enemies.
Note: Due to how KQMC works, C4 is a lot less impactful on paper than in actual practice.
On-field DPS Increase from C0: 77%
On-field DPS Increase from C3: 1%
Rating: 2/5

C5 - The Alpha Unleashed
- Increases the Level of Molten Inferno by 3.Maximum upgrade level is 15.
Dehya’s weakest Constellation by far. It boosts her Skill Talent levels, which is practically useless since Dehya’s Skill does miniscule damage for on-field Dehya, and her Talent level is irrelevant in Burgeon teams.
On-field DPS Increase from C0: 84%
On-field DPS Increase from C4: 4%
Rating: 1/5

C6 - The Burning Claws Cleaving
- The CRIT Rate of Leonine Bite is increased by 10%. Additionally, after a Flame-Mane's Fist attack hits an opponent and deals CRIT Hits during a single Blazing Lioness state, it will cause the CRIT DMG of Leonine Bite to increase by 15% for the rest of Blazing Lioness's duration and extend that duration by 0.5s. This effect can be triggered every 0.2s. The duration can be extended for a maximum of 2s and CRIT DMG can be increased by a maximum of 60% this way.
Her best Constellation by a mile. Even with just a moderate amount of CRIT Rate, you should be able to proc the maximum number (5) of additional Flame-Mane’s Fists. However, this does not justify lowering CRIT Rate for more CRIT Damage, because not only do you want more CRIT Rate for consistency, but also the sooner you get your CRIT Damage procs, the larger your overall damage increase will be. Building more CRIT Rate instead of CRIT Damage till 90% CRIT Rate gives positive returns since the constellation provides a 10% CRIT Rate Buff. Keep in mind that her Burst does not snapshot; therefore, some buffs may run out before she finishes her punch, and a proper setup is recommended. For more in-depth numbers with regards to Dehya’s C6, please refer to the mastersheet.
On-field DPS Increase from C0: 197%
On-field DPS Increase from C5: 62%
Rating 5/5
Combos
Authored by Emiliabyss
Dehya’s combos are straightforward, regardless of whether you are playing her on-field or off-field.
On-Field:
Use Dehya’s Skill and create a Fiery Sanctum Swap to teammates to lay down their buffs and activate their Skills/Bursts Swap back to Dehya and use her Skill again, if not at least to move the Fiery Sanctum somewhere more convenient Deploy Dehya’s Burst and button mash either until the Burst ends on its own, or swap before the long wind-up for her finishing attack.
Off-Field
Set up Dendro Cores with teammates (Dendro and Hydro teammates required) Use Dehya’s Skill to apply Pyro and set up a Fiery Sanctum. Swap to teammates and use their abilities to ensure Dendro Cores are made between coordinated attacks. Use Dehya’s Skill a second time to reposition the Sanctum as needed and get another instance of Pyro application.
The off-field rotation can be re-arranged according to the team composition; just make sure to get as many Burgeon reactions as possible with her.
Artifacts
Authored by Emiliabyss
On-field Dehya
Sands of Eon: ER% until at least 200%; if this is met without an ER% Sands, then ATK% Sands is fine. HP% Sands can also be considered if Dehya is at least Constellation 1. Goblet of Eonothem: Pyro DMG Bonus Circlet of Logos: CRIT Rate/CRIT Damage
Substats: ER% (until 200%) > CR% = CDMG% > ATK% > HP%
 4PC Emblem of Severed Fate:
Her BiS artifact set. The 4pc effect is great for Dehya’s Burst-heavy playstyle, as more than 70% of her on-field damage comes from her Burst. She will have to compete with all other characters who also want this coveted artifact set, but it is by far her best unconditional set.
 4PC Lavawalker:
A strong but slightly polarizing set, due to its reliance on constant Pyro application and the inert Element on some enemies like Slimes negatively affecting uptime. However, in a team with Bennett, Xiangling, and Kazuha, there is plenty of Pyro application to go around, meaning this concern is not as pertinent. 4pc Emblem, however, is still about 5% stronger.
4PC Lavawalker:
A strong but slightly polarizing set, due to its reliance on constant Pyro application and the inert Element on some enemies like Slimes negatively affecting uptime. However, in a team with Bennett, Xiangling, and Kazuha, there is plenty of Pyro application to go around, meaning this concern is not as pertinent. 4pc Emblem, however, is still about 5% stronger.
 2PC/2PC Combination Ranking:
- 2pc Crimson Witch + 2pc Noblesse Oblige
- 2pc Crimson Witch + 2pc 18% ATK
- 2pc 18% ATK + 2pc Noblesse Oblige
- 2pc 18% ATK + 2pc 18% ATK
Off-field Dehya
Sands of Eon: Elemental Mastery
Goblet of Eonothem: Elemental Mastery
Circlet of Logos: Elemental Mastery
Substats: EM > CR% = CDMG% > HP%
NO ENERGY RECHARGE; NO BURST
 4PC Gilded Dreams AND/OR 4PC Flower of Paradise Lost:
Both of these sets are tied for Dehya’s Best-in-Slot artifact set as an off-field Burgeon DPS. The difference between these sets in both of their ideal conditions is less than 1%. Because of this, it’s best to just go with the best substats.
4PC Gilded Dreams AND/OR 4PC Flower of Paradise Lost:
Both of these sets are tied for Dehya’s Best-in-Slot artifact set as an off-field Burgeon DPS. The difference between these sets in both of their ideal conditions is less than 1%. Because of this, it’s best to just go with the best substats.
For 4pc Gilded Dreams, Dehya should be the only Pyro member of the team, though luckily, you want her as the only Pyro character anyways, so this is not a drawback.
4pc Paradise Lost is agnostic regarding team composition, but because you want Dehya to be the only Pyro character on the team anyways in Burgeon teams, the agnosticism is not a benefit.
In sum, both deal about the same damage. Just pick whatever’s easiest to farm. This will likely be 4pc Gilded Dreams, as 4pc Deepwood Memories is an important artifact set to farm for other characters.
 2PC 80EM + 2PC 80EM:
Just slap some stuff together and you’ll be fine. As much EM as possible, while building substats for CRIT as well.
2PC 80EM + 2PC 80EM:
Just slap some stuff together and you’ll be fine. As much EM as possible, while building substats for CRIT as well.
 4PC Tenacity of the Millelith:
Dehya’s synchronized Skill attacks trigger just often enough to keep good uptime on Tenacity’s teamwide ATK% boost. If you care more about using Dehya as a support unit, Tenacity is a fine choice.
4PC Tenacity of the Millelith:
Dehya’s synchronized Skill attacks trigger just often enough to keep good uptime on Tenacity’s teamwide ATK% boost. If you care more about using Dehya as a support unit, Tenacity is a fine choice.
Weapons
authored by Emiliabyss
Dehya’s weapons depend on whether she is built for reaction or non-reaction damage. Non-reaction damage (on-field) focuses on ER%, CRIT%, and ATK%, while reaction damage (off-field) focuses instead on pure Elemental Mastery.
Here I will list the main recommendations, from her signature weapon to the most freely accessible weapon. However, for a more complete idea of weapon rankings, please refer to the mastersheet included here, make a copy, and play with the filters to examine the relationships with buffs in more detail.
On-field Dehya
![]()
1. Beacon of the Reed Sea - It gives CRIT Rate, ATK%, and (when not shielded) HP%. It’s basically a stat stick for Dehya meant to appeal to all of her on-field attributes. There are no other special effects to this weapon. Just use your Skill twice for the maximum ATK% buff and play as normal.
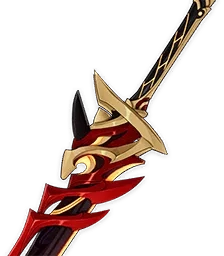
2. Redhorn Stonethresher - CRIT DMG% stat stick. Passive is irrelevant.
Other Options
- Akuoumaru (R5; 270 Energy across team)
Makes Dehya’s Burst stronger. You’ll notice these weapons don’t really have much to say other than “it gives a bunch of stats”
- Wolf’s Gravestone / The Unforged (or Akuoumaru R3)
Both give lots of ATK%, and the passives are mostly equal. No other weapon affects their placement regardless of whether the passive is active or not.
- Blackcliff Slasher / Serpent Spine (any refinement) / Luxurious Sea-Lord
Dehya cannot maintain stacks even if shielded, since she takes damage while off-field as well. Pick whichever weapon is easiest to build based on your artifact substats. Serpent Spine still edges out above the other two due to having non-zero uptime on the buff.
- Favonius Greatsword
Favonius Greatsword is by far the worst Claymore for Dehya’s personal damage out of this ranking, except in a selective number of circumstances. For example, with Ayaka, Rosaria, and Bennett, Dehya needs Favonius Greatsword to function in order to help manage team ER requirements, and this team can deal more damage and provide better Elemental coverage than a Mono Pyro team. It is also useful if you struggle to find an ER Sands. However, it is 5-7% below the next best free-to-play option, making it a “bare-minimum” choice.
Off-field Burgeon Dehya

1. Makhaira Aquamarine (any refinement) It only barely falls behind the personal damage of the new event weapon, Mailed Flower. However, its teamwide Flat ATK buff based on Dehya’s Elemental Mastery is what makes this weapon stand as the top-choice. It’s not worth breaking the bank, but if you have it, use it. R5 is of course better, but R3 and R1 do not fall far behind in personal damage.

Mailed Flower (R5) Best for personal damage, but only by 1%. However, it is free and getting R5 of a limited 4-star weapon is usually not free.
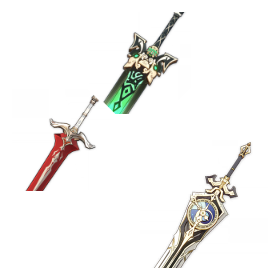
Other Options 3. Rainslasher (any refinement) This assumes any amount of uptime on Rainslasher’s passive.
- Bloodtainted Greatsword
The easiest possible weapon to obtain for Dehya.
- The Bell (any refinement)
Not recommended, but it functions. You’re better off with an Elemental Mastery weapon.
Team Building
Authored by Kuko_kami and Leifa
For all of the teams listed and more, Dehya can also be used as a general defensive option thanks to the utility she provides, an example of such a team could be VV Hu tao or Melt Ganyu.
Reverse Melt
Dehya/Cyro/Bennett/Flex
Cyro options: Kaeya/Rosaria/Ayaka
Flex options: Anemo/Zhongli

When it comes to Melt teams, due to Dehya’s slow Pyro application, she can be used to Melt off fast Cryo applicators or have them Melt off her coordinated attacks. While this is all fine and dandy, Dehya runs into quite a number of issues in this comp. For starters, her multipliers aren't up to par to be worth Melting, as the slot she takes up could be used for an additional Cryo character for more damage and/or buffing as well as Cryo Resonance. Nahida can also be used for additional Pyro application through the use of Burning and a substantial EM buff for your Cryo carry Zhongli is another unit that comes to mind for not only providing better defensive utility than Dehya, but also buffing all party members due to his RES Shred. Even without considering Zhongli as a potential flex unit, Dehya’s defensive utility is already contested by Bennett, since he is already hard slotted into the team by virtue of his ATK buff, healing, and lack of Energy problems.
Kazuha - Remains the premium support for buffing Dehya and/or Cryo party members with Double Swirl. One thing to note is that Double Swirling for both Cryo and Pyro is extremely hard to do; this more often than not forces players to pick and choose whether or not you will be buffing your Cyro carry i.e Rosaria or Dehya for your rotation. Kazuha also provides CC, which helps with team survivability and positioning due to Dehya’s limited range.
Nahida - Provides high Elemental application both on and off-field, as well as enabling Burnmelt for your Cryo character(s), on top of providing good off-field damage and a massive EM buff for the on-fielder. Both Dehya, if she ever gets to use her Burst, and your Cyro carry can make use of this EM buff, resulting in a greater increase in damage.
Rosaria - Deals good damage and provides a teamwide CRIT Rate buff, which alleviates some stat pressure for other carries, as well as being a good Cryo applicator for Dehya to Melt consistently.
Ayaka - Together with Kaeya or Rosaria and Bennett, offers Dehya a chance at performing as an on-field Melt carry. Rosaria and Bennett are both essential for batterying their respective DPS, and with Bennett's buffs, Rosaria's CRIT Rate, Pyro and Cryo Resonance, Dehya can unleash her flurry of flaming punches straight through Ayaka's Blizzard and Rosaria's Burst ticks. One thing to note is that Ayaka is going to be your primary source of damage. With that in mind, Ayaka's ER should be accommodated in order to not have severe issues in DPR downtime when playing this comp.
Bennett - Although he invalidates Dehya’s defensive utility, Bennett remains a must-have with Dehya in teams where she bursts in, because not only does Dehya have significant her Energy issues without him, but also Bennett buffs her damage output considerably — to the point where Dehya suffers tremendous losses without him.
Regarding Ganyu and Dehya
Dehya/Bennett/Ganyu/Flex
Flex: Zhongli/Nahida/Sucrose/Kazuha

There is another team that Dehya surprisingly fits well in — Ganyu Melt — due to Dehya’s ability to increase other characters’ Interruption Resistance within her Skill. Units like Ganyu, who are particularly vulnerable to interruption, benefit greatly from this skill. It is important to note that Dehya also runs into a severe issue involving set ups with Ganyu, as Dehya’s Elemental Skill tick doesn't line up well with Ganyu’s Charged Attack charging time. This results in a scenario where Ganyu’s first CA will be Melted, but additional CA’s will end up as cannon fodder for Dehya’s Skill. Adding another Pyro applicator could fix this issue, but that could end up creating more issues with team-building. Additionally, the slot that Dehya takes up could typically be given to another character with more overall benefit, such as Nahida and her EM buffing, or Kazuha as a 4VV holder and Elemental DMG% buffer. Sucrose is another alternative to the aforementioned characters, providing both 4VV and EM sharing, but she runs into problems of her own, such as her Burst’s high Energy Cost. Yet another alternative is Zhongli, who not only has very strong defensive utility, but also can run buffer sets like 4TotM. However, in choosing to run him, Dehya’s main purpose in the team becomes redundant, with the only loss being less Pyro application. For many players after Version 3.5, Dehya may become a more accessible option than Zhongli with her addition to the standard banner. Ultimately, she provides another unique option to slot in Ganyu Melt teams, but the issues that arise from using her substantially decrease her overall value to the comp.
Vaporize
Dehya/Bennett/Hydro/Anemo
Hydro options: Kokomi/Mona/Nilou
Anemo options: Kazuha/Venti

When it comes to Vaporize, Dehya’s Burst is unable to trigger both Yelan and Xingqiu, the current premium Hydro enablers for Vape teams. Because of this, you are left with using Kokomi, Mona, Nilou, or an Anemo character (namely Kazuha or Venti for their absorbed Bursts) in order to Vaporize with Dehya. With each character comes their respective caveats, such as Pyro holding Absorption priority with Anemo characters, and the fact that these characters are all 5*.
Mona - Provides short off-field Hydro application as well as her Omen buff. Unfortunately, her Elemental Skill duration is slightly shorter than Dehya’s entire Skill duration, so other sources of Hydro may be necessary for consistent Vapes, either from other Hydro characters or Hydro-absorbed Anemo skills.
Kokomi - Although she overshadows Dehya’s defensive utility, Kokomi brings sustained off-field Hydro application as well as on-field driving capabilities to fill any possible downtime.
Nilou - If all you want is Hydro application, Nilou provides enough over a long period of time for Dehya to consistently Vape, provided no other teammates eat up any of her Hydro Gauge. Nilou is a viable option; however, she isn’t recommended if other Hydro characters are available due to her lack of offensive and defensive utility.
Kazuha - Remains the premium support for buffing Dehya and other PECH party members with Double Swirl. Kazuha also provides CC which helps with survivability and positioning due to Dehya’s limited range.
Venti - Another Anemo option for his superior CC, access to VV, and Energy refund. Has a larger CC range than Kazuha and can help alleviate Energy problems for teammates. However, absorbing Pyro means that Dehyawon’t get any Vaporizes due to Venti’s fast Elemental application.
Bennett - Although he makes Dehya’s defensive utility somewhat redundant, his buffing, healing and battery capability make him the best Pyro support for this team.
Burgeon
Dehya/Dendro/Hydro/Flex
Dendro options: Nahida/Yaoyao/Collei/DMC
Hydro options: Ayato/Xingqiu/Yelan
Flex options: Kazuha/Venti/Any above Hydro or Dendro options.

When it comes to Burgeon, Dehya can be slotted in this archetype due to her Skill-based Pyro application as well as her good defensive utility. However, she is the least cost-effective for this role due to Thoma’s easy accessibility as a 4*, better Pyro application, stronger defensive utility, and more Burgeon frequency compared to Dehya. Additionally, since her coordinated attacks are very slow, you would proc more Blooms than Burgeons, wasting the EM she's currently building.
Nahida - The go-to option for Dendro teams, providing high Elemental application both on and off-field, as well as good off-field damage and a massive EM buff for the on-fielder. Dehya can make use of this EM buff if she ever gets to use her Burst and has off-field Hydro sources other than Xingqiu / Yelan. However, this generally won’t happen, meaning other Dendro options such as DMC or Collei may be more optimal freeing up Nahida for other teams.
Any Hydro Character - Due to Dehya not using her Elemental Burst, she hardly has to take any field time. This allows for on-fielders such as Ayato to drive the team, or for off-fielders such as Xingqiu and Yelan to be used alongside Dehya with another driver.
Collei/DMC - F2P Dendro options that just apply Dendro to enable Burgeon teams. Their personal damage isn’t anything special, but due to the decent number of Blooms, it may be worth building them for some EM to make sure those Cores aren’t entirely wasted. If all you need is application, these two will be more efficient to use, saving Nahida for another team.
Yaoyao - Another Dendro option who was recently free in the 3.4 Lantern Rite event, Yaoyao provides both healing and Dendro application. She can be very nice to keep players topped up if Dehya’s damage mitigation isn’t enough; however, falling below 70% HP means Yaoyao will now be healing the player and not applying Dendro to enemies, resulting in fewer or no Dendro Cores. On the one hand, her Burst provides ample healing alongside Dendro application, allowing for an emergency top up on health and Dendro if need be. On the other hand, if players can survive using only one of the two’s defensive utility, why bring the other over a more offensive alternative?
Kazuha - High Swirl DMG, DMG% buff, VV holder for PECH teammates, and CC. Simple but effective for providing the team with buffs and grouping, allowing for all enemies to be hit by cores. Additionally, Pyro absorption can allow him to proc more Dendro Cores for some high EM Burgeons. However, this may result in Burning, resulting in no Cores at all.
Venti - Another Anemo option for his wide-ranged CC, VV access and Energy refund. Venti also can proc Burgeons with a Pyro Swirl; however, the same caveats as Kazuha can occur.
Mono Pyro
Dehya/Bennett/Pyro DPS/Kazuha

In comparison to her other team options, Mono Pyro alleviates much of Dehya’s Energy needs, which makes it a comfortable and viable option. That's the good news, now here's the bad. Not only are all the members, excluding Dehya, some of the most highly contested characters in terms of usage, but also Dehya does considerably less damage and requires more ER than Klee, another Mono Pyro DPS. While Klee, thanks to her 4th Ascension Passive, decreases the team's Energy requirements, allowing Kazuha, Xiangling, and herself to build more into damage rather than ER, Dehya imposes her high Energy needs on the rest of the team. Her defensive utility is also rendered useless due to Bennett’s healing capabilities, thus slotting her in is a less ideal choice than other Pyro characters.
Kazuha - Remains the premium support for Dehya and other party members due to his DMG% buff, which both Xiangling and Dehya like very much. Kazuha also provides CC, which helps with survivability and overall DPS due to Dehya’s and Xiangling’s limited ranges
Bennett - Although he makes some of Dehya’s defensive utility redundant, because Bennett provides substantial buffs to both her and Xiangling as well as plentiful Energy and healing, he ends up being the best Pyro support for this team.
Xiangling - A strong consistent source of off-field damage, allowing you to gain more benefits from running another unit on-field. One thing to note is that Xiangling will require quite a bit of funneling to consistently use her Burst, and this is more so the case due to Dehya’s high Energy costs.
Hu Tao - A strong on-field carry that can make use of Dehya as a Zhongli replacement. Keep in mind that similarly to Thoma, Dehya may steal some of Hu tao’s Vapes. However, unlike C4 Yanfei or Thoma, Dehya’s defensive utility isn't tied to her Burst, so she doesn’t suffer from Energy problems. This means Dehya can simply be used as a 4pc TOTM/4pc Instructor bot in order to supply Hutao with buffs and defensive utility.
Klee - Functions as an on-field DPS in this team thanks to her rather flexible Elemental Skill. Compared to Xiangling, Klee has much more lenient Energy requirements, which is something Dehya would prefer. Using Klee also eases the need for Bennett funnels.
Day 1 Findings
Now that Dehya has finally been released, we’ve received several reports from various different people about a few issues regarding her kit that we previously had no idea about. This section here is to address those issues, which may or may not be fixed in later versions of the game.
E targeting location - Testing has revealed that Dehya’s Elemental Skill coordinated attack will primarily target the middle of the enemy’s hitbox. While this isn’t an issue when it comes to her elemental application or damage, there arises a problem when it comes to her Burgeon teams in particular. Because of how small Dehya’s coordinated attack hitbox is, there might be issues against bigger enemies, such as the Ruin Grader seen in this clip: https://clips.twitch.tv/SpicyPopularBaguetteBuddhaBar-Irmp1119fpThfkjz
Q early cancel - While you can naturally swap out of Dehya’s burst, it has been confirmed that jumping during her Blazing Lioness state will cause the burst state to prematurely end. While we’re not sure whether this is intentional or not, what we’re certain of is that this is a rather significant point to take note of since about 80% of on-field Dehya’s personal damage comes from her burst, and prematurely ending it is a huge hamstring to her. Additionally, if Dehya were to get frozen or trapped in a Hydro bubble during her Q state, you would be
 Edit this page on GitHub
Enable hardware acceleration for the best site performance | Built using  and
and 
Wangsheng Funeral Parlor is in no way sponsored, endorsed or administered by or associated with miHoYo Co., Ltd.
