
Faruzan FAQ

Akane, Athena, Gerryoat, Chaoryn
Last updated on Jun 4, 2025
Credits:
- Akane: Author, Calcs | Artifacts, ER requirement.
- Athena: Author, Calcs | Weapons, Team Building.
- Gerryoat: Contributor | Character Overview, Talent
- Chaoryn: Contributor | Constellation
For all Faruzan Calcs you can reference: Faruzan Mastersheet by Athena and Akane, and Faruzan Frames Mastersheet by jrm.spirit
Pre-TC is volatile and, as always, perpetually subject to change until release (and sometimes later!). Please note that these are theoretical suggestions. Everything described in this FAQ is a good faith analysis based on the little information about the character’s kit that we know. Team calcs, additionally, are not established yet, and as with everything in TC, the content in this FAQ should be taken with a grain of salt.
Character Overview
Authored by Gerryoat

Faruzan is a 4* Anemo bow user whose kit revolves around buffing her team's Anemo damage while decreasing the enemies Anemo resistance. This allows her to serve as the staple support for a team with an Anemo DPS.
For stats, Energy Recharge is the most important stat on her. With her 80 energy cost, her ER requirements on her teams can reach extremely high levels. As her Energy requirements are quite high, Favonius Warbow is often recommended to be able to use her Elemental Burst off cooldown and continually support the Anemo DPS. ER sands, Anemo DMG% Goblet and CRIT% circlet can be used, CRIT Rate% becoming even more important with Favonius Warbow as her weapon.
While her Elemental Skill can provide light crowd control for small enemies, the main part of her kit is her Elemental Burst, which provides the buffs for her Anemo DPS teammate. At C0 she is a serviceable Anemo DPS support that can be used. Her C1 allows her to use a second charged arrow after using her Skill. C2 increases her Burst length by 6 seconds to a total of 18. C4 allows her to gain more energy for the amount of characters hit by her Elemental Skill’s Charge Attack. C5 is notable since it adds 3 levels to her Elemental Burst, which boosts the Anemo damage bonus she gives. While her C2, C4 and C5 are decent, her C6 drastically improves her. Her C6 both adds CRIT Damage to Anemo attacks and significantly boosts her support capabilities for the team and herself, while reducing her ER% requirements for herself.
Talents
Authored by Gerryoat

Leveling Priority: Burst > Skill > Normal Attack
Analysis
Part of Faruzan’s kit increases Anemo damage by 32% of her base attack, so leveling her to at least 80/90 is recommended. Leveling her to 90 would maximize this buff that is based off her base attack, which is only increased by level and weapon.
Faruzan’s Normal Attacks do not deal a great amount of damage and her Charge Attack damage mainly comes from her Elemental Skill. Most of her kit is focused around her Elemental Skill and Elemental Burst.
When pressing her Elemental Skill, she will deal AOE Anemo Damage to nearby opponents and enter her Manifest Gale state. When in this state, her next fully charged arrow will apply Pressurized Collapse to enemies hit by the AOE. It causes light CC to nearby enemies, provides a fixed 30% Anemo RES decrease to enemies from her A1 and deals Anemo damage to enemies hit. This part of her kit provides decent grouping for small enemies that can make it easier for your Anemo DPS to target them.
Faruzan’s Elemental Burst releases an Anemo Shape that moves in a triangular path on the field. When used, it reduces enemies Anemo RES by 30% while also boosting Anemo damage of nearby party members by 30.6% at Talent level 9. This is the most important part of her kit, providing herself and the Anemo DPS on the team with pretty good buffs. Recommend leveling this talent first over any of the others.
Her 1st Ascension Talent reduces the time taken to charge a shot by 60% for her Charge Attack of her arrow after using her elemental skill. Also reducing enemies with the 30% Anemo RES on enemies hit by the Charge Attack’s AOE. Think of it like Sara’s A1 and Charge Attack after using her Elemental Skill. Decent A1 which helps boost her team’s damage outside of her burst.
Faruzan’s 4th Ascension is when your characters deal Anemo damage while under the effects of Faruzan’s Elemental Burst, their Anemo damage is boosted by 32% of Faruzan’s Base Attack. While this isn’t the biggest damage increase (Especially if already pairing your Anemo DPS with an external attack buff like Bennett), it does still help overall. Leveling your weapon to 90 and leveling Faruzan to at least 80/90 should maximize this A4.
Lastly, her overworld Passive Talent is the basic expedition talent which gains an extra 25% of materials when dispatched in Sumeru for 20 hours.
ER Requirement
Authored by Akane
Faruzan’s particle generation relies on her hitting her Hurricane Arrow to the enemies and waiting for Pressurized Collapse to trigger, meaning she will rely on a specific combo of E CA Q to funnel the particle to herself or E Q CA to funnel the energy to the Anemo DPS. Generally, funneling energy to another party member is not ideal for Faruzan due to her particles generation being 2 per CA so her ER Requirement would be high. Typically, 220%+ ER Requirement solidifies her need to cast Burst every rotation with Favonius Warbow and without it, her ER skyrockets to a degree in which most KQMC distributed subs can not reach.
Weapons
Authored by Athena
Due to her enormously high ER requirement before C6, the weapon options are quite limited here; some of them make 2pc Emblem/Exile mandatory on her, thus may reduce team’s damage without 4pc Viridescent Venerer effect. At C6, she can choose more offensive options to increase her personal damage without worrying too much about her energy problem
For more explicit number and ranking, please check out the mastersheet
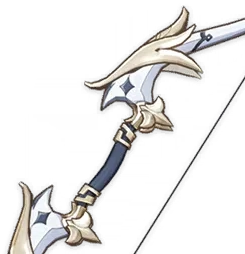 Favonius Warbow
- Arguably her Best-in-Slot 4* weapon; it lowers her ER requirement with the particles provided by its passive. Also allow her to use 4pc Viridescent Venerer without compromising the ER needed.
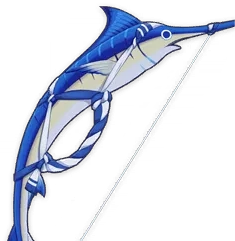
 Elegy for the End
- Also an amazing choice that both give ER% needed and team-wide buff.
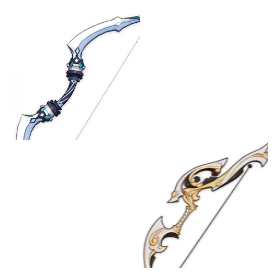
 End of the Line
- An acceptable F2P weapon that gives moderate ER% if Favonius Warbow has been occupied.
 Other ER weapons
- They can be used if all the options above are not availnpm install -g npmable.
Offensive options
- Only use them if you have Faruzan at Constellation 6, where her ER requirements are much more acceptable. All of them are pretty similar in strength therefore any option will do.
Artifacts
Authored by Akane
Artifacts will be dependent on what team composition you will run Faruzan with the proper Anemo DPS and other supports that provide other utilities compared to Faruzan.
Timepiece: ER% - This consolidates her ER needs and with Favonius Warbow, reaches that requirement fairly easily along with 1-2 ER distributed subs.
Goblet: Anemo DMG% - Strictly to push out damage from her kit overall
Circlet: CR% - With Favonius Warbow, CR% is mandatory for its passive to trigger consistently while allowing Faruzan to proc CRITS for her damage as well.
Substat Priority: ER% (Until requirement is reached) > CR%=CDMG% > ATK%
Recommended
 4PC Viridescent Venerer - This artifact set excels at providing RES Shred for the off-field DMG that the other units provide for the Anemo DPS. It also amps up Faruzan’s overall DMG but not to a significant degree compared to the other artifact sets
 4PC Noblesse Oblige - Standard support artifact set. Quick and easy to use for Faruzan and generally helps the Anemo DPS deal more DMG and works well with a dynamic off-field DMG.
 4PC The Exile - With Faruzan’s ER Requirement needing to be high, this artifact set stands out from the rest as not only her ER Requirement lowers, it also lowers the entire parties, consolidating the ER subs to a much more offensive distribution for DMG. Faruzan would want the off-piece to be a 5* ER% Timepiece with this set.
 4PC Emblem of Severed Fate - Along with Exile, this set consolidates with her ER Requirement but provides a much more offensive attribute from its 4PC passive to Faruzan only.
Options
 4PC Tenacity of the Millelith - Only viable when Faruzan is at C6 due to its extra Collapse being able to maintain the ATK% Buff throughout the entire Anemo DPS on-field time.
Team Building
Authored by Athena
Her kit excels at giving buffs to Anemo characters and Anemo RES Shred to the enemies, therefore she should be paired with some of the Anemo main carries that are available at the moment.

Hypercarry Anemo:
Wanderer / Xiao / Heizou - Faruzan - Bennett/Flex - Flex
Pairing anyone of those 3 above with Faruzan is essential to bring out their maximum potential. The last 2 slots can be anyone that either brings more to the team or the main carry: Bennett, Zhongli, Yelan, Fischl, … Do note that in teams that have a sub DPS like Yelan or Xingqiu, pairing her with 4pc Viridescent Venerer should be prioritized to enhance their damage.
Overall Anemo support
As an Anemo character, she has access to 4pc Viridescent Venerer, which is useful overall. Therefore, she can technically fit in as the flex slot just for the 4VV effect and ignore her energy problem by not Bursting every rotation. However, she is not recommended because there exist other Anemo characters that either have more utilities or deal more damage than her.
Constellation
Authored by Chaos
 C1 - Truth By Any Means
Gives her the ability to fire two Hurricane Arrows when you use fully charged aimed shots, but only after you use her Skill, Wind Realm of Nasamjnin. Normally, you do not want to fire both of them twice due to energy ICD, which will not generate another instance of Energy with the second consecutive second shot; rather than that, the second Arrow should only be used when you miss the first shot. Rating: 1/5
C1 - Truth By Any Means
Gives her the ability to fire two Hurricane Arrows when you use fully charged aimed shots, but only after you use her Skill, Wind Realm of Nasamjnin. Normally, you do not want to fire both of them twice due to energy ICD, which will not generate another instance of Energy with the second consecutive second shot; rather than that, the second Arrow should only be used when you miss the first shot. Rating: 1/5
 C2 - Overzealous Intellect
The polyhedron that is created during her burst stays for 6 seconds more on the field. A moderate constellation which can extend the rotation to around 22 seconds without losing its uptime. Rating: 2/5
C2 - Overzealous Intellect
The polyhedron that is created during her burst stays for 6 seconds more on the field. A moderate constellation which can extend the rotation to around 22 seconds without losing its uptime. Rating: 2/5
 C3 - Spirit Orchard Stroll
Adds 3 more levels to her E skill. A minuscule damage buff, become better with her Constellation 6. Rating: 1/5
C3 - Spirit Orchard Stroll
Adds 3 more levels to her E skill. A minuscule damage buff, become better with her Constellation 6. Rating: 1/5
 C4 - Divine Comprehension
The vortex that is created by pressurized collapse gives her energy particles based on how many opponents it hits, minimum of 2 energy and 0.5 per extra enemy, up to 4. This Constellation alone does not solve her energy problem, but combined with C6 will. Rating: 2/5
C4 - Divine Comprehension
The vortex that is created by pressurized collapse gives her energy particles based on how many opponents it hits, minimum of 2 energy and 0.5 per extra enemy, up to 4. This Constellation alone does not solve her energy problem, but combined with C6 will. Rating: 2/5
 C5 - Wonderland of Rumination
Adds 3 more levels to her burst. Increase both the main Anemo carry and her own damage. Rating: 2.5/5
C5 - Wonderland of Rumination
Adds 3 more levels to her burst. Increase both the main Anemo carry and her own damage. Rating: 2.5/5
 C6 - The Wondrous Path of Truth
Characters that are in her burst’s field and obtain the Prayerful Wind’s Benefit will have their crit damage increase by 40% if they happen to deal Anemo damage, while also apply Pressurized Collapsed to the enemy. Not only does it improve the main Anemo carry damage, it also lowers both of their energy issues by triggering Pressurized Collapsed that deals more damage from C3, restore energies to Faruzan with C4 and generate Anemo particles overtime. Rating: 6/5
C6 - The Wondrous Path of Truth
Characters that are in her burst’s field and obtain the Prayerful Wind’s Benefit will have their crit damage increase by 40% if they happen to deal Anemo damage, while also apply Pressurized Collapsed to the enemy. Not only does it improve the main Anemo carry damage, it also lowers both of their energy issues by triggering Pressurized Collapsed that deals more damage from C3, restore energies to Faruzan with C4 and generate Anemo particles overtime. Rating: 6/5
 Edit this page on GitHub
Enable hardware acceleration for the best site performance | Built using  and
and 
Wangsheng Funeral Parlor is in no way sponsored, endorsed or administered by or associated with miHoYo Co., Ltd.
