Furina FAQ
Leifa
Last updated on Jun 4, 2025
Credits:
- Leifa - Lead, Author, Calcs | Writing: Everything | Calcs: Weapons, Artifacts
- Ac1d - Calcs: Energy Requirements
- Raikh - Calcs: Constellations
- fianwens - Writing Verification
- sivaughan - Calcs Verification
For all Furina Calcs you can reference: Furina Mastersheet by Leifa, Ac1d and Raikh
Pre-TC is volatile and, as always, perpetually subject to change until release (and sometimes later!). Please note that these are theoretical suggestions. Everything described in this FAQ is a good faith analysis based on the little information about the character’s kit that we know. Team calcs, additionally, are not established yet, and as with everything in TC, the content in this FAQ should be taken with a grain of salt.
Character Overview
Authored by Leifa

Furina is a 5-star Hydro Sword character whose kit revolves around summoning the guests of the Salon Solitaire to deal damage and manipulate the team’s HP. Her Charged Attack can be used to change her Arkhe alignment between Ousia and Pneuma, changing the effects her guests provide. Her Elemental Burst causes the team to enter the Universal Revelry state, increasing their DMG Bonus and Incoming Healing Bonus based on how much their current HP changes during its duration.
Furina will primarily be played off-field, dealing significant damage with minimal field time, whilst providing substantial buffs to the team. Because of this, she can fit into a large variety of teams. However, players may want to invest in characters that provide large amounts of healing, such as Baizhu or Kokomi, in order to offset Furina’s HP drains and increase the amount of Fanfare stacks gained during her Burst state.
Talents
Authored by Leifa
-
Leveling Priority: Elemental Skill = Elemental Burst > Normal Attack

Analysis
Furina’s Elemental Skill is her main source of damage, whilst her Elemental Burst provides large amounts of DMG Bonus and Incoming Healing Bonus. Because of this, players will want to level both talents equally. Her Normal Attack talents can be ignored, unless players are using her on-field at C6, in which case her Normal Attack talent levels become slightly less negligible.
Talent Overview
Normal Attack: Soloist's Solicitation
Furina performs a 4-hit attack string. At C0, she has almost no reason to use these. However, at C6, she gains a Hydro Infusion and increased scalings based on her Max HP. Her Charged Attack may be used often to change her Arkhe alignment between Ousia and Pneuma, changing the effects of her Elemental Skill and helping with overworld puzzles. Both Arkhe Attacks have a 6s CD each, making her excel at any content involving Arkhe mechanics compared to previous Fontainian characters.
Elemental Skill: Salon Solitaire
Furina’s Elemental Skill summons the Salon Solitaire to aid the team in battle. She will summon either the Salon Members or the Singers of Many Waters, based on her current Arkhe alignment. It has a long duration of 30 seconds and a cooldown of 20 seconds, allowing for 100% uptime, even in teams with longer rotations, such as Neuvillette teams.
When aligned with Ousia, Furina will summon three Salon Members, who will each attack enemies at different intervals (prioritizing the target of the active character), dealing Hydro DMG based on Furina’s Max HP. If there are party members with more than 50% HP, they will drain their HP upon attacking, while also increasing the damage of the Salon Members by 110%/120%/130%/140%, based on the number of characters who had their HP consumed. Each Salon Member deals a different amount of damage and drains a different amount of HP from all teammates upon attacking. Furina’s Salon Members will drain around 2.5% HP per second from all of her teammates, making healers a requirement when playing her in order to maximize her damage, as characters at/below 50% HP won’t have sufficient HP available to drain to acquire the damage increase for her Salon Members.
When aligned with Pneuma, Furina will summon the Singers of Many Waters, who will heal nearby active characters based on her Max HP. While this means that she will provide AoE healing in co-op, in singleplayer, only the current active character will be healed, meaning that she won’t be able to reliably solo-sustain the whole team against her own HP draining mechanics.
The currently active Salon Solitaire guests can be swapped at will by using her Charged Attack to change her Arkhe alignment, meaning players can easily swap from damage to healing if their HP gets too low. However, since both guests can’t be active at the same time, she will lose out on generating Energy and applying Hydro whilst the Singers of Many Waters are active.
Currently, Furina’s Elemental Skill DOES NOT snapshot, meaning that any buffs she currently has will affect her guest’s damage or healing dynamically throughout their duration.
Elemental Burst: Let the People Rejoice
Furina’s Elemental Burst deals AoE Hydro DMG and causes all party members to enter the Universal Revelry state. During this state, when nearby party members’ HP changes, they will grant Furina one Fanfare for each percentage point that their Max HP changed (For example, a 40% reduction in a nearby character’s HP would grant Furina 40 Fanfare). Based on the amount of Fanfare Furina has (up to a maximum of 300 Fanfare), she will grant all nearby party members DMG Bonus and Incoming Healing Bonus. At max Fanfare, Furina is granting the team 69% DMG Bonus and 27% Incoming Healing Bonus, a large amount of stats that almost no character would hate to have. Fanfare is based on the percentage of HP changed, meaning that teams with AoE healers such as on-field Kokomi, Jean, or Baizhu, or characters with fast HP manipulation, such as Neuvillette and Wriothesley, will gain Fanfare much quicker than teams with single-target healers. Due to Fanfare being a stacking effect, gaining Fanfare earlier in a rotation is going to be much more impactful than near the end. Her Elemental Burst can have 100% uptime in some teams, being a 60 cost Burst with an 18 second duration and a 15 second cooldown. Once the duration of her Burst ends or is recast, all Fanfare points will be cleared.
Ascension 1 Passive: Endless Waltz
If the currently active character is overhealed by someone that isn’t Furina, Furina will heal all nearby party members for 2% of their Max HP once every 2 seconds within the next 4 seconds. This Passive will help to gain some extra Fanfare for her Burst, and, if activated frequently, acts like a pseudo Prototype Amber.
Ascension 4 Passive: Unheard Confession
Furina will grant buffs to her Salon Solitaire guests based on her Max HP. For every 1,000 points of HP she has, the Salon Members will gain 0.7% DMG Bonus, up to a maximum of 28%, and the healing interval of the Singers of Many Waters will be decreased by 0.4%, up to a maximum of 16%. These effects will be maxed out at 40,000 HP, meaning players may want to run a secondary HP main stat piece to help reach this.
Utility Passive: The Sea is My Stage
Furina decreases the ability cooldown of Xenochromatic Fontemer Aberrants by 30%, allowing players to use the abilities granted by underwater sea creatures much faster.
Constellations
Authored by Leifa

Constellation 1 - "Love Is a Rebellious Bird That None Can Tame"
- When using Let the People Rejoice, Furina will gain 150 Fanfare. Additionally, Furina's Fanfare limit is increased by 100.
Immediately grants 34.5% DMG Bonus and 13.5% Incoming Healing Bonus to the whole team upon casting Furina’s Burst, helping to gain even more frontloaded Fanfare. It also raises the maximum amount of Fanfare that Furina can obtain, increasing the max buffs to 92% DMG Bonus and 36% Incoming Healing Bonus at Talent level 9, making it an amazing Constellation for any team she’s used in. The personal gain of this Constellation is representative of its value for the whole team.
DPS% Increase vs. C0: 11.75%
Rating: 4/5

Constellation 2 - "A Woman Adapts Like Duckweed in Water"
While Let the People Rejoice lasts, Furina's Fanfare gain from increases or decreases in nearby characters' HP is increased by 250%. Each point of Fanfare above the limit will increase Furina's Max HP by 0.35%. Her maximum Max HP increase is 140%.
Another amazing Constellation for any Furina team. C2 increases her Fanfare gain by 3.5x, allowing her to rapidly gain and cap Fanfare. Additionally, Furina converts any overcapped Fanfare into large amounts of HP% for herself, massively increasing her personal damage output.
DPS% Increase vs. C1: 42.16%
DPS% Increase vs. C0: 58.86%
Rating: 5/5

Constellation 3 - "My Secret Is Hidden Within Me, No One Will Know My Name"
Increases the Level of Let the People Rejoice by 3. Maximum upgrade level is 15.
C3 increases the levels of Furina’s Elemental Burst, granting the party even more DMG Bonus and Healing Bonus per Fanfare stack. At Talent level 12, she’s now able to grant up to 116% DMG Bonus and 48% Incoming Healing Bonus to the party. C1’s frontloaded Fanfare stacks now also grant 43.5% DMG Bonus and 18% Incoming Healing bonus immediately, increasing the value of an already great Constellation.
DPS% Increase vs. C2: 7.47%
DPS% Increase vs. C0: 70.73%
Rating: 3/5

Constellation 4 - "They Know Not Life, Who Dwelt in the Netherworld Not!"
When the Salon Members from Salon Solitaire hit an opponent, or the Singer of Many Waters restores HP to the active character, Furina will restore 4 Energy. This effect triggers once every 5s.
A nice Constellation to help with Furina’s Energy requirements in high ER scenarios, granting her 16 Energy in 20 second rotations. This helps to lower her Energy requirements by ~45%, allowing for more offensive stats to be built on her.
DPS% Increase vs. C3: 11.99%
DPS% Increase vs. C0: 91.2%
Rating: 3/5

Constellation 5 - "His Name I Now Know, It Is...!"
Increases the Level of Salon Solitaire by 3. Maximum upgrade level is 15.
C3 increases the levels of Furina’s Elemental Skill, providing a decent damage increase.
DPS% Increase vs. C4: 17.66%
DPS% Increase vs. C0: 124.96%
Rating: 3/5

Constellation 6 - "Hear Me — Let Us Raise the Chalice of Love!"
When using Salon Solitaire, Furina gains "Center of Attention" for 10s.
Throughout the duration, Furina's Normal Attacks, Charged Attacks, and Plunging Attacks are converted into Hydro DMG which cannot be overridden by any other elemental infusion. DMG is also increased by an amount equivalent to 18% of Furina's max HP.
Throughout the duration, Furina's Normal Attacks (not including Arkhe: Seats Sacred and Secular Attacks), Charged Attacks, and the impact of Plunging Attacks will cause different effects up to every 0.1s after hitting opponents depending on her current Arkhe alignment:
- Arkhe: Ousia
Every 1s, all nearby characters in the party will be healed by 4% of Furina's max HP, for a duration of 2.9s. Triggering this effect again will extend its duration.
- Arkhe: Pneuma
This Normal Attack (not including Arkhe: Seats Sacred and Secular Attacks), Charged Attack, or Plunging Attack ground impact DMG will be further increased by an amount equivalent to 25% of Furina's max HP. When any of the attacks mentioned previously hit an opponent, all nearby characters in the party will consume 1% of their current HP.
During the duration of each instance of "Center of Attention," the above effects can be triggered up to 6 times. "Center of Attention" will end when its effects have triggered 6 times or when the duration expires.
After casting Furina’s Skill, she gains a Hydro infusion, dealing an extra 18% of her Max HP, as well as special effects on her next 6 Normal Attacks based on her Arkhe alignment. This Constellation is similar in function to Nahida and Yelan’s C6, taking a small amount of field time in exchange for some extra personal damage. When Furina is aligned with Ousia, her Normal Attacks will heal the party over time. However, when she’s aligned with Pneuma, her Normal Attacks will gain an additional scaling of 25% of her Max HP and will also drain 1% of all party member’s current HP.
These offensive and defensive forms are inverted from her Elemental Skill, which deals damage when aligned with Ousia, but heals when aligned with Pneuma. Because of this, Furina is unable to generate Particles whilst in her Pneuma stance and sacrifices her Salon Member’s damage for extra HP scalings on her Normal Attacks. She can still swap her alignment freely during this state though, allowing players to mix and match the effects from both Arkhe alignments. After 6 hits or 10 seconds, this effect will be cleared.
Due to the high damage output provided by her Pneuma stance, 4pc Marechaussee Hunter becomes competitive and can beat out 4pc Golden Troupe, allowing players to frontload more damage due to the large amounts of CRIT Rate. Furina’s extremely high damage output at C6 allows players to dispense of enemies very quickly, even without her Salon Members being active.
DPS% Increase vs. C5: 20.85% (Ousia)
DPS% Increase vs. C5: 31.42% (Pneuma)
DPS% Increase vs. C0: 171.87% (Ousia)
DPS% Increase vs. C0: 195.65% (Pneuma)
Rating: 4.5/5
ER Requirement
Authored by Leifa
Due to Furina’s wide variety of teams, her Energy requirements can vary drastically. In scenarios with few Hydro particles, her Energy requirements can reach well above 200%, compared to scenarios with an abundance of Hydro particles going as low as 130%. Neuvillette teams also have relatively low Energy requirements due to the longer rotation length, allowing for 2 uses of Neuvillette’s Skill.

Furina’s Energy requirements will vary based on your team and rotation. For a more accurate estimate, please use the Energy Recharge Calculator linked here. For more details on how Favonius weapons will affect your team, please use Ac1d’s Favonius Mastersheet linked here.
Artifacts
Authored by Leifa
Artifact Stats
Sands of Eon: HP% / ER%
Goblet of Eonothem: HP% / Hydro DMG%
Circlet of Logos: CRIT
Substats: ER until requirement > CRIT DMG = CRIT Rate = HP% > Flat HP
Artifact Sets
 4PC Golden Troupe (GT):
4pc Golden Troupe is Furina’s prime artifact set, providing her Elemental Skill 70% DMG Bonus. Alongside all the other DMG Bonus buffs she gains, she will generally prefer to run a HP goblet on this set.
 4pc Tenacity of the Millelith (TotM)
4pc Tenacity provides a 20% ATK buff to the team as well as 20% HP to Furina. A possible option for teams with multiple ATK scaling damage dealers, although Furina’s personal damage drops significantly.
 *2pc Skill/Hydro/HP/ER combos
Any combination of 2pc Golden Troupe, 2pc Heart of Depth, 2pc Nymph’s Dream, 2pc Tenacity of the Millelith, 2pc Vourukasha's Glow and 2pc Emblem of Severed Fate can work before acquiring a 4pc Golden Troupe set for Furina.
Weapons
Authored by Leifa
Splendor of Tranquil Waters
Her signature weapon and current best in slot option, providing a large amount of CRIT DMG from its substat, as well as both Skill DMG Bonus and HP% when the user and teammates’ current HP changes respectively. Although this is a standout weapon on her, it is currently not an improvement by a huge margin compared to even F2P weapons, so players may wish to hold off on wishing for this compared to her Constellations.
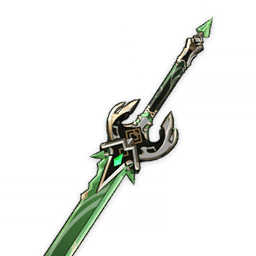 Primordial Jade Cutter
Another 5-star option that performs well on Furina, granting a large amount of CRIT Rate, as well as HP% from its Passive. Furina will almost always prefer to run a CRIT DMG circlet when using this weapon, due to her also having CRIT Rate as her ascension stat. Despite this, it's her next best option at lower ER requirements for personal damage.
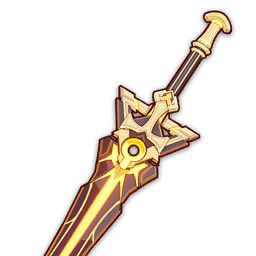 Key of Khaj-Nisut
The Key grants Furina more supportive abilities, giving a teamwide EM buff upon hitting enemies with her Skill, which scales off of her Max HP. It also provides a massive amount of HP%, perfect for increasing the amount of EM she provides, as well as easily letting her run an Energy Recharge sands without much downside in scenarios with high ER requirements. Although she already gets a lot of DMG% from other sources, Hydro DMG goblets rise in value due to the large amounts of HP she has when running this weapon.
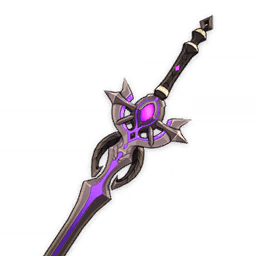 Festering Desire
An outstanding F2P option for Furina, providing a mix of utility and offense with its ER% substat, Skill CRIT Rate, and DMG Bonus Passive. This weapon provides almost everything Furina needs to shine, competing with Jade Cutter for her 2nd best option in higher ER scenarios. However, this weapon was only available back in 1.2, meaning many players may not have it. Regardless, for those who do, it is an amazing choice.
 Fleuve Cendre Ferryman
Another F2P sword for helping Furina’s ER requirements, whilst also providing extra Skill CRIT Rate and a variable Energy Recharge buff after using an Elemental Skill. Due to Furina generating Particles over the course of a rotation, this extra ER isn’t too useful, unless players can funnel a large amount of Particles into her quickly from another Hydro teammate. On the other hand, it is free from Fontaine’s Fishing Association, meaning players can slowly farm for it and its refinements over time.
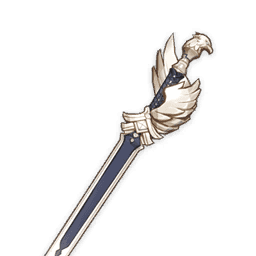 Favonius Sword
In scenarios with high ER requirements, Favonius soars up the ranks compared to other options, granting large amounts of Energy Recharge and even more Energy to the party through its Passive. Although it moderately reduces her damage potential when compared to other weapons, it’s a good option to consider if she needs a lot of Energy for the team you’d like to play her in.
Team Building
Authored by Leifa
Furina’s main condition requires either a healer or teammate with large amounts of HP manipulation in order to get a decent amount of Fanfare every rotation. Because of this, the best suited roles for the job are AoE healers and current Fontainian DPS. If players can fulfill these conditions, she can be run with almost any other characters, due to providing both large amounts of off-field damage and buffing. Due to her wide variety of teams, some standout teammates will be listed rather than set archetypes, whilst also providing a few sample teams instead of an exhaustive list. For more info on a specific character, please check out their respective FAQs or KQM Guides.
Fontainian Teammates
Most Fontainian characters have access to HP manipulation, helping to speed up Fanfare gain for the team. Although our current roster is slim, future characters with these mechanics will fit with her very similarly.
Neuvillette

Neuvillette is able to gain large amounts of Fanfare due to him both draining and healing constantly between 60% and 100% HP when using his Charged Attacks. His HP manipulation is so great, he can be played without a healer and still get a good amount of Fanfare, allowing for more offensive teammates to be used, at the cost of Furina’s personal damage. Neuvillette also greatly benefits from his Constellation 1 when being run with Furina, granting him an extra stack for his A1 Passive and 100% Interruption Resistance, further amplifying the offensive pressure of his teams. Neuvillette also tends to overcap his HP when healing from a Charged Attack, activating Furina’s A1 Passive to provide extra healing to the party.
Neuvillette / Furina / Kazuha / Charlotte ER Reqs: 150%
Neuvillette / Furina / Fischl / Jean ER Reqs: 130%
Neuvillette / Furina / Nahida / Raiden ER Reqs: 125%
Wriothesley

Wriothesley also drains large amounts of his HP when he attacks during the Chilling Penalty state, further increasing Fanfare gain for the team. However, his total HP loss is further increased when paired with Furina, making a healer a requirement in order to keep Wriothesley above 50% HP to avoid disabling the Chilling Penalty state. This large amount of HP drain further incentivises healers, who will now change more amounts of HP, resulting in more Fanfare gained. Although Wriothesley’s C1 increases his survivability, it is still recommended to run him with a healer due to the extra Fanfare gained whilst keeping his off-field teammates healthy.
Wriothesley / Furina / Yelan / Mika ER Reqs: 185%
Wriothesley / Furina / Xiangling / Baizhu ER Reqs: 240% / 200% (21s vs 25s rotation)
Wriothesley / Furina / Shenhe / Jean ER Reqs: 225%
Non-Fontanian Teammates
Currently, Furina’s standout non-Fontanian teammates are ones who specialize in AoE healing. These come in two categories: sustained healers, who will slowly heal the entire team over time, and burst healers, who grant a large amount of healing to the entire team immediately.
Sustained Healers
Sustained healers specialize in consistently healing the team over the course of a rotation. This provides less frontloaded stacks compared to burst healing, but comes with the added benefit of keeping teammates consistently healthy, never letting them get close to the cut off of 50% HP. This also comes with the benefit of consistently activating Furina’s A1 Passive, which helps to keep the team at high amounts of HP. Currently, our only sustained healers require to be on-field to do their job, which can limit the options available for teams. Characters that fall into this category include: Qiqi, Kokomi, Noelle, Barbara, Dori and Yaoyao.
Kokomi
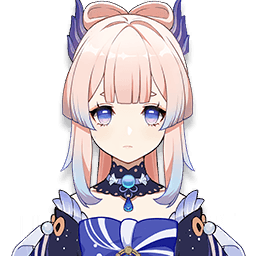
Kokomi is a perfect candidate for an on-field healer for Furina, providing more than enough healing to keep the team healthy whilst helping to lower Furina’s Energy requirements. One standout team with her is Mono Hydro, a team with very low Energy requirements that makes great use of Furina’s Fanfare buff. Unfortunately, the Incoming Healing Bonus provided by Furina’s Burst does not interact with Kokomi’s A4 Passive, but the DMG Bonus gained is still a large increase for her. Mono Hydro is not Kokomi’s only team however, as she’s able to run other playstyles (such as Taser and Hyperbloom) with ease.
Kokomi / Furina / Yelan / Kazuha ER Reqs: 130%
Kokomi / Furina / Fischl / Lynette ER Reqs: 135% / 115% (21s vs 25s rotation)
Kokomi / Furina / Nahida / Kuki ER Reqs: 150%
Noelle

Noelle also fits the role for an on-field healer, providing both healing and shielding to the team with the ability to switch off-field if needs be, allowing other teammates to use their Skills without losing Noelle’s Burst effect. Being a Geo character, Noelle is able to hold 4pc Archaic Petra to further increase the damage of her off-field teammates. This set also incentivises running more Hydro characters alongside Furina, as they can not only take advantage of the buffs provided by Petra, but also help to lower Furina’s Energy requirements. To further help with the team’s Energy, Noelle can wield the Favonius Greatsword, helping to gain her own Burst back due to not generating Particles with her Elemental Skill.
Noelle / Furina / Yelan / Kazuha ER Reqs: 205% / 165% (Yelan 1E vs 2E)
Noelle / Furina / Xingqiu / Zhongli ER Reqs: 205% / 160% (Xingqiu 1E vs 2E)
Noelle / Furina / Gorou / Albedo ER Reqs: 220% / 195% (Without vs with 4pc Exile)
Burst Healers
Burst healers specialize in providing a large, immediate amount of healing to the entire team. This can help with gaining a large amount of Fanfare immediately once Furina has already drained your team’s HP. Characters that fall into this category include: Jean, Baizhu, Barbara, Sayu, Yaoyao, Mika and Charlotte.
Baizhu

Compared to our other burst healers, Baizhu doesn’t need to use his Elemental Burst to heal the entire team, instead only needing to cast his Skill, which can be used once every 10 seconds. He also provides extra comfort through his Burst, periodically healing the active character whilst refreshing his shields and applying Dendro to the enemy. This periodic healing helps to consistently activate Furina’s A1 Passive, keeping the team even healthier and generating more Fanfare.
Jean

Jean is a great slot in for teams that need to consolidate both 4pc Viridescent Venerer and healing. Her Burst not only provides extra continuous healing to characters inside her Field, but also cleanses, Swirling the element cleansed onto nearby enemies. Her A4 Passive also helps to lower her Energy requirements, alongside a low cooldown Skill to refresh 4pc VV if needed.
Charlotte

A new 4-star Cryo Catalyst healer who will be available on Furina’s banner. Although her Energy requirements can be very high, she can make great use of Prototype Amber despite her healing scaling off her ATK. Her healing is already high at C0, but when factoring in both Constellations and Prototype Amber, her total healing skyrockets to the point of needing no extra healing substats to sustain the team. This allows her to focus fully on the Energy Recharge she needs to consistently cast her Elemental Burst.
Mika

A 4-star Cryo Polearm healer with both a strong AoE Burst heal and sustained single-target healing. Compared to Charlotte, Mika has access to the new Fontaine craftable polearm, Rightful Reward, granting him HP% and large amounts of Energy when he receives healing. In a Furina team, he is able to trigger this passive twice, thanks to Furinas A1 Passive, allowing him to run next to no Energy Recharge in his teams. He also provides an Attack Speed and Physical DMG Bonus buff, allowing him to fit nicely into Wriothesley, Wanderer and Eula teams, alongside Furina for even more team buffs.
Prototype Amber

Prototype Amber at R5 provides healing to all party members equal to 18% of their Max HP. which can be used for extra comfort, and more immediate Fanfare gain in teams. Alongside Furina’s Fanfare, and a Healing Bonus Circlet, this can be increased to ~30% Max HP or ~36% Max HP with 4pc Maiden Beloved. Although this generally won’t sustain a team by itself, it can make teams with single-target healing much easier to play, especially if your Catalyst teammate doesn’t require any other gear to benefit the team. In longer rotations, characters with lower cost Elemental Bursts such as Ninggaung or Heizou can activate Prototype Amber’s Passive twice to heal 60% of the party’s Max HP. They are also able to run supportive artifact sets such as 4pc Archaic Petra or Viridescent Venerer with little to no Energy Recharge substats due to the large amounts of Energy granted by this weapon.
Other Possible Teams
Here are some other possible teams Furina can be slotted into
Hu Tao / Furina / Hydro / Jean

ER Reqs: 210%
This team replaces either Xingqiu or Yelan for Furina, playing similarly to original Hu Tao double Hydro teams. Although Hu Tao has innate HP loss mechanics, she gains an extra 33% Pyro DMG Bonus whilst under 50% HP from her A4 Passive. This is counteractive with Furina’s HP drain, requiring teammates to be above 50% HP in order to have their HP drained. On top of this, Hu Tao teams generally don’t run a healer because of her A4 Passive, making the 4th slot now a requirement to be a healer to keep Furina’s extra Skill damage active and Fanfare stacking up. Like other teams with burst healers, they can frontload a large amount of Fanfare from the 2nd rotation onwards, overcoming the loss of Hu Tao’s A4 Passive whilst buffing the rest of the team at the same time. However, the Energy requirements in this team are quite high, so don’t hesitate to run Favonius weapons if need be.
Cyno / Furina / Nahida / Baizhu

ER Reqs: 175%
Another team that replaces Xingqiu or Yelan for Furina to provide Cyno with large amounts of DMG Bonus, alongside Furina’s high personal damage. Although Cyno has access to weapons such as the Kitain Cross Spear, the Energy requirements for this team can be very high without extra help from weapons like Favonius. Baizhu can also carry Prototype Amber to help with his own Energy requirements and provide some extra immediate Fanfare upon using his Elemental Burst.
Ayaka / Furina / Shenhe / Charlotte

ER Reqs: 205%
Due to Furina’s Salon Members attacking as they wish, she can be a great slot in for Freeze teams, granting even more buffs to Ayaka to further boost the benefit added from Shenhe’s Icy Quill effect. Charlotte can also wield the Thrilling Tales of Dragon Slayers to provide Ayaka with a large amount of ATK%, whilst providing a lot of immediate Fanfare. If players require additional grouping, Shenhe can be replaced for an Anemo character, such as Kazuha. However, this team will still perform strong against unfreezable enemies due to the raw damage output from Ayaka.
Eula / Furina / Fischl / Mika

ER Reqs: 190%
Although Furina’s Energy requirements may be high, she can actually be an increase to Eula teams, given you can gain a large amount of Fanfare. Mika works excellently for this role, providing a large AoE heal and then extra, off-field healing to the active character, which helps to trigger Furina’s A1 Passive consistently. With constellations, he becomes on par or better than Bennett in terms of buffs for Eula, whilst Fischl helps to trigger Superconduct and provide extra Energy to the team. Raiden can be a viable option over Fischl for double carry teams, where she is able to catch the tail end of Furina’s Fanfare on most of her Burst and further lower Energy requirements.
Raiden / Furina / Jean / Bennett

ER Reqs: 145%
Another general Raiden team containing the sunfire duo of Jean and Bennett, helping to both buff, heal and apply large amounts of Pyro for the team. Jean’s Burst helps to gain a lot of Fanfare very quickly whilst consistently activating Furinas A1 Passive for even more healing. The extreme Pyro application also allows for many Overloaded and Vaporize reactions to be triggered, however, the lack of grouping may not be for everyone.
Furina / Yelan / Xiangling / Bennett

ER Reqs: 150%
One of the few teams that can safely run a single-target healer. Due to the team having no dedicated on-field character, players can swap freely between their party members when they need healing, and then swap back to Bennett to repeatedly use his Skill to funnel Particles into Xiangling. Yelan is able to freely use her Skill twice per rotation in this team, helping to lower Furina’s Energy Requirements further. Xingqiu can be a viable alternative with higher Energy Requirements in exchange for defensive utility and Hydro RES Shred from his Constellation 2.
Alhaitham / Furina / Nilou / Baizhu

ER Reqs: 200%
An alternative style of Nilou Bloom that doesn’t require Nahida, instead preferring to use Alhaitham on-field whilst Furina provides both Hydro application and off-field damage. Nilou’s Tranquility Aura provides additional Hydro application for Bountiful Blooms and Baizhu provides large amounts of healing to generate Fanfare and to help offset the team’s self damage. Baizhu can also run Prototype Amber for additional healing and Energy whilst having the freedom to use two Skills quite safely. Furina’s Fanfare buff is utilized effectively by Alhaitham, providing large amounts of Dendro DMG and application for Blooms. Although Baizhu’s shields will help mitigate it somewhat, this team is adding Furina’s teamwide HP drain on top of the Bountiful Bloom’s self damage, which may be uncomfortable for some players.
Please note this is not an exhaustive list of teams and is only meant to give an example of some teams Furina fits in. Feel free to experiment with characters you enjoy and see what works best for you.


