Lynette FAQ
emiliabyss, leifa, sigurd3854
Last updated on Jun 4, 2025
Credits:
- Emiliabyss - Lead, Author | Overview, ER Requirements, Weapons | Weapon Calcs
- sigurd3854 - Lead, Author | Artifacts | Artifact Calcs
- Leifa - Author | Talents, Constellations, Artifacts, Teambuilding
- snowclipsed - Weapon Calcs, Constellation Calcs
- sirvaughan - Framecounting
- fianwens - Writing Verification
- .athene. - Calcs Verification
Pre-TC is volatile and, as always, perpetually subject to change until release (and sometimes later!). Please note that these are theoretical suggestions. Everything described in this FAQ is a good faith analysis based on the little information about the character’s kit that we know. Team calcs, additionally, are not established yet, and as with everything in TC, the content in this FAQ should be taken with a grain of salt.
Character Overview
Authored by Emiliabyss

Lynette is a 4-star Anemo Sword character who is the first “Ousia-aligned” character to be released in the Fontaine era of Genshin Impact. While the Ousia alignment on her Skill can help solve puzzles and exploit boss weaknesses, she is a support character who can buff her teammates with a pseudo-Noblesse Oblige set on one of her passives. With all six Constellations, she can infuse her sword with Anemo upon using her Skill and can deal modest damage with the help of Faruzan and Bennett.
At C0, her team options are quite restrictive; National teams may struggle with Lynette due to her Burst application interfering with Xiangling’s reaction triggers, leaving her only able to use her low-power Skill before switching out. Her other potentially viable playstyles are locked behind her C6, which allows her to drive with Anemo infusion. However, with C6, she can be the trigger for Hyperbloom reactions if you have an Electro character who fails to hit Dendro cores like Fischl.
That said, the majority of the time, Lynette will serve as a dedicated support, rather than a DPS.
Compared to other Viridescent Venerer-wielders, Lynette falls behind. While her Burst taunts enemies, her crowd control is severely lacking compared to Sucrose, another 4-star Anemo character. In Hyperbloom teams, Sucrose remains a stronger option due to her being able to share her Elemental Mastery stat, whereas Lynette’s teamwide ATK buff is less relevant, and Sucrose’s Anemo application is not dependent on an infusion like Lynette, offering Sucrose more consistency. For raw damage in An3mo teams, 4-star Heizou is a fierce competition and doesn’t need to rely on an infusion through max Constellations to deal respectable Anemo damage.
To summarize, Lynette is seldom the best choice for any circumstance outside of being an Anemo character with the Ousia alignment. When it comes to support, ATK damage, and reactions, other 4-stars and 5-stars are more efficient at their jobs. Lynette’s true power evaluation, then, depends on exactly how essential Ousia alignment becomes from 4.0 onward.
Talents
Authored by Leifa
Leveling Priority:

- C0 / C6 off-field - Burst > Skill >> Normal Attacks

- C6 on-field - Burst > Normal Attack >= Skill
Analysis
At C0, Lynette generally just wants to Skill, Burst and swap out, whilst Absorbing an element into her Elemental Burst to increase its damage output. At C6, Lynette is able to on-field with Anemo-Infused Normal Attacks, giving her some alternative playstyles.
Talent Overview
Normal Attack: Rapid Ritesword: Lynette performs a quick, 4-hit attack string with a multihit on the 3rd attack. At C0, these are underwhelming due to Lynette not being suited for Physical DMG, but her C6 grants a short Anemo Infusion, allowing her to have some on-field presence.
Elemental Skill: Enigmatic Feint Lynette’s Skill has both a Tap and Hold function. On Tap, Lynette unleashes Enigma Thrust, thrusting forward with her sword. Once Enigma Thrust hits an opponent, Lynette will restore 25% of her Max HP and then proceed to lose 6% of her Max HP every second for 4 seconds.
-
On Hold, Lynette enters the Pilfering Shadow state, increasing her Movement SPD for 2.5 seconds. During this state, a Shadowsign mark will appear over a nearby enemy, which marks the enemy Lynette will target upon ending her Skill, where she will then perform the same Enigma Thrust as her Tap Skill.
-
When Lynette unleashes an Enigma Thrust, she will also activate her Arkhe Attack, Surging Blade, dealing Ousia-aligned Anemo DMG to the enemy hit, and has a cooldown of once every 10 seconds. Arkhe Attacks do not apply an element and deal very little damage, however, it will cause an Annihilation reaction when coming into contact with the opposite Arkhe energy. At this point in time, Lynette is our only source of Ousia-aligned attacks, giving her a possible role against Pneuma-aligned enemies or mechanics.
-
Lynette’s Skill generates 4 Anemo particles on a 12 second cooldown, allowing her to generate a large amount of particles in a short period with C4 or Sacrificial Sword. However, the cooldown on her Skill alongside her high Burst cost results in her having relatively high Energy requirements when played off-field. Unfortunately, as of the time of writing, both Lynette’s Arkhe Attack and her Skill also have a tendency to whiff on enemies, making gaining particles and annihilating against Pneuma-aligned enemies cumbersome.
Elemental Burst: Magic Trick: Astonishing Shift Lynette hits around her in an AoE whilst summoning a Bogglecat Box, which taunts enemies and deals Anemo DMG every second. When the Bogglecat Box is hit by a Cryo, Pyro, Hydro or Electro attack, it absorbs the element and starts firing Vivid Shots, one every 2.3 seconds.
- Her Burst is her highest source of damage, lasting for 12 seconds on an 18 second cooldown with a 70 Energy Cost. It has similar properties to other abilities in the game, such as Amber’s Baron Bunny, in which it can be pushed around easily by players and enemies. The Bogglecat Box also shares the same absorption rules as Dendro Traveler, absorbing the first Element it comes into contact with. With C2, the Elemental application from her Vivid Shots doubles to once every wave, compared to once every other wave, allowing her to trigger more reactions against enemies. Her Burst is also dynamic, meaning buffs such as Marechaussee Hunter will grant all 3 stacks to her Burst, rather than snapshotting 1 or 2 stacks upon casting.
A1 Passive: Sophisticated Energy After using her Burst, based on the amount of different elements in the team, Lynette will give a teamwide ATK boost. Pure Anemo offers 8%, whereas a 3 Anemo team gets 12%. The most common distribution (three elements) offers 16%, and in a rainbow team (all different elements), the passive gives 20%. This buff lasts for 10s.
A4 Passive: Props Positively Prepped Once Lynette's Elemental Burst absorbs an element, it gains a 15% DMG Bonus for the rest of its duration. This helps increase the damage provided by her Burst and scales in usefulness depending on how quickly you can cause it to absorb an element.
Utility Passive: Loci-Based Mnemonics Lynette shows the location of Recovery Orbs on the minimap whilst underwater and increases the HP and stamina gained from these by 25%,letting players explore Fontaine's new underwater areas more easily.
Constellations
Authored by Leifa

Constellation 1 - A Cold Blade Like a Shadow
- When Enigmatic Feint's Enigma Thrust hits an opponent with Shadowsign, a vortex will be created at that opponent's position that will pull nearby opponents in.
Grants Lynette some extra utility in the form of grouping. The grouping is about the same size as Sucrose/Faruzan’s Skill grouping whilst having the same pull speed as Kazuha’s Skill. The grouping also lasts long enough to actually pull light enemies together, making it quite reliable. Unfortunately, it only activates upon hitting an opponent with her Hold Skill rather than Tap or Hold, and with her Skill’s relatively easy chance to miss even when locked on, you’ll need to be careful when using it.
Rating: 2.5/5

Constellation 2 - Endless Mysteries
- Whenever the Bogglecat Box summoned by Magic Trick: Astonishing Shift fires a Vivid Shot, it will fire an extra Vivid Shot.
A rather nice Constellation, increasing the Elemental Application from her Vivid Shots to once every wave rather than once every other wave. This effectively doubles the amount of reactions from her Elemental Burst and can be especially useful in Hyperbloom teams upon swirling Electro, allowing for easy off-field Hyperbloom triggers.
Rating: 3/5

Constellation 3 - Cognition-Inverting Gaze
- Increases the Level of Magic Trick: Astonishing Shift by 3. Maximum upgrade level is 15.
Three extra levels to Lynette’s Skill, granting her slightly more damage. Her damage contribution, however, isn’t massive to begin with.
Rating: 1/5

Constellation 4 - Tacit Coordination
- Increases Enigmatic Feint's charges by 1.
Lynette makes quite good use of an extra Skill charge, allowing her to frontload Anemo Particles, doubles her grouping potential and lets her fit 20-second rotations, where she alternates between 1 and 2 Skill casts per rotation. Keep in mind, her Ousia-aligned Arkhe Attack only triggers once every 10 seconds, meaning she will only send out one Arkhe Attack if you use two Skills back to back. In 20s rotations, she essentially gains one extra skill use every other rotation. In 25s rotations, she can maintain her Anemo infusion for over 10s.
Rating: 3/5

Constellation 5 - Obscuring Ambiguity
- Increases the Level of Enigmatic Feint by 3. Maximum upgrade level is 15.
Three extra levels to Lynette’s Burst, granting more damage from both the Bogglecat Box and Vivid Shots. However, like her Constellation 3, her damage contribution to the team isn’t massive.
Rating: 1/5

Constellation 6 - Watchful Eye
- When Lynette uses Enigmatic Feint's Enigma Thrust, she will gain an Anemo Infusion and 20% Anemo DMG Bonus for 6s.
Her last Constellation grants a new playstyle to Lynette, allowing her to take the field for a portion of your rotation, whilst also gaining a 20% Anemo DMG Bonus, increasing the damage from the rest of her kit. This Constellation allows her to drive teams such as Hyperbloom, where EM stats can be valuable compared to her traditional ADC build. The increased field time also lowers her Energy requirements, allowing more offensive substats in her gear. Anemo Infusions also allow for Lynette to swirl other infusions off her weapon, allowing for unique double swirl setups with other infusions such as C6 Bennett, Chongyun or Candace.
Rating: 3.5/5
ER Requirement
Authored by Emiliabyss
Lynette’s Energy requirements are quite high without a plethora of support through Favonius weapons and Anemo teammates. In 25s rotations and an Energy-rich team, these requirements plummet, though longer rotations will mainly be useful only when Lynette’s infusion at C6 is unlocked. However, even at C0, she has a 12s cooldown on her Skill, which allows her to use it twice per long rotation.
We tested Energy Recharge requirements for teams grouped into three categories: General Use (National, Freeze, etc.), An3mo (C6 Lynette with C6 Faruzan and Kazuha), and Hyperbloom teams (Collei/DMC/Nahida, Xingqiu, and Fischl, C6 Lynette is the trigger).
General Use National (1 Fav on Team) - 230%
National (1 Fav + Lynette Fav) - 180%
Freeze (1 Fav on Team) - 220%
Freeze (1 Fav + Lynette Fav) - 180%
An3mo (C6 Lynette) No Fav - 150%
1 Fav - 140%
2 Fav - 135%
Hyperbloom (C6 Lynette) ER needs will vary slightly depending on how consistently you can keep Oz up (whether you Burst every rotation or slightly desync) and which Dendro character you use between Collei, DMC, and Nahida
Collei 1E, No Fav - 155-160%
Collei 2E, No Fav - 145%-155%
Collei 1E + Fav - 140%-150%
Collei 2E + Fav - 135%-145%
DMC 1E + Fav - 145%-150%
DMC 2E + Fav - 140%-145%
Nahida, No Fav - 135%-145%
Energy requirements will vary based on your team and rotation. For a more accurate estimate, please use the Energy Recharge calculator linked here.
Artifacts
Authored by sigurd and Leifa
Artifacts Stats
Sands: ER/EM/ATK% Goblet: Anemo DMG%/EM Circlet: CRIT/EM
Lynette prefers ATK% or ER / Anemo DMG% / CRIT in general, but it is only marginally better than other combinations of main stats in most cases. In Hyperbloom or reaction-focused teams where she is the trigger, EM or ER / EM / EM should be used instead. Her Burst can be important depending on the team, therefore, enough ER should be built to suit her needs.
Substats: ER (Until ER Reqs) > EM (If Hyperbloom) > CRIT > ATK
Artifacts Set
 4pc Viridescent Venerer (VV)
Like most other Anemo supports / Sub-DPSes, Viridescent Venerer is Lynette’s Best-in-Slot set, performing extremely well when compared to other sets. When comparing sets for her solo DPS, 4pc VV is only outperformed marginally <0-4%> in certain niche team comps. When comparing it to other sets for her team’s overall DPS, 4pc VV easily beats all other sets due to the excellent debuff it inflicts, allowing her swirls to reduce the enemy’s resistance based on the element swirled by 40%.
 4pc Emblem of Severed Fate (EoSF)
Due to Lynette’s relatively high ER Requirements at C0, as well as most of her damage coming from her Burst, 4pc Emblem of Severed Fate is her highest personal damage Artifact set. This set can be an option for off field playstyles or before C6 in teams that don’t gain a lot from Viridescent Venerer.
 4pc Gilded Dreams (GD)
An option not too far behind for personal damage whilst giving a mix of ATK% and EM. This set excels when using Lynette as a driver for Hyperbloom when built with 3 EM main stats.
 4pc Flower of Paradise Lost (FoPL)
An option over Gilded Dreams that grants slightly more Hyperbloom damage in exchange for lower Swirl and Aggravate damage.
 4pc Marechaussee Hunter (MH)
Due to Lynette’s Skill healing and then slowly draining her HP, she is able to activate the 4pc effect of Marechaussee Hunter, granting her large amounts of CRIT Rate. However,a s the set only procs on-field, the stacks will not stay for her Burst’s whole duration unless she is played on-field at C6
 4pc Desert Pavilion Chronicle (DPC)
A set only recommended at C6, due to providing 40% Normal, Charged and Plunging Attack DMG after hitting an enemy with a Charged Attack. With the 2pc effect granting extra DMG%, it is another option Lynette can use to further boost her personal damage.
 4pc Noblesse Oblige (NO)
If there is not already a Noblesse user on the team, Lynette doesn’t lose too much from running it, as her personal damage isn’t high in most teams. However, it is recommended to use 4pc VV instead for team buffs if there is no other 4pc VV user on the team.
 2pc Anemo / ATK / ER / EM
General 2pc options that Lynette can use to boost her personal damage or reach ER requirements.
Weapons
Authored by Emiliabyss
Due to Lynette’s three potential playstyles, it’s important to clarify that the rankings will be vastly different depending on your ideal playstyle.
General-Use playstyles require Energy Recharge weapons in order to meet Energy requirements. CRIT weapons cannot reach 220+% in KQMC standards, which severely limits your options.
An3mo playstyles as an on-field DPS prefer CRIT weapons, due to her much lower Energy requirements.
Hyperbloom playstyles prefer Energy Recharge or Elemental Mastery weapons, since she will be triggering the Hyperbloom reactions. Keep in mind that Favonius Sword overshoots her energy needs in this team.
Recommended for General Use (C0+; National, Freeze, etc.)
 Favonius Sword
The best all-around weapon for Lynette, decreasing her own as well as her teammates’ Energy requirements. Do keep in mind that without building CRIT Rate, you might find some difficulty in triggering its passive consistently.
 Sapwood Blade
A solid craftable option that can boost a character’s Elemental Mastery for a short time. Only opt for this over Favonius Sword when energy needs are quite comfortable across the team, but this is still a potent option in some circumstances.
 Sacrificial Sword
Offers less general batterying than Favonius Sword in exchange for more Anemo particles created. If the trigger on the passive occurs, it solves 100% of Lynette’s Energy Recharge requirements, but since it maxes out at an 80% chance at R5, this is not guaranteed. It can also situationally add time to Lynette’s rotation.
 Fleuve Cendre Ferryman
This weapon is almost purely an Energy Recharge stick, but it solves almost all of Lynette’s Energy requirements.
 Amenoma Kageuchi
Another sword that mainly exists to provide Energy. It has no other special uses.
 Festering Desire R5
Energy Recharge stick. The extra CRIT Rate on Skill uses and Skill DMG isn’t much of a boon.
 Skyrider Sword R5
Not to be confused with the 5-Star Skyward Blade, though the two perform similarly. This is the barebones 3-star option.
Recommended for An3mo
 Mistsplitter Reforged (N1 after E)
The best-in-slot for Lynette’s damage by far, assuming full stacks and an infused N1 immediately after her Skill use. When buffed by C6 Faruzan and C5 or below Bennett, she can almost scratch 15k DPS within her 6-7s field time. About 10% greater than the next best option in terms of damage.
 Primordial Jade Cutter
A generically good CRIT weapon for almost anyone, giving her a whopping 44% CRIT Rate and an extra bit of HP from its passive, along with extra attack based on her Max HP. Lynette doesn’t care as much about her HP stat, but it’s useful for the CRIT Rate regardless.
 Haran Geppaku Futsu
Another solid option. Lynette can use the passive quite well with her infusion.
 Light of Foliar Incision (N1 after E)
Another CRIT stick. The passive is nice to have but doesn't provide a meaningful increase due to Lynette generally building for ATK and CRIT rather than EM.
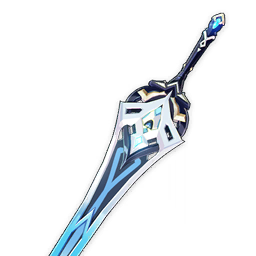 Wolf-Fang R5
The dynamic-buffing CRIT Rate is useful on both her Skill and Burst, and offers surprising damage potential as a 4-star weapon.
 The Black Sword R5
A solid CRIT Rate weapon obtainable through Battle Pass. The Normal and Charged Attack damage buff is very much appreciated when Lynette is attacking in An3mo teams. The lifegain is a nice bonus but inessential. Many players already have a few of these already if they’re a regular Battle-Pass renewer.
Other 5-Star Swords besides Aquila and Key
There isn’t much to say about other weapons other than “they do decent damage.” This includes Freedom Sworn, Summit Shaper, and Skyward Blade.
 Amenoma Kageuchi R5
The best craftable option for damage, lessening Lynette’s Energy needs in An3mo teams even further. This allows Lynette to invest almost purely into damage. Lion’s Roar R5 can tie if you can maintain 100% passive uptime.
Recommended for Hyperbloom Trigger
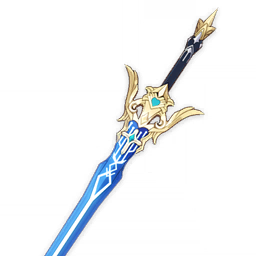 Freedom-Sworn
The obvious 5-star choice for an EM sword-wielder. It provides a ton of Elemental Mastery while also buffing the team. The bonus to her Normal, Charged, and Plunging Attack damage isn’t a significant boost, but it is well-appreciated.
 Xiphos Moonlight R3+
If you want something that performs similarly to Freedom Sworn but don’t want to wish for a 5-star weapon, Xiphos Moonlight is a great choice. It also acts as a pseudo-Favonius weapon by increasing the team’s’ Energy Recharge. R5 has no impact on personal damage performance compared to R3, but the Energy Recharge buff to the party will be greater at higher refinements.
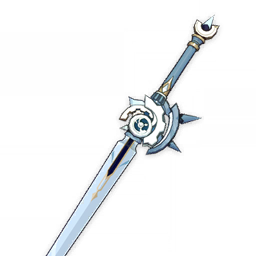 Iron Sting R5
Best craftable for her personal damage while also outranking other options, including other 5-star weapons. There’s not much to say about this, other than it is a solid stat stick.
 Sapwood Blade R5
This craftable does less damage, but can offer a leaf that buffs Elemental Mastery. This is probably better on support builds, but is still worth mentioning.
Team Building
Authored by Leifa
At C0, Lynette leans much more to a general Anemo slot in for teams, especially against Pneuma-aligned enemies and mechanics. Her Skill gives short but fast mobility whilst her Burst gives fast, off-field Anemo DMG. With constellations, she gains grouping, increased Absorption application, an extra Skill charge and an Anemo Infusion, granting her more utility and flexibility.
However, due to her skill being Single-Target and having a tendency to miss both the initial hit and Ousia follow-up, she may struggle to actually annihilate Arkhe mechanics.
Lynette’s field time varies depending on your build and team:
-
General Use: 2-4s
-
An3mo: 6-7s; when Normal Attacking with infusion, N2C is best for damage.
-
Hyperbloom: 6-7s+6-7s or 12-13s (whether you infuse two separate times, or use all your field time at once); when Normal Attacking with infusion, N3D is best for Swirl count.
Hyperbloom

Due to Lynette being an Anemo character that generally builds for ATK and CRIT over EM stats, she finds a nice place in An3mo. Bennett is highly recommended for the flex slot of this team due to the large attack buff he brings on top of general survivability. However, he must be C5 or lower, due to Lynette’s infusion being swirled away by the Pyro Infusion granted by his Burst. C6 Faruzan is also another large increase, lowering her and the team's ER requirements whilst also dealing good off-field damage, allowing C6 Lynette or another Anemo character to take the field.
Teammates
- Anemo options: Kazuha / Venti / Heizou / Sucrose
- Flex options: Bennett C5 / Zhongli
An3mo

With Lynette’s C6 granting an Anemo Infusion, she is able to drive on-field in Hyperbloom teams, constantly swirling Electro with her Elemental Burst and Normal Attacks to trigger Aggravate and Hyperblooms. Although Electro is last in her Burst Absorption priority, it grants more Hyperblooms than a Hydro Absorption due to characters like Xingqiu and Yelan having high enough Hydro Application to wipe Quicken Auras. Nahida and Baizhu are options, but both come with their own detriments that make them worth reconsidering. First, Nahida’s 1.5U Dendro application on her Skill, whilst also applying on the triggering of reactions can remove Electro Auras from enemies. This interferes with Swirl reactions to consistently trigger Hyperblooms. Second, Baizhu’s application may be good enough for Quicken teams, but cannot generate sufficient Dendro Cores as the sole Dendro applicator in Hyperbloom. Yaoyao is an alternative if players need a Dendro healer but performs better in AoE scenarios compared to Single-Target due to the random targeting on her Skill. Kuki is another viable option due to consolidating both healing and great Hyperbloom triggers, but leads to Lynette feeling out of place, not getting many Swirls or Hyperblooms.
Teammates
- Electro options: Fischl / Beidou / Yae / Kuki
- Hydro options: Kokomi / Xingqiu / Yelan
- Dendro options: Nahida / Baizhu / Collei / Dendro Traveler / Yaoyao


