
Mika FAQ

KB, Luna, Kuro_kami
Last updated on Jun 4, 2025
Credits:
- KB#1111 - Lead, Author
- Luna#0188 - Calcs, Author
- Kuro_kami91#6652 - Writing: Teambuilding
- TWICE#9958 - Consultation
For all Mika Calcs you can reference: Mika Mastersheet by KB, Luna
Pre-TC is volatile and, as always, perpetually subject to change until release (and sometimes later!). Please note that these are theoretical suggestions. Everything described in this FAQ is a good faith analysis based on the little information about the character’s kit that we know. Team calcs, additionally, are not established yet, and as with everything in TC, the content in this FAQ should be taken with a grain of salt.
Character Overview
Authored by KB

Mika is a Polearm support unit that focuses on increasing his team’s Attack Speed and Physical DMG while also offering healing. One of the most notable things about Mika is even without Constellations, he currently has the highest Attack Speed buff in the game; unfortunately, his Physical DMG buffs are quite lacking until C6 unless in a multi-target situation. That said, he is not resource-demanding to build, as he only requires ER and minor amounts of HP% to do his job.
Talents
Authored by Luna
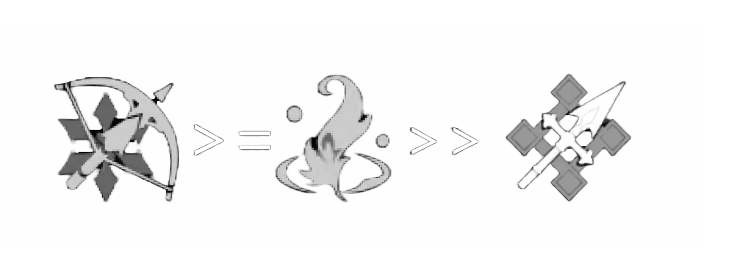
Leveling priority (on-field): Skill >= Burst >> Normal Attack
Talent Overview
Typically, it is recommended to level HP-scaling characters to 90. However, in Mika's case, this only improves his healing — therefore, it is not as high of a priority if a player is comfortable playing without the added survivability.
Starfrost Swirl [E] - 4 Particles, 15s CD: Has Tap and Hold versions. Mika does a ranged attack with his crossbow: the Tap version shoots an arrow that pierces through enemies, while the Hold version shoots a Fragmentation Arrow, which explodes on the first enemy hit and launches Shards targeted towards other enemies. Both uses also grant the Soulwind Effect for all party members, increasing their Attack Speed based on Talent level.
With his Ascension 1, Soulwind [E] also grants the Detector effect, providing on-field characters 10% Physical DMG Bonus per stack, up to a maximum of 3. Detector stacks can be obtained via these means:
- Tap Version: Grants one Detector stack per enemy pierced (Except the first target)
- Hold Version: Grants one Detector stack per enemy hit by the Fragmented Shards. Note that the Shards can’t target the same enemy nor the one hit by the main arrow attack.
- It is recommended to use his Hold Skill in multi-target situations since landing piercing hits with Tap Skill is much more difficult.
- With his Ascension 4, if the active character crits and has both the Soulwind [E] and the Skyfeather Song [Q] effects, they gain one Detector stack. Only one Detector stack can be gained in this manner per Soulwind [E] effect. A4 also increases the maximum Detector stacks from 3 to 4.
It’s worth noting that at C0, Mika can only grant one Detector stack from his A4 in total in single-target scenarios. One extra single-target Detector stack can be gained upon his arrow hitting with either Tap or Hold version via his C2.
Skyfeather Song [Q] - 70 Energy, 18s CD: Mika heals all party members and grants on-field characters Eagleplume for 15 seconds, which heals on-field characters by a small portion when they deal Normal Attacks, with a CD of 2.5 seconds for each healing instance.
- His Elemental Burst neither deals damage nor has Elemental application, so it is mainly used for healing and gaining 1 Detector stack via his A4 for Physical characters.
- When Mika is not used in Physical-focused teams and the healing is not needed, Skyfeather Song [Q] can be skipped.
Constellations
Authored by KB

C1 - Factor Confluence
- The Soulwind state of Starfrost Swirl can decrease the healing interval between instances caused by Skyfeather Song's Eagleplume state. This decrease percentage is equal to the ATK SPD increase provided by Soulwind.
Provides a minor increase in his healing. Although the interval reduction is appreciated, this Constellation only improves the single-target healing portion of his Burst, which is not too significant. Players who struggle with survivability may enjoy this Constellation, though it is definitely not a necessity to stay alive.
Rating: 1/5

C2 - Companion's Ingress
- When Starfrost Swirl's Flowfrost Arrow first hits an opponent, or its Rimestar Flare hits opponents, 1 Detector stack from Passive Talent "Suppressive Barrage" will be generated. You must have unlocked the Passive Talent "Suppressive Barrage" first.
Functionally gives one more Detector stack in situations with three or fewer enemies. Although an additional Detector stack is appreciated, the amount of Physical DMG a Detector stack gives is minor.
Rating: 2/5

C3 - Reconnaissance Experience
- Increases the Level of Skyfeather Song by 3.Maximum upgrade level is 15.
Increases the healing from his Burst marginally, which can help players with comfort.
Rating : 1/5

C4 - Sunfrost Encomium
- When Mika's own Skyfeather Song's Eagleplume state heals party members, this will restore 3 Energy to Mika. This form of Energy restoration can occur 5 times during the Eagleplume state created by 1 use of Skyfeather Song.
Reduces the amount of Energy he needs from 70 to 55, which makes building Mika much easier. Since in Eula teams Mika is forced to funnel his own particles to Eula, lowering his Energy needs is important.
Rating: 2/5

C5 - Signal Arrow
- Increases the Level of Starfrost Swirl by 3. Maximum upgrade level is 15.
Increases his Attack Speed buff by 3%. For Eula players, this is not enough to garner an extra stack for Lightfall Sword.
Rating: 1/5

C6 - Companion’s Counsel
- The maximum number of Detector stacks that Starfrost Swirl's Soulwind can gain is increased by 1. You need to have unlocked the Passive Talent "Suppressive Barrage" first. Additionally, active characters affected by Soulwind will deal 60% more Physical CRIT DMG.
A significant Constellation for Mika, as this bonus is much more valuable than all other buffs that his base kit provides. This solidifies his identity as a Physical DMG support.
Rating 4/5
ER requirements
Authored by KB
In Eula teams, Mika will typically donate his particles to Eula, which increases his Energy needs significantly. You can expect roughly 150-200% ER on him depending on the amount of Favonius weapons in the team, or if Raiden is also used.
Artifacts
Authored by Luna
Artifact stat
Sands of Eon: HP% / ER% Goblet of Eonothem: HP% Circlet of Logos: Healing Bonus > HP%. If using Favonius Lance: CRIT Rate%
Substats Priority: ER% (if Bursting every rotation for ‘Detector stacks’, healing or 4pc Noblesse Oblige) > CRIT Rate% (with Favonius Lance) > HP% > Flat HP
Mika doesn’t offer great Elemental application or damage with his Elemental Skill and Burst, making artifact substats and sets that focus on buffing or healing teammates more useful overall.
Notable sets
 4PC Noblesse Oblige:
An excellent support set in most teams. As both the Soulwind effect and 4pc Noblesse Oblige’s buff last 12s, they synergize well when activated right before swapping into your on-field DPS.
 4PC Scholar:
Niche artifact set that can be used in Wanderer teams to help with Energy requirements, if someone (usually Bennett) already holds 4pc Noblesse. Artifact quality is not important, as Mika would only use his Elemental Skill in those teams, which doesn’t scale with stats, and his damage contribution is negligible.
4PC Scholar:
Niche artifact set that can be used in Wanderer teams to help with Energy requirements, if someone (usually Bennett) already holds 4pc Noblesse. Artifact quality is not important, as Mika would only use his Elemental Skill in those teams, which doesn’t scale with stats, and his damage contribution is negligible.
 4PC The Exile:
When his Elemental Burst is needed or if the rotation length enables it, 4pc Exile serves as a more universal choice compared to Scholar, as the latter only restores Energy for Bow and Catalyst users while 4pc Exile restores more Energy overall, and for everyone on the team besides the set holder.
4PC The Exile:
When his Elemental Burst is needed or if the rotation length enables it, 4pc Exile serves as a more universal choice compared to Scholar, as the latter only restores Energy for Bow and Catalyst users while 4pc Exile restores more Energy overall, and for everyone on the team besides the set holder.
 4PC Ocean-Hued Clam (4OHC):
If someone already holds a 4pc Noblesse Oblige, 4OHC provides a big burst of Physical DMG with the initial healing from Mika’s Burst, along with smaller procs after. It is worth noting that 4OHC’s damage is enhanced by shredding enemies’ Physical Resistance with Superconduct, but is not increased by Physical DMG% Bonuses.
4PC Ocean-Hued Clam (4OHC):
If someone already holds a 4pc Noblesse Oblige, 4OHC provides a big burst of Physical DMG with the initial healing from Mika’s Burst, along with smaller procs after. It is worth noting that 4OHC’s damage is enhanced by shredding enemies’ Physical Resistance with Superconduct, but is not increased by Physical DMG% Bonuses.
Weapons
authored by Luna
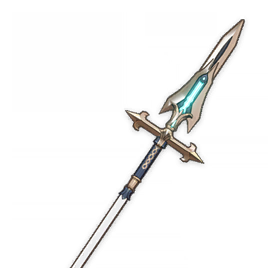
Favonius Lance:
His Best-in-Slot weapon as it can provide more Energy for the whole team. In multi-target scenarios, his Skill can hit multiple targets by piercing them or with the Fragmentation Shards targeting other enemies, making it easier to proc the passive. However, Mika cannot reliably trigger the passive in single-target scenarios since his Skill only has one instance of damage. Performing extra Normal Attacks lengthens his field time for minimal reward; thus, players can choose to treat the extra Favonius particles as quality of life instead of building around it.
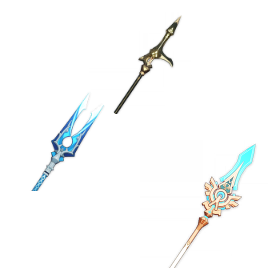
Prototype Starglitter/”The Catch”/Skyward Spine
Energy Recharge stat sticks. If not in possession of a spare Favonius Lance, the three weapons provide more ER% for Mika himself, easing his Energy needs. It’s worth noting that “The Catch” should be used on any other Polearm character who benefits better from its stats before slotting it into Mika, and that Skyward Spine has a lower ER% stat compared to the other two options.
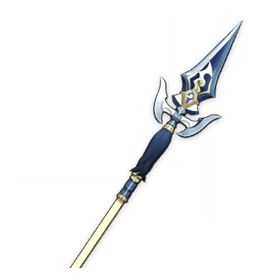
Black Tassel
With its HP% stat, Black Tassel provides more healing from his Burst. Only use this weapon if ER% needs are already met from artifact substats and CRIT Rate is too low to proc Favonius Lance reliably.
Eula Specific Information
Authored by KB
Attack Speed Buff:
Mika has one of the strongest Attack SPD buffs in the game, which can make Eula feel better to play by increasing the fluidity of her attacks. However, due to her being a Claymore character, hitlag can diminish the actual effects of Attack SPD buffs. This results in her only being able to fit in two more Normal Attacks in her combo; unfortunately, only one of these Normal Attacks will land in time before her Lightfall Sword locks in the stack count. In practice, without Song of Broken Pines, Eula can increase her stack count from 13 -> 15 rather comfortably. For Pines users, the stack increase is only 14 -> 15 stacks.
Eula Can Not Swap Early
Mika’s buffs only apply to the on-field unit. This can be detrimental for players who are swapping out early on Eula to:
- apply Cryo for Cryo Resonance with Rosaria for 15% CRIT Rate
- detonate Eula’s Burst slightly early so Rosaria’s A4 CRIT Rate buff does not expire
- detonate Burst manually when weak enemies are grouped up
- shorten their rotations if they have overkill damage; especially in the case of C6 Eula players
- detonate Burst manually before an enemy goes into an invincibility phase
This additional layer of restriction can add gameplay grief for Eula players on top of existing conditions that she has to contend with.
Particle Generation:
Even though four Cryo particles is a hefty amount of Energy, it has a 15 second cooldown, which means that you cannot fit two Skills in a typical Eula rotation. This means that Mika effectively generates less Energy than Eula’s classic supports such as Rosaria, Diona, or Shenhe.
This problem is also exacerbated by the fact that Mika does not have as many hits as Diona or Rosaria to activate Favonius comfortably. His Burst does not deal damage, so Mika has to coinflip whether his Skill will proc Favonius without the option to weave in Normal Attacks since he must swap to Eula in time to funnel particles.
Low Cryo Application
Mika only applies Cryo once with his Skill, which is not ideal if he is the only Cryo unit supporting Eula. Having consistent, off-field Cryo application is something that is much appreciated.
Larger Damage Numbers
Even at C6, Mika is more of a sidegrade option for Eula teams due to all of the factors above impacting either total team DPS or general gameplay comfort. That being said, Mika will enable your Eula to hit larger numbers on her Normal Attacks and Burst due to him enhancing her CRIT Damage and Physical DMG% at the cost of team DPS. So for players that drool over the idea of hitting that THICC, FAT damage number with their Eula Burst, Mika can definitely look appealing even with his downsides.
Team Building
Authored by KB
Eula Carry

At C6, Mika can serve as a good alternative to Bennett, since he provides both healing and buffs for Eula. Using C6 Mika as a buffer also means that Eula no longer has to worry about staying within a circle to maximize her damage. As Mika already provides sufficient defensive utility, using an offensive Cryo unit such as Rosaria or Shenhe is recommended in the third slot to compensate for his lack of damage. Running an Electro unit as the last teammate further boosts Physical DMG with Superconduct; while Mika's Skill cooldown is too long to buff 2 units, Raiden is still a premier option for this due to the Energy she generates.
Crescent Pike Zhongli

While a very fun comp to play as the ATK SPD buff from Mika makes using Normal Attacks more appealing, this team has the opportunity cost of running a more beneficial support like Bennett or Yun Jin in place of Mika, as his buffs lack the same impact. Since Mika’s poor Cryo application is insufficient in maintaining Superconduct uptime, it would be advised to run a secondary Cryo unit along with him. Ultimately, he brings less to the table than other team members.
Wanderer

As Catalyst characters do not have hitlag, Wanderer can make full use of the ATK SPD buffs Mika can offer to increase both his damage and the fluidity of his attacks. If Mika can apply sufficient Cryo to allow Wanderer to come into contact with it when using his Skill, he also provides a hefty 20% CRIT Rate buff due to Wanderer’s A1. However, he suffers stiff competition from both Layla and Rosaria in this role. Both offer more damage and Elemental application than Mika can muster; Rosaria's damage is particularly notable and she can also offer a 15% CRIT Rate buff from her A4, while Layla's strong shield is much more valuable for the interruption-prone Wanderer than Mika’s healing. As such, they are generally better, though Mika still serves as a fun and usable option.
 Edit this page on GitHub
Enable hardware acceleration for the best site performance | Built using  and
and 
Wangsheng Funeral Parlor is in no way sponsored, endorsed or administered by or associated with miHoYo Co., Ltd.
