Nahida FAQ
Leifa, Apollo, Sir Von, redd
Last updated on Jun 4, 2025
Credits:
- Leifa#1359 - Lead, Mapping, General Writing
- Kuro_kami91#6652 - Co-Lead, Mapping, Writing: Teambuilding
- *Sir Von | Skill Deficiency Cult#7672 - Writing: Teambuilding *
- *ඞඞ#6874 - Artifact Calcs, Writing: Constellations, Artifacts *
- Raikh / Vailen#8564 - Weapon Calcs
- sigurd#3854 - ER Calcs
- jrm.spirit#2671 - Framecounts
- Akane#0926 - Mapping, Consulting
- Emiliabyss#1641 - Consulting
- Reens#9389 - Consulting
For all Nahida Calcs you can reference: Nahida Artifact Sheet Compilation by redd, Nahida Weapon Ranking by Raikh, and Nahida Frames Mastersheet by jrm.spirit
DISCLAIMER Everything in this FAQ is Pre-TC, meaning any information is SUBJECT TO CHANGE (STC) until release. To our knowledge there is only one version of Nahida and no proof has been given to show otherwise. Anything can change at any time before the official release but this is meant to help give our current understanding of the character. And with that, enjoy reading and happy birthday Nahida!
TLDR
Role: On-field Driver / Sub DPS
Talent Priority E (Skill) = Q (Burst) > NA (Normal ATK)
Constellations C2 > C6 > C4 > C3 > C5 C1 ranking depends on team compositions
Artifacts 4pc Deepwood (preferred) 4pc Gilded Dreams 2pc GD / 2pc WT / 2pc DW
Weapons Weapons can change depending on team compositions A Thousand Floating Dreams Kagura’s Verity The Widsith Solar Pearl Wandering Evenstar Sacrificial Fragments Magic Guide
Character Overview
(Authored by Leifa)
![]()
Nahida is a 5* Dendro character who can be played as an on-field driver or off-field buffer. The majority of her damage comes from the mark applied by her Elemental Skill, which is further buffed from her A4 passive. Nahida’s Elemental Burst also gives different effects to her Skill depending on the amount of Pyro, Hydro or Electro members in her party, as well as granting an EM buff that reaches up to 250 EM to the on-field character through her A1 passive.
Her Normal / Charged Attacks have a high frequency of application, making her a great on-field driver / enabler for many team compositions. Her Charged Attack can also be canceled very quickly, although at the cost of stamina.
Nahida’s Elemental Skill has both a press and a hold form and applies 1U Dendro with no ICD. Pressing her Elemental Skill does a quick AoE hit of Dendro DMG and marks enemies with the Seed of Skandha. Holding her Elemental Skill allows Nahida to enter an aiming mode, which will mark up to a maximum of 8 enemies when aimed at. During this time, Nahida’s interruption resistance will also be increased.
Enemies marked by the Seed of Skandha will be linked to one another, signified by green chains between enemies. Triggering an Elemental Reaction or dealing damage with Bloom Cores to marked enemies will trigger Tri-Karma Purification on all marked enemies, dealing single target Dendro DMG which scales off both ATK and Elemental Mastery. Tri-Karma Purification can be triggered every 2.5 seconds and applies 1.5U Dendro to enemies with no ICD. This will also generally apply as an aura in a lot of cases due to being procced after a reaction takes place. Three particles are generated from Tri-Karma Purification when it procs and can happen once every 8 seconds.
Nahida’s Elemental Burst creates a very large AoE field and grants buffs to Nahida’s Tri-Karma Purification and the Burst itself depending on the current elements in the party. Pyro party members grant Tri-Karma Purification extra DMG%, Electro party members shorten the time between Tri-Karma Purification procs and Hydro party members increase the duration of her Elemental Burst. This Elemental Burst is a 50 cost Burst with a 13.5s CD and 15s duration, allowing for 100% uptime if needed.
Nahida’s A1 passive grants up to 250 Elemental Mastery to the on-field character inside of her Burst based on 25% of the Elemental Mastery of the party member with the highest Elemental Mastery. This can be a sizable buff to characters who appreciate EM and also affects Nahida’s A4 as well.
Nahida’s A4 passive gives her Tri-Karma Purification bonus DMG% and Crit Rate based on the amount of EM she has that exceeds above 200 EM, maxing out at 80% DMG bonus and 24% Crit Rate. A very nice amount of stats to her main damage source, which emphasizes building EM on Nahida.
Talent Priority
(Authored by Leifa)

E (Skill) = Q (Burst) > NA (Normal ATK)
The majority of Nahida’s damage comes from her Elemental Skill, but her Elemental Burst buffs increase with talent levels so it’s important to level both. Nahida’s Normal Attacks don’t have impressive scaling and are mainly for applying Dendro so they aren’t as necessary. It’s worth leveling if you’re playing her on-field.
Combos and Rotations
(Authored by Leifa)
Nahida’s combos will differ depending on if you’re playing her on or off-field.
On-field: Nahida’s main goal whilst on-field is to apply as much Dendro as possible through her Normal Attacks whilst also driving the rest of the team. Her Elemental Skill can also be used to add extra Dendro applications during her field time. Her Charged Attack can be canceled extremely early, allowing for even more Dendro, however, due to being a Catalyst user, this can cause you to run out of stamina very quickly.
Off-field: E, Q is recommended over Q, E due to her E being cancellable slightly early and also allows funneling particles to Nahida if Tri-Karma Purification procs during her Burst animation.
Artifacts
(Authored by Leifa and redd)
Mainstats
Sands - EM > ATK% Goblet - Dendro% / EM Circlet - Crit / EM EM mainstats are favoured if using a non-EM weapon and if Nahida is off-field. An ATK% sands is typically subpar to its EM counterpart, especially if you intend to maximize Nahida’s A1, but the gap can be closed if: The ATK% sands has good substat quality Nahida is being played on-field and performing Normal or Charged Attacks Nahida does not trigger any reactions
Substats
ER (120-150% depending on team) > EM (~900-1000) >= CRIT > ATK% In Bloom teams where Nahida can get some ownership of Blooms, EM becomes more valuable over CRIT and ATK stats. Generally, it is recommended to reach ~900-1000 EM on Nahida even if she is not triggering any reactions. This range is typically optimal for her damage output, whilst also maximizing her A1 passive. Going beyond 1000 EM is not usually recommended, unless she is on a Bloom team where she has high ownership of Blooms. In that case, reaction damage becomes a huge portion of her damage and CRIT becomes less relevant. TLDR: Triple EM is the easiest way to get near 1000 EM, but if you can pass that threshold, other mainstats start becoming better (except in Bloom teams where Nahida gets some ownership). For Spread teams and teams where Nahida has little reaction ownership, aim for artifacts that get you closest to the 900-1000 EM range (factoring in external buffs) while also meeting your ER needs of 120% ER for Spread and 140-150% ER for teams such as Hyperbloom or Burgeon. After that, start prioritizing CRIT substats. ATK substats do increase Nahida’s damage output, but are low priority. On-field Nahida gets the benefit of her A1, so typically triple EM will cause her to go beyond 1000 EM. In this case, it is recommended to use a Dendro Goblet and/or CRIT Circlet. For teams where Nahida is specifically on-field but has low reaction ownership, 1000 EM is less important to aim for and CRIT substats become more valuable. For Bloom teams where Nahida gets a significant amount of Blooms: Run triple EM mainstats while also meeting your ER needs of 130% ER. EM substats take precedence, even if you go beyond 1000 EM. CRIT substats are fine, but not as important.
Recommended
 4PC Deepwood Memories - Proccing on Elemental Skill hits, this set is practically made for Nahida, allowing for 30% Dendro RES shred 100% of the time, increasing not only her damage but also other Dendro party members and Bloom reactions. Fits her very well whether she’s on-field driving or off-field and will generally be preferred if she’s the only Dendro in a team.
 4PC Gilded Dreams - If another character is already holding Deepwood, Nahida can benefit more from running Gilded Dreams, providing ATK% and EM depending on the teammates in the party. Generally will be giving 14% ATK and 180 EM with double Dendro or 230 EM as the only Dendro although she needs to proc a reaction to gain the effect which, due to how her Elemental Skill applies Dendro, may be hard to do from off-field only. Thus, it is not recommended in scenarios where Nahida does not trigger reactions very often (for example, off-field Nahida in Bloom teams).
 2PC WT / 2PC GD / 2PC DW - A consistent source of stats which isn’t reliant on Nahida proccing reactions, allowing her to make more use of the sets whilst off-field. Either 160 EM or 80 EM + 15% Dendro DMG%, both work for unconditional sets.
 2PC ATK- An OK option, but is worse than the 2PC above.
 4PC Tenacity of the Millelith - An uncommon option that trades Nahida’s personal damage for a more supportive role, providing 20% ATK to the party. It can be quite powerful or even BiS if your damage dealers are disproportionately stronger than Nahida. With another party member running Deepwood, this can be a usable option in some situations or whilst farming for a dedicated set for Nahida.
 4PC Noblesse Oblige - It has the same 20% ATK buff as 4PC Tenacity of the Millelith, but with worse uptime. It may be situationally better if you want to buff multiple party members.
Weapons
(Authored by Leifa)
Due to Nahida being played both on and off-field as well as having high or low reaction ownership depending on the team composition, weapon rankings can vary drastically. Because of this, recommended weapons will be options which performed well across all scenarios. Please see the full weapon calcs for specifics.
Recommended
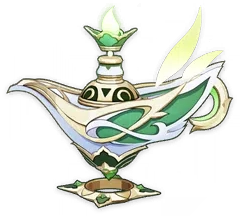 A Thousand Floating Dreams - Nahida’s BiS weapon, providing 265 EM base as well as extra EM/DMG% to Nahida depending on the elements of her party members. Generally will be given a 30% DMG Bonus due to her being played as solo Dendro in a lot of teams. On top of that, it also grants 40 EM to other party members, a small but nice unconditional buff for the rest of the team.
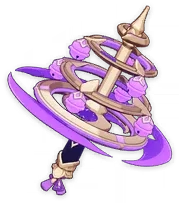 Kagura’s Verity - Another 5* weapon option which synergises with Nahida very well, providing 66.2% CDMG as well as Elemental Skill DMG and DMG Bonus. Her short Elemental Skill cooldown allows for her to stack it quite easily when played on-field but even with one stack performs very well. However, due to the substat being CDMG%, you may need to run an EM Goblet / Circlet to make up for the lack of an EM substat.
 The Widsith - An amazing 4* option for Nahida, providing 55.1% CDMG as well as a large random buff for a short amount of time. Contrasting Kagura’s, Widsith excels when being able to kill enemies in one rotation and lowers in value for extended rotations due to the long cooldown on its buff but again, still performs well overall.
 Solar Pearl - The battle pass exclusive Catalyst, providing 27.6% CR and an Elemental Skill and NA DMG% buff. This weapon buffs all sources of Nahida’s damage, even beating out 5* options in some on-field situations due to the short but easily refreshable duration on its buff. If you have this weapon, especially at high refines, it’s worth considering but don’t feel pressured to buy the battle pass just for this weapon.
 Wandering Evenstar - The new Catalyst option on the current weapon banner, providing 165 EM and a flat ATK buff based on EM to Nahida and 30% of that to her teammates. The buff given to teammates is around 50-75 ATK at R1 and around 100-150 ATK at R5. Due to Nahida wanting to build EM by default, this weapon is a good all-rounder option for both her personal and team damage, if you have it. Similarly to Solar Pearl, this weapon has only just released so don’t feel pressured to pull on the weapon banner right now just for a chance at getting it.
 Sacrificial Fragments - Another 4* option with a high 221 EM substat, which Nahida likes. The extra Dendro application from another Skill cast can be valuable for damage in comps where she has reaction ownership but generally won’t be too useful at low refines due to the small proc chance and long cooldown. Either way, just being a large EM stat stick is good.
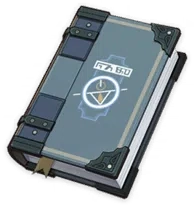 Magic Guide - Surprisingly, a really good option for Nahida, providing 187 EM as well as DMG% to opponents affected by Hydro or Electro. Due to her EM scalings on her Elemental Skill and ATK subs being less valuable, the base ATK doesn’t affect her too much and can even beat out 4* and 5* weapon options in certain scenarios. Refines are also easy to get due to it being a 3* weapon. Overall, an amazing F2P option considering its rarity.
Options
 Lost Prayers to the Sacred Winds - A 5* option, providing 33.1% CR and a stacking Elemental DMG buff whilst on-field. Unfortunately, these stacks disappear when swapping between characters, meaning it's generally a CR stat stick but they’re a nice bonus when playing comps that play Nahida on-field.
 Skyward Atlas - Another 5* option with a high Base ATK and a 33.1% ATK substat, as well as providing 12% Elemental DMG bonus and an extra portion of DMG from the clouds it creates. This ATK% can be valuable in places where Nahida is on-field but doesn’t have ownership on reactions but can leave her struggling for other more important stats overall.
 Mappa Mare - A F2P craftable Catalyst, providing 110 EM as well as an Elemental DMG Bonus buff upon triggering Elemental Reactions. Can be a very good option specifically for on-field Spread teams where Nahida has a lot of reaction ownership. However, for other scenarios, Nahida can struggle to trigger its passive due to how her Elemental Skill applies Dendro as well as her own reaction ownership in Bloom reaction teams.
 Fruit of Fulfillment - Another craftable Catalyst, providing 45.9% ER and an EM buff at the cost of ATK. Generally, the passive isn’t enough stats to make this weapon worth crafting over other options and the large amount of stats from the substat aren’t as useful although it can mean you can focus on more offensive substats in artifacts.
 Blackcliff Agate - A 4* option which can be bought from the Starglitter store, providing 55.1% CDMG as well as ATK% when defeating an enemy. Unfortunately, ATK% does very little for Nahida and she can struggle to gain stacks at all, especially off-field, due to the enemy needing to die to her damage. Basically just a CDMG stat stick if you don’t have other options.
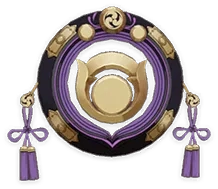 Hakushin Ring - A more supportive craftable Catalyst, providing 30.6% ER and an Elemental DMG Bonus to Dendro and Electro when Nahida triggers Quicken. This weapon sacrifices Nahida’s personal damage a bit in return for buffing the rest of the party, allowing more of the team’s damage to come from her teammates instead.
 Prototype Amber - Another more supportive craftable Catalyst, which sacrifices Nahida’s personal damage a lot in exchange for healing the party upon casting her Elemental Burst. If you need some role consolidation in a Dendro healer, it’s an option you can use although may not be enough to survive on for some players.
 Thrilling Tales of Dragon Slayers - A 3* F2P Catalyst that utterly butchers Nahida’s personal damage in exchange for its 48% ATK buff. Generally not recommended, unless you intend for Nahida to be a pure support.
Teambuilding
(Authored by Leifa, Apollo, and Von)
Nahida is a very versatile character, able to be played in almost every Dendro composition, on and off-field, with an EM sharing passive boot. Her Elemental Skill has high uptime, and her Dendro application is not constrained by energy. Rotations will change depending on what teammates you use just like artifact stats and weapons.
Bloom Teams
Nilou Bloom




Hydro options: Xingqiu / Yelan / Barbara / Ayato
Due to the way Nahida applies Dendro with her Elemental Skill, she unfortunately can’t be used as solo Dendro off-field for Nilou Bloom teams. However, her on-field application is strong enough that she can keep a Dendro aura on the enemy, allowing for your Hydro teammates to trigger a lot more Blooms. Although Nahida can still get some ownership on Blooms, building Elemental Mastery on your Hydro teammates is still recommended. If Kokomi or someone else on the team is built for full EM, Nahida’s A1 passive can end up using their EM rather than her own, allowing for a larger EM buff whilst on-field.
Hyperbloom




Hydro options: Xingqiu / Yelan / Kokomi / Ayato Electro options: Electro DPS / Kuki / Fischl / Yae Flex options: Anemo / Beidou / DMC / Collei / Any above teammate
Nahida's Dendro application is capable of allowing an Electro unit to build EM to deal large amounts of DMG with Hyperbloom. This composition also allows for Quicken, Aggravate and Spread to be triggered (Quickbloom), further increasing overall team damage. Due to Nahida’s high amount of Dendro application, the last slot can be used to fill any necessary roles such as healing, shielding or buffing.
Burgeon


Hydro options: Ayato / Kokomi / Xingqiu / Yelan Pyro options: Thoma / Xiangling / Xinyan Flex options: Anemo / Bennett / Any above teammate
Nahida's Dendro application allows for a Pyro unit to build full EM to maximize the DMG dealt by Burgeon. This team has one large caveat and that's its very delicate setup. If Burning is triggered, you may lose out on potential Burgeon procs due to having to overtake the Pyro application from Burning with your Hydro character.
Quicken Teams


Electro options: Electro DPS / Yae / Fischl / Kuki Flex options: Anemo / Dendro / Zhongli / Beidou / Any above teammate
Quicken teams are very flexible, allowing Nahida to maximize Spread reactions by driving, or just provide enough off-field Dendro whilst an on-field Electro prioritizes their own Aggravates. Her A1 Passive is also helpful for providing more EM to your on-field character, further increasing the DMG output of your Spreads and Aggravates.
Burning Teams
Burnmelt


Cyro options: Ganyu / Ayaka / Kaeya / Rosaria Pyro options: Bennett / Xiangling / Thoma Flex options: Anemo / Pyro / Diona / Zhongli / Shenhe / Layla
Burning has been seen as a largely underwhelming reaction since Dendro's official launch in 3.0, the reduction to its Pyro application has effectively reduced its viability significantly. With the release of Nahida, Burning can now be used to enable Melt teams. However, with the setup being rather delicate, characters such as Ayaka may not make much use of Burning compared to someone like Ganyu due to the reaction being more susceptible to being ruined by additional Cryo applications.
Pure Burning


Pyro options: Xiangling / Bennett / Klee / Thoma Flex options: Anemo / Zhongli / Any above teammate
Outside of using Burning to enable a Cryo character to trigger Melt, there is also the option of running full Burning based teams as it allows the use of 4PC Lavawalker for 35% DMG to opponents affected by Pyro. One flaw with this team is that Nahida doesn't really provide much other than fueling Burning. Also, Burning ticks are unable to proc Tri-Karma Purification, meaning Nahida ultimately ends up being reliant on Swirls from an Anemo character to deal damage with her Skill.
Constellations
(Authored by redd)
Due to Nahida being played both on and off-field as well as having high or low reaction ownership depending on the team composition, the value of each constellation can vary drastically. DPS increases assume a reactionless, off-field Nahida.
 C1 - A nice QoL constellation, providing one level of each Elemental Burst buff without needing specific teammates and has a good chance of adding another Tri-Karma Purification proc due to Electro reducing the cooldown between procs as well as the Hydro effect increasing Burst uptime. This can lead to a longer burst duration, more damage and Dendro application. Also adds 25% DMG to her skill, assuming there is no Pyro character. Mileage depends on teams, whether you can get another Tri-Karma Purification proc or not, and whether or not Nahida's Elemental Burst is activated every rotation. (3/5)
DPS increase: ~5-29%
 C2 - An outstanding constellation. It is a straight-up 16-20% DPS increase to not only Nahida but the entire team, given they utilize Dendro reactions. It is roughly equivalent or stronger than giving every party member their BiS 5* weapon thus, making Nahida an even more exceptional support for practically every team that wants a Dendro character. (5/5)
DPS increase: ~18% in Quicken teams, ~14-16% in Bloom teams
DPS increase over C0: 105-129% (The effect of C2 is not included in this figure because the assumption is a reactionless Nahida).
 C3 - +3 talent levels to Elemental Skill. Given that most of Nahida's damage comes from her Elemental Skill, C3 is a fairly good buff to her DPS output, although nothing spectacular. However, on teams where Nahida triggers Spread or Blooms, MVs aren't as important and the value of C3 diminishes. Still, it is a decent constellation. (3/5)
DPS increase: ~17% (Less valuable in both Spread and Bloom teams, especially the latter).
DPS increase over C0: ~151%
 C4 - Grants a sizable amount of EM for Nahida, a stat she greatly appreciates for both offense and support. This constellation makes it easier for Nahida to reach the 1000 EM benchmark, or allows her to drop some EM mainstats/substats for better stats such as CRIT or a DMG% goblet. (3.5/5)
DPS increase: ~8-16% (Slightly more valuable in Spread teams, and less valuable in Bloom teams where Nahida has some ownership).
DPS increase over C0: ~169%
 C5 - +3 talent levels to Elemental Burst. Levels on Nahida's Burst are not particularly impressive: the extra DMG% bonus is quite small, and the CD reduction and Burst extension are also rather minor. It is unlikely to grant another Tri-Karma Purification proc, but in certain scenarios it may give you the push needed. (2/5)
DPS increase: 1-15% (15% is very optimistic)
DPS increase over C0: ~172%
 C6 - Like most C6s in the game, Nahida's final constellation is a remarkable one. It gives her a frontloaded AoE nuke after using her Burst when she attacks marked enemies and can be triggered up to 6 times, significantly boosting her damage at the cost of field time. While it is an absurd constellation for her personal damage, Nahida is usually not the one doing majority of her team's damage, so the actual team DPS increase is not stellar, especially as she is taking field time to properly utilize this constellation. Hence, it is crucial to form teams around Nahida and even change her entire playstyle in order for her C6 to truly shine. (4.5/5)
DPS increase: ~77%
DPS increase over C0: ~304%
Note that while this seems like a massive % increase, since Nahida takes field time and you may be playing her in a Bloom or Spread team, the actual % increase is actually lower.
Constellations Value for On-field vs Off-field Nahida In terms of percentage increase, C1, C3, and C5 are more important for off-field Nahida as they buff her E damage. Since an on-field Nahida incorporates NAs/CAs into her damage output, these three constellations become slightly less important.


