Wanderer FAQ
Emiliabyss#1641, Raikh / Valien#8564, EduLis#2176, jrm.spirit#2671, redd(ඞඞ#1984)
Last updated on Jun 4, 2025
Credits:
- Emiliabyss#1641 - Team Lead, Author, Calcs || Overview, Talents, Combos, Weapons
- Raikh / Valien#8564 - Consultant, Author, Calcs || Constellations
- EduLis#2176 - Author, Calcs || Artifacts
- jrm.spirit#2671 - Framecounts
- redd(ඞඞ#1984) - Contributor || Team Building Section
For all Wanderer Calcs you can reference: Wanderer Mastersheet by Emiliabyss, Raikh and Edulis, and Wanderer Frames by jrm.spirit
Pre-TC is volatile and, as always, perpetually subject to change until release (and sometimes later!). Please note that these are theoretical suggestions. Everything described in this FAQ is a good faith analysis based on the little information about the character’s kit that we know. Team calcs, additionally, are not established yet, and as with everything in TC, the content in this FAQ should be taken with a grain of salt.
Character Overview
Authored by Emiliabyss

Wanderer is an Anemo catalyst user who takes up the majority of the team’s field time in order to dish out high amounts of damage. This means that Wanderer teams will focus on having teammates that increase Wanderer’s damage values while taking little field time.
As for stats, Wanderer is a pretty standard unit to build, focusing on the traditional ATK, DMG%, and CRIT stats. While his ER needs are quite high, even with his dedicated support, Faruzan, and a Favonius weapon on the team, Wanderer can instead Burst every other rotation in order to put all of his artifact stats into offensive capabilities. In fact, this is his strongest option until constellations are added to him. Otherwise, Wanderer needs somewhere around 170% ER when C6 Faruzan is not included in the team – however, we do not expect players to have a new 4-star at C6 the same patch they are released.
When played as an Anemo DPS, he is heavily dependent on the new Anemo support, Faruzan, who brings Anemo resistance-shredding to the team, much like Viridescent Venerer does for Pyro, Electro, Cryo, and Hydro characters. Additionally, with constellations, she skyrockets the damage potential of teams focusing on Anemo DPS units like Wanderer and Xiao.
Being an Anemo unit, some people may consider him another Viridescent Venerer driver for teams including characters like Fischl, Beidou, and Xingqiu. Additionally, focusing on Elemental Mastery for Swirls makes him comparable to Sucrose in some cases, but Wanderer lacks the utility in EM-sharing and crowd control that Sucrose has.
One of the main highlights of Wanderer’s kit is that he can fly in mid-air while attacking enemies while also absorbing up to two elements for various buffs. Hovering in mid-air leaves Wanderer vulnerable to being knocked down and staggered by enemy attacks, so a shield may be desirable in some cases. Additionally, dodging when his A4 cannot trigger significantly reduces his air-time and thus his DPS. With regards to elemental buffs, they are quite hard to control, though the absorption priority is the same as Kazuha. If Bennett is on your team, Wanderer will almost always be able to absorb Pyro for a 30% ATK bonus. The other elements offer comparable damage increases, and so building your team around the infusions is (typically) not recommended.
Talents
Authored by Emiliabyss

Leveling priority: Normal Attack > Skill = Burst
Analysis
Since Wanderer only focuses on ATK, there is no necessity to level him to 90. Level 80 is fine, if you’re saving on resources. However, incidental low-EM swirls will still be beneficial, so there are still some benefits to leveling to 90.
Most of the damage Wanderer dishes out comes from Normal Attacks, which fire arcs of blade-like Anemo energy at opponents. Naturally, this is the first choice. However, his Normal Attacks are not nearly as strong unless he is benefitting from his Skill, which provides a valuable damage bonus akin to Yoimiya’s Skill to his attacks.
Upon using his Skill, Wanderer will stay in air and will have an alternative stamina bar to show how long he can stay in mid-air. Moving and sprinting will deplete the bar quickly, so often it is best to stay still in mid-air and unleash ranged attacks.
Finally, while his Burst is not terrible, we are usually Bursting every other rotation, so this becomes the lowest priority. However, all talents should be leveled as high as possible, since he is responsible for the vast majority of your team’s damage. Wanderer’s Burst is pure damage, with no special effects, and hits opponents within its range five times in quick succession.
For Ascension Talents, A1 offers Wanderer up to two buffs based on elemental infusion with his Skill, depending on the elements absorbed. The priority is the same as Kazuha, making Pyro (+30% ATK) one of the two buffs. With Electro infused as well, Wanderer gains enough energy that, in some cases, Bursting off-cooldown becomes possible. Cryo gives 20% CRIT Rate, and Hydro increases the maximum amount of time he can spend in mid air (though keep in mind this could extend rotations depending on team composition).
None of the elements provide a buff greater than 10% of each other, and controlling the elemental infusion, aside from Pyro with Bennett’s Burst circle (and Hydro due to it being second-priority), is difficult, and so building a team around certain infusions is not always advised. For Hydro, Xingqiu’s orbiting Rain Swords can help with interruption resistance and Hydro infusion.
Wanderer’s A4 allows some dashes to not consume this alternate flight stamina during the duration of his Skill; when this happens (based on RNG, increasing the odds with each failure like Royal weapons), a brief flurry of Anemo attacks will occur automatically, which can provide a valuable DPS boost. However, without testing, the fact dashes can still consume this alternate stamina and shorten the airborne state is often too large of a sacrifice to risk it, unless you must dash to avoid knockdown. This, however, is subject to change with constellations and once actual testing can be done.
Combos
Authored by Emiliabyss
Wanderer’s combos are fairly difficult to precisely pin down. His kit is designed with Normal Attacks in mind, so any weapon that benefits Normal Attacks excels. However, with many weapons that don’t fit this criteria, N2C helps squeeze around.
We calculated based on the following assumptions, but the number of attacks are conservative estimates. You may get more than what we’ve assumed.
Tullaytullah’s Remembrance + 4pc Desert Pavilion - (Q), E, CA, N3x6 (N2C Version) Most weapons on Desert Pavilion - (Q), E, C, N2C (x5) + N2 (N2C Version) Most weapons with NO ATK SPD buffs - (Q), E, N2C (x5) + N1 (N3 Version) Most weapons on Desert Pavilion - (Q), E, CA, N3x5 + N2 (N3 Version) Most weapons with NO ATK SPD buffs - (Q), E, CA, N3x5 + N1 Dodoco Tales CA Spam on Desert Pavilion - (Q), E, N1, CAx6, N1, CAx6
Based on these calculations, N2C can squeeze out more damage. However, this is mostly for players using low ATK SPD, non-Yunjin teams. Newer info that is being released leans towards this being more of a sidegrade, so calcs may not perfectly reflect this. That said, N2C is not always a strict upgrade.
N2D, when controlled, might deal even more, provided you only dash when A4 activates - learning to master the dash timing will take time, rewarding the player for going the extra mile, but not dealing so much more damage that it’s mandatory to get down (about 10%). Dashing too early, however, will tank the damage in your rotation.
Even further, Wanderer’s A4 has a visual indicator for when you can dash without stamina consumption to unleash bonus attacks. You can increase your damage even further by dash-cancelling N2 or N3 once you know for sure you can trigger the A4 passive.
Again, we urge you to take this with a grain of salt - research on these combos is ongoing.
Artifacts
Authored by EduLis
Sands of Eon: ATK%
Goblet of Eonothem: Anemo DMG Bonus
Circlet of Logos: Crit Rate/Crit Damage
Substats: CR%=CDMG% > ATK% > ATK

4PC Desert Pavilion Chronicle
His BiS artifact. The 4 piece effect is tailor made for Wanderer’s normal attack heavy playstyle. Being a catalyst character he does not suffer hit lag therefore attack speed is especially valuable for him. 10% attack speed from the set allows him to squeeze in an extra charged attack per rotation which is perfect for triggering the set effect, and it lasts his entire on-field time.

4PC Shimenawa’s Reminiscence
A strong but slightly polarizing set. The extra attack is very appreciated by him. When bursting every other rotation this would be his second best choice. However when attempting to burst every rotation this set will suffer and be one of the worst, due to it making Wanderer more ER hungry and requiring extra ER subs.

2PC ATK/2PC Anemo DMG mix and match
Please checkout the mastersheet for detailed assumptions
Generally, the three combos are ranked in this order: 2PC Anemo DMG + 2PC Anemo DMG > 2PC Anemo DMG + 2PC ATK > 2PC ATK+2PC ATK
The difference between each combo is minimal, at most at around 4%. So if running one of these sets simply choose whichever has the better substats.

4PC Echoes of an Offering
A mediocre set for Wanderer. Depending if an attack speed buff is present or not, he is projected to proc the 4 piece effect for 5-6 times per rotation. This is not enough procs to contribute a significant amount to his overall damage per rotation.
Circumstantial Sets

4PC Viridescent Venerer
The set of choice when running him as a driver for reaction teams. However due to the reasons mentioned above he is not the most naturally suited character played as a driver. His personal damage with the 4 piece is decent, about 4-6% worse than 2PC ATK + 2PC ATK.

4PC Lavawalker
A choice based on his great synergy with Bennett. With Bennett on the team the enemy is very likely to have pyro applied onto them, hence proccing the 4 piece’s set effect. The effect itself is comparable to 2PC Anemo DMG and 2PC Anemo DMG, winning over that combo by 5% extra DMG Bonus.

4PC Blizzard Strayer
An interesting set to use in freeze teams. Although given Wanderer is a Crit Rate ascending character, he is very likely to over-cap on that with the set’s 4 piece effect. And equipping 4 piece VV will be more beneficial for the overall team’s damage. Switch over to this set over 4 piece VV will only gain him marginal personal damage.
Weapons
Authored by Emiliabyss
Wanderer’s weapons depend on your team; most notably, they depend on whether he is being supported by Bennett or not, as Bennett’s massive Flat ATK buff devalues ATK% weapons.
Here I will list the main recommendations from the signature weapon to the most efficient freely accessible weapon. However, for a more complete idea of weapon rankings, please refer to the mastersheet included here, make a copy of it, and play with the filters to examine the relationships with buffs in more detail.
 1. Tullaytullah’s Remembrance - Limited Signature Weapon
- It gives CRIT DMG and ATK SPD, which makes it a good stat stick by itself for Wanderer, while also providing an extremely valuable 48% DMG bonus on Normal Attacks. While this buff takes time to ramp up, Wanderer can quickly ramp the buff to its maximum potential. It is consistently between 10-15% stronger than the next best option, but declines with buffs compared to N2C weapons.
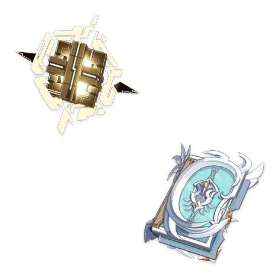 2. Memory of Dust (w/o Benny) // Lost Prayer to the Sacred Winds (w/ Benny)
- A shield for Memory of Dust is valuable, but does not affect the weapon’s ranking (shielded is 2nd place, unshielded is third). It’s a natural fit for Wanderer since he attacks so rapidly.
- Lost Prayer to the Sacred Winds finally has a home; we have not yet had a catalyst-wielding DPS who values CRIT and spends lots of time on-field. Wanderer fits the bill.
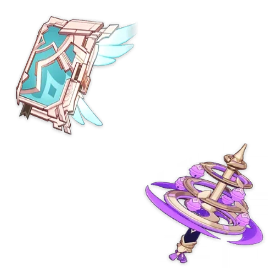 3. Skyward Atlas (w/o Benny) // Kagura’s Verity (w/ Benny)
- Atlas is generically strong on almost any catalyst-user who values ATK, and Wanderer is no exception. The passive is straightforward, so there’s not much to say here.
- Kagura’s Verity was calced without regard for the passive, due to Wanderer only using his Skill one per rotation. It ranks this high purely because of its CRIT DMG stat and high ATK.
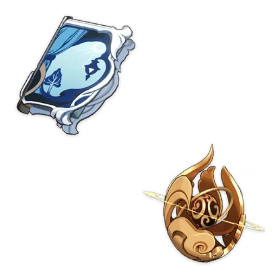 4. Widsith // Solar Pearl
- Widsith and Solar Pearl are, on Normal Attacking catalyst-users, quite close in terms of damage. Widsith scores higher than Solar Pearl and has higher spikes in damage, even when averaged across two rotations. Wanderer does not quite benefit from the Elemental Mastery buff, often feeling close-to-wasted on him and leading to Abyss floor resets. Solar Pearl is the consistent option for lower damage.
 5. Dodoco Tales (Event Weapon)
- This event weapon made for Klee is surprisingly strong on Wanderer on a modified rotation. Since Wanderer’s Charged Attacks are quick to execute, he spam them while only Normal Attacking once every few seconds to maintain the buff. Without Benny, this weapon on its specialized rotation surpasses the weapons in “Tier 3” of this section.
 6. Blackcliff Agate (Paimon’s Bargains)
- Even when not counting any stacks, this is at least respectable for pure F2P players, and beats out Mappa Mare by a good amount even at R1. Think of the ATK bonus as just an occasional buff to an OK weapon, since some floors of Spiral Abyss only have one enemy, making it impossible to trigger.
 7. Frostbearer (Craftable) // Mappa Mare (Craftable)
- Frostbearer is a generic ATK%-scaling weapon that is best when Bennett is not on the team. For Bennett teams, Mappa Mare at high refinement offers a desirable damage bonus.
Team Building
Authored by redd
Wanderer is an ATK and CRIT based Anemo DPS, and is therefore not reliant on reactions to deal most of his damage, unless you intend to use an EM-based build. While he’ll likely trigger swirls and possibly chain reactions in his teams, they’re not pivotal to his damage. That being said, his A1 incentivizes players to bring Pyro/Hydro/Cryo/Electro units to the team to obtain additional buffs. Each A1 buff is close to each other in strength, except for Electro which is volatile in value. Otherwise, Wanderer does not strongly prefer a specific element and is quite flexible with his team compositions. His teammates will either be a buffer, an off-field DPS, or a defensive option.
Buffers
More often than not, Wanderer will be dealing the majority of his team’s damage. It is never a bad idea to buff his personal damage, especially if your Wanderer is highly invested.
Faruzan: Faruzan is a new 4 star Anemo unit launching with Wanderer in 3.3, commonly dubbed as Wanderer’s dedicated support. Her kit revolves around buffing Anemo damage: she provides Anemo DMG% bonus, shreds Anemo resistance, CRIT DMG% at C6, and can group enemies. Anemo buffs and debuffs are extremely rare in the game, making Faruzan all the more valuable. Needless to say, Faruzan is an integral part of Wanderer’s teams where his personal damage is the focal point. Additionally, if played with other off-field damage dealers, she can hold the 4 Viridescent Venerer (VV) set to debuff enemy and boost damage.
Bennett: Gives a massive ATK buff second to none, on top of 20% ATK from Noblesse Oblige, 30% through Wanderer’s A1, and another 25% if played with Pyro resonance. Also doubles as a defensive option by healing the team. Unquestionably a powerful support for not only Wanderer, but possibly his teammates if they benefit from his ATK buff.
Yun Jin: As Wanderer’s damage mostly comes from his Normal Attacks, Yun Jin is naturally one of the first picks that come to mind. Her burst grants a flat DMG buff to all Normal Attacks for up to 30 stacks. At C2 and C6 respectively, she additionally provides 15% DMG to Normal Attacks and 12% ATK Speed. Wanderer’s N3 is multi-hit and his kit lends itself towards ATK speed, meaning Yun Jin’s stacks will be consumed faster–in other words, Wanderer gets even more mileage off Yun Jin. Unfortunately, she is not as strong in AoE situations.
Mona: With Thrilling Tales of Dragon Slayers and her Omen debuff, Mona grants a 48% ATK, around 50% DMG bonus, and Hydro absorption for Wanderer’s A1. Unfortunately, her Omen debuff has low uptime, so she will fall behind other buffers.
Off-field DPS
Another way to increase team DPS aside from buffing Wanderer’s personal damage is to include an off-field DPS. Ironically, Wanderer does not provide much for these DPS units except for driving. Rather, it is Faruzan who supports these units by carrying the Viridescent Venerer set, providing grouping, and potentially through Favonius triggers.
It should be noted that many units under this category rely on their burst to dish out damage and will likely have high ER needs. To offset this, players can run a second unit of the same element to reduce ER needs or trade offensive stats for more ER. In the former case, Wanderer cannot absorb a secondary element through his A1 and thus loses a buff. In the latter scenario, the off-field DPS will of course lose significant damage and their place in the team becomes harder to justify. Alternatively, if the team consists of Bennett, the loss in damage can be mitigated.
Yelan: Has strong single target damage potential and can also buff Wanderer through her A4 passive which increases DMG% over time. On the downside, her ER requirements are quite high if played as solo hydro, significantly reducing her damage. Playing her with a secondary Hydro can alleviate this issue.
Xingqiu: Like Yelan, he has strong single target damage but high ER needs. He provides defensive utilities such as minor healing and interruption resistance.
Xiangling: Even while Wanderer is in midair, Xiangling’s Pyronado can still hit enemies on the ground. She has strong AoE Pyro damage at the cost of high ER requirements. Recommended to play only with Bennett and potentially Favonius weapons.
Fischl: Has strong off-field single target damage while being relatively low maintenance. Wanderer is not a bad driver for her and can trigger multiple instances of her A4 and C6, further increasing damage.
Beidou: Specializes in AoE off-field damage. She offers interruption resistance via her burst as well as a small shield at C2, which Wanderer appreciates. However, she is greedy for energy and wants to be paired with Fischl to battery her.
Yae Miko: Yae’s damage is split between her Elemental Skill and Elemental Burst. She does not need her burst to deal damage, but it is a significant portion of her DPS. Contratrily, her burst costs 90 energy, making it difficult to burst every rotation, and even if you can, it leads to rotation extension.
Ganyu: Her burst can deal a fair amount of damage. With Faruzan’s grouping, she can take advantage of her burst’s targeting mechanics to deal even higher damage in AoE situations.
Rosaria: Has solid damage output, especially with constellations. Also provides a partywide CRIT Rate buff with her passive.
Kaeya: Kaeya’s burst follows Wanderer while he is midair, making it impossible to hit most enemies. Not recommended.
Ayaka: Most of Ayaka’s damage comes from her burst which is entirely off-field, allowing Wanderer to take the field. Not only does she have high multipliers, but also high energy cost! It is not recommended to play solo Cryo with Ayaka, and even if paired with another Cryo unit, she will struggle with energy. It can also be challenging to play her without Freeze, even with Faruzan’s grouping.
Venti & Kazuha: Many people play Venti and Kazuha as supports, and in doing so also forget that they have high talent multipliers. Because Wanderer wants to run Faruzan and Bennett, this means Venti or Kazuha will also benefit from their buffs, producing noticeable damage. In teams with Wanderer, they will function closer to a subdps than a support.
Defensive Options
Wanderer prefers having a shielder support over a healer, if possible. This is because Wanderer has low interruption resistance even during his Windfavored state. He can get staggered midair, which is a DPS loss, but dodging without his A4 ready also depletes his secondary stamina bar and reduces his DPS uptime.
Layla: Has a strong shield and allows Wanderer to gain 20% CRIT Rate through his A1. She is also a reliable Tenacity of the Millelith holder, and can buff Wanderer’s Normal and Charged Attacks at C4.
Diona: Similar to Layla, but has a weaker shield and cannot hold Tenacity of the Millelith. On the contrary, she can heal.
Zhongli: His shield is the strongest in the game while also providing a 20% universal resistance shred as well as 20% ATK from Tenacity of the Millelith. While not the best option, he is a good comfort pick with some buffs and debuffs in his kit.
Thoma: Unlike the above shielders, Thoma relies on his burst to maintain uptime on his shield, which to some players may be a turnoff. Though his ER needs are demanding, his shield is reliable. He can provide a 30% ATK buff through Wanderer’s A1 passive and potentially complete Pyro resonance for 25% ATK. His C6 also confers 15% DMG to Normal and Charged attacks.
Jean: A decent healing option. With Faruzan’s buffs and lowered ER requirements, she can build into damage, although note she is not particularly impressive at C0. If Bennett is on the team, her damage can become significant via his ATK buff and her Sunfire tech. At C2, she provides a 15% ATK Speed buff, and shreds Anemo resistance by 40% at C4, boosting Wanderer’s damage by a significant margin.
Kokomi: Heals while holding Thrilling Tales of Dragon Slayers and Tenacity of the Millelith for a total of a 68% ATK buff, and also gives Hydro absorption for Wanderer’s A1.
Do I need a battery for Wanderer? No. Most of Wanderer’s damage output comes from his Normal Attacks. While his burst deals a good amount of damage and should be used if possible, it is not the main feature of his kit.
Teams
Hyper Wanderer Wanderer/Faruzan//Bennett/Flex
To no one’s surprise, pairing Wanderer with his best buffers skyrockets his personal damage, becoming the default hypercarry core for him. This configuration is particularly effective because the buffs each unit offers is unique and undiluted. Faruzan provides DMG% bonus, Anemo shred, and a CRIT DMG buff at C6, while Bennett supplies Wanderer with a ridiculous ATK buff.
Many characters can fit within the fourth team slot. Yun Jin’s Burst, for example grants additional flat damage to all Normal Attacks, and it scales with Faruzan’s buffs and debuffs. At C6, she will also give 12% ATK speed, another stat Wanderer greatly appreciates. Overall a potent team that scales well the more invested Wanderer is.
Double Hydro Wanderer/VV Faruzan/Yelan/Xingqiu
Pairs a strong Anemo duo with another Hydro duo. Yelan and Xingqiu are both off-field damage dealers who become even more powerful when slotted together, as they mitigate each other’s weaknesses. Provided they have an on-field DPS who can drive them, they can practically be put in any team. Wanderer enjoys Yelan’s ramping DMG% buff and Xingqiu’s defensive utilities on top of their high single target damage. Faruzan carries a VV set to lower Hydro resistance, and can use Favonius Warbow to reduce energy requirements.
Double Cryo Wanderer/VV Faruzan/Cryo/Cryo Cryo Units: Rosaria, Layla, Diona, Ayaka, Ganyu, Shenhe
A double Cryo core grants Wanderer 20% CRIT Rate through his A1 passive as well as another 15% via Cryo resonance. He can run two offensive Cryo units such as Ganyu, Rosaria, and Ayaka, but can also run an offensive option plus a defensive option.
Triple Anemo Wanderer/Faruzan/Anemo/Bennett or flex Anemo: Venti, Kazuha, Jean
Wanderer is not the only character who can benefit from Faruzan’s and Bennett’s buffs. Adding a third Anemo unit who can take advantage of their buffs is certainly a viable option. Unfortunately, many Anemo supports don’t provide utilities relevant to Wanderer, so they only function as a subdps. For example, Venti’s grouping is redundant since Faruzan already has some, and Kazuha’s A4 DMG bonus is straight-up useless for Wanderer.
Sunfire Wanderer/Faruzan/Jean/Bennett A variant of triple Anemo that uses Jean as the third Anemo unit combined with Bennett to trigger her Sunfire tech and deal more off-field damage. Jean has lower ER requirements than she normally would, while also benefiting from Faruzan and Bennett’s buffing. Aside from that, this team does not particularly stand out until Jean gains constellations, most noticeably at C2 and C4.
Double Geo Wanderer/Faruzan/Yun Jin/Zhongli
This team composition leans towards comfort and consistency in exchange for lower damage potential. Wanderer loses two potential A1 buffs, although it is slightly offset with Geo resonance. Nonetheless, he will still have decent baseline damage due to Faruzan and Yun Jin supporting him along with minor buffs from Zhongli.
Double Pyro Wanderer/VV Faruzan/Bennett/Xiangling One way to gain extra value from Bennett is using him to buff multiple units. Xiangling deals significant off-field AoE damage, can snapshot buffs, benefits from Faruzan’s VV debuff, and completes Pyro resonance for an extra 25% ATK. On the contrary, she has monstrous ER needs even with Bennett to battery her. If you cannot manage the team’s energy economy, her damage will plummet.
Thoma can also be traded in for Xiangling. While his damage is not as impressive, he brings a shield for Wanderer.
Double Electro Wanderer/VV Faruzan/Fischl/Electro Electro options: Yae, Beidou, Kuki
Fischl, Yae, and Beidou are off-field Electro characters who are capable of dishing out serious damage. With Electro resonance, Fischl, and Wanderer’s A1 passive, the team is quite energy rich. Normally, Wanderer requires an unreasonable amount of ER to burst every rotation, but playing him on double Electro significantly reduces that threshold. It becomes feasible to burst every rotation with him, although you’ll still need to build a bit of ER on him.
Kuki can be played as a defensive option, but team output will significantly tank.
What about Wanderer teams without Faruzan? Not playing Wanderer with Faruzan will of course cause his DPS to drop. As mentioned, Anemo buffs/debuffs are rare, so there aren’t any suitable replacements for Faruzan. The nature of Wanderer’s teams will be warped, focusing on his team’s total output rather than just his personal damage. For example: Playing Wanderer as a Driver. This can happen for both ADC and EM Builds. ADC Builds are favorable for Single Target scenarios or if a Buffer like Bennett is still present on the Team. Whereas an EM build primarily pays off in AoE scenarios with increased Reaction counts as he cant trigger enough Reactions against single targets for EM to be worthwhile. A Driver Playstyle also allows him to operate in a more quick swap-y fashion by cutting his Skill short and use it more frequently in shorter bursts across a rotation to allow teammates to cast their abilities off cooldown or even use his grounded form to fill gaps. This isn’t his optimal use case but can be a serviceable transitional or budget option for those who can’t field a Team centered around him or simply don't want to do so. Pairing him with another strong team core (e.g Wanderer National) Alternatively, if you still want to build around Wanderer’s personal damage, you can form a three member core with Wanderer/Bennett/Yun Jin and add in an off-field DPS or utility support in the fourth slot.
EM Driver Wanderer A common trend among Anemo units is their synergy with EM and their ability to deal considerable amounts of damage with it. While Wanderer is capable of following in his predecessors’ footsteps, it is not optimal. His kit points to him being a selfish ATK-based DPS who deals most of the team’s damage without relying on reactions, the exact opposite of an EM driver. He does get the benefit of being an Anemo catalyst and being able to hold VV, but this is not exclusive to him. Sucrose and Heizou fulfill both conditions and offer additional utility such as grouping and EM share. Nonetheless, he can still perform the role of an EM driver just fine.
Wanderer National Wanderer/Bennett/Xiangling/Xingqiu
Dubbed as “National” by the community, Bennett/Xiangling/Xingqiu is a powerful three man core with high internal synergy. They deal substantial DPS by themselves, so practically any fourth member can be slotted in. Wanderer can hold VV to debuff enemies while also taking advantage of Bennett’s ATK buff. Compared to the Sucrose variation, his personal damage will be higher, but he has significantly less utilities such as EM share and grouping. Wanderers regular field time demands also make funneling Xiangling more troublesome. Usable, but nothing special even among National variants.
Constellations
Authored by Raikh
 C1 - Shoban: Ostentatious Plumage
Increases NA/CA ATK SPD by 10% and increases the total damage of A4 Procs from 140% ATK to 240% ATK.
Allows Wanderer to fit 1-3 NAs more into a DPS Window. Increasing total DPS by 6-11%. Value can vary based on how much ATK SPD Wanderer already has. The increased A4 damage can further increase the value of this Constellation if Wanderer has to dodge frequently or can utilize A4 Dash Cancels for a DPS gain.
Individual Increase: 6-11% Total Increase from C0: 8.5%
 C2 - Niban: Moonlit Isle Amidst White Waves
Grants Wanderer increased Q DMG% based on Kuugoryoku Points spent while in his Skill State, up to 200% after 50 points spent.
Grants Wanderer a powerful nuke option but also forces him to use his Burst as a finisher at the end of his DPS window. Generally yields around 15% more total DPS, which isn’t impressive for a C2. The effective value of this Cons however can be higher due to the practical advantages of powerful nuking abilities. Only major stopping point for Wanderer Constellations prior to C6.
Individual Increase: 14-17% Total Increase from C0: 25%
 C3 - Sanban: Moonflower Kusemai
Increases the Wanderer’s Elemental Burst Talent Level by 3.
Further build upon the nuking power of his Burst after C2, but nothing to write home about in terms of value. Usually around 5% more DPS.
Individual Increase: 5% Total Increase from C0: 32%
 C4: Yonban: Set Adrift Into Spring
Grants Wanderer an additional Elemental Absorption Buff he doesn't already have at random, when he is absorbing an Element with his Skill and increases the cap of Buffs to 3.
Can provide 0%-15% more damage. The randomness makes these Buffs difficult to use consistently, as they may require you to adjust your Stats, are devalued in some Teams or require changes in your rotation.
Hence a pessimistic evaluation at 0%.
Generally: Cryo > Pyro > Electro/Hydro
Individual Increase: 0% (up to 15% at the mercy of RNG) Total Increase from C0: 32%
 C5 - Matsuban: Ancient Illuminator From Abroad
Increases the Wanderer’s Elemental Skill Talent Level by 3.
The value of Skill Talent Levels on Wanderer is generally pretty awful, making this his arguably weakest Constellation at around 3% more total damage.
Individual Increase: 3% Total Increase from C0: 36%
 C6 - Shugen: The Curtains’ Melancholic Sway
Causes the Wanderer to shoot a second Kuugo:Fushoudan (Skill State Normal Attack) whenever he uses a Normal Attack in his Skill State.
This second attack deals 40% of the original Normal Attack and also counts as a Normal Attack.
Additionally when Wanderer drops below 40 Kuugoryoku Points, his Normal Attacks will restore 4 such Points with a 0.2s CD, up to 5 times in total per Skill use.
The additional Normal Attacks are the primary value of this Constellation, effectively increasing his Normal Attack dmg by a total 40% or about 25% more total damage. A notable synergy is being able to rapidly fire the added Bonus Damage Stacks granted by Yun Jin’s Elemental Burst. The additional Skill State duration is mostly QoL and isn’t used for the numerical evaluation of this Constellation.
Individual Increase: 25% Total Increase from C0: 70%


