
Yaoyao FAQ

EduLis, Athena, Akane, Leifa, Luna, gerryoat, seima
Last updated on Jun 4, 2025
Credits
- EduLis#2176 - Lead, Author, Calcs || Overview, Talents, ER Requirement, Artifacts
- Athena#2444 - Co-Lead, Consultation
- Akane#0926 - Consultation
- Leifa#1359 - Calcs || Weapons
- Luna#0188 - Contributor, Calcs || Constellation
- gerryoat#6790 - Author || Constellation
- Seima#4597 - Author || Weapons, Teams
- Sir Von|Skill Deficiency Cult#7672 - Framecounting
- gellagella#6999 - Framecounting
For all Yaoyao Calcs you can reference: Yaoyao Mastersheet by EduLis#2176, Leifa#1359, and Luna#0188 as well as Yaoyao Frames Mastersheet by Sir Von|Skill Deficiency Cult#7672 and gellagella#6999
DISCLAIMER Pre-TC is volatile and, as always, perpetually subject to change until release (and sometimes later!). Please note that these are theoretical suggestions. Everything described in this FAQ is a good faith analysis based on the little information about the character’s kit that we know. Team calcs, additionally, are not established yet, and as with everything in TC, the content in this FAQ should be taken with a grain of salt.
Character Overview
Authored by EduLis

Yaoyao is a Dendro Polearm character and the first Dendro healer in the game. Aside from being a solid healer, being a Dendro character opens her up to some unique applications. Her role in a team composition is flexible thanks to her low desire for on-field time and in many applications low desire for Energy as well.
Yaoyao’s playstyle can be split into two directions: Elemental Skill focused or Elemental Skill & Elemental Burst focused. The main differentiator between these playstyles is the requirement for ER and on-field time. Yaoyao’s healing scales off of her HP. Because of her HP% Ascension stat and high Base HP, she gets more value out of Healing Bonus% than HP%. As an off-field DPS, she wants a good balance between Dendro DMG Bonus, CRIT Rate/CRIT DMG and EM (to boost Spread DMG). Artifact set and Weapon wise, she is not picky, and players are free to choose whichever combo fits their team-building the best.
While picking playstyles for Yaoyao, the main thing to consider is the pressure of survival. Her Burst can be treated as an emergency heal button for the whole team. Using it will extend her on-field time and decrease the overall team’s DPS by a small margin, in exchange for a substantial amount of healing. For instance, in teams with less i-frames and high self-damage like Nilou Bloom/Burgeon, players would likely utilize Yaoyao’s Burst more often than other typical Aggravate/Spread teams.
Yaoyao performs all of her core functions at C0. Her Constellations provide QoL features such as Stamina restoration, ER requirement reduction, self EM boost, extra Dendro application and healing.
Talents
Authored by EduLis

Leveling priority: Skill >= Burst >> Normal ATK
Analysis
For HP scaling characters, it's usually recommended to level them to 90. If not, Yaoyao should at least be fully ascended to take advantage of the HP ascension stat.
Yaoyao’s Elemental Skill creates one instance of Yuegui: Throwing Mode, a turret-like summon akin to Fischl’s Oz. By holding the Skill button, players can also manually adjust the position of the summon on initial cast, similar to Amber’s Baron Bunny. Yuegui: Throwing Mode will continuously throw out projectiles called White Jade Radishes. Upon contact with either an enemy or a character, they will explode and deal damage to the enemy while healing the on-field character within the same AoE, albeit a relatively small one. If a Radish does not contact an enemy or a character, it will remain on the field for 5 seconds.
“Yuegui: Throwing Mode” also has a set of logic for picking its target:
- If the on-field character has below 70% HP: targets the on-field character
- If the on-field character has above 70% HP with enemies present: targets the enemy
- If the on-field character has above 70% HP without enemies present: targets the on-field character
Yaoyao’s Elemental Burst grants her the Adeptal Legacy state while she is on-field. This state’s effect consists of three parts:
- Yaoyao will throw out three instances of Yuegui: Jumping Mode, turrets with the exact same targeting logic as Yuegui: Throwing Mode, in very quick succession.
- All of the White Jade Radishes fired during this state, from both Yuegui: Throwing Mode and Yuegui: Jumping Mode, will be converted to Adeptal Legacy White Jade Radishes. They deal extra damage and healing, and they are considered as Elemental Burst DMG. The healing also benefits her whole team instead of only the on-field character like her Skill.
- Yaoyao gains 15% Movement SPD and 50% Dendro RES Bonus.
If Yaoyao leaves the field, all Yuegui: Jumping Mode will immediately despawn.
Yaoyao’s 1st Ascension Passive is a nice addition to her Burst mechanic, as she is encouraged to move around while in her Adeptal Legacy state, evading a large portion of both damage from enemies or Bloom self-damage, at the same time boosting her healing even further. Her 4th Ascension Passive is another addition to her healing. It’s worth noting that this Passive will be hard to trigger when the Yueguis are targeting the enemy instead of Yaoyao herself due to the small Radish AoE.
Yaoyao’s Utility Passive is very handy for exploration, as it reduces difficulty for catching Crystalflies or wildlife for teapot.
Constellations
Authored by gerryoat

C1 - Adeptus’ Tutelage
When White Jade Radishes explode, active characters within their AoE will gain 15% Dendro DMG Bonus for 8s and have 15 Stamina restored to them. This form of Stamina Restoration can only be triggered every 5s.
This Constellation provides a decent boost for Yaoyao’s Dendro teammate’s damage output, making it a decent Constellation in teams where Yaoyao is the 2nd Dendro on the team. The 15 Stamina restoration is also a quality of life in her teams as well.
Rating: 3/5

C2 - Innocent
While affected by the Adeptal Legacy state caused by Moonjade Descent, if White Jade Radish explosions damage opponents, 3 Energy will be restored to Yaoyao. This form of Energy regeneration can occur once every 0.8s.
After using her Burst, while Yaoyao is on-field, Jade Radishes that hit opponents refund 3 Energy to Yaoyao with a cooldown of 0.8 seconds. This Constellation helps with some Energy because she has an 80 Energy Cost on her Burst, but it could be inconsistent. This Constellation only is accounted for when Yaoyao is on-field while her Burst is active. In teams where she spends a significant time on-field during her Burst, this can be a pretty decent Constellation for reducing her Energy Cost. If used to its full extent, this can essentially reduce her Burst from an 80 Energy Cost to a 62 Energy Cost.
Rating: 3/5

C3 - Loyal and Kind
Increases the Level of Raphanus Sky Cluster by 3. Maximum upgrade level is 15.
Adds 3 levels to her Elemental Skill. Not much to say about this Constellation; it just increases the healing and damage of her Elemental Skill slightly. The healing portion can be somewhat relevant, since it can allow her to rely a bit more on her Skill for healing.
Rating: 2/5

C4 - Winsome
After using Raphanus Sky Cluster or Moonjade Descent, Yaoyao’s Elemental Mastery will be increased based on 0.3% of her Max HP for 8s. The maximum Elemental Mastery she can gain this way is 120.
After using her Elemental Skill or Elemental Burst, Yaoyao’s Elemental Mastery will be increased by 0.3% of her maximum HP. This bonus is capped at 120 Elemental Mastery. This Constellation can be good depending on the team you are playing. In Bloom teams such as Nilou’s with Candace, the EM bonus can help with your Bloom DMG. If you want to max this bonus out, it caps at 40,000 HP, which is easily achievable without having to go HP/HP/HP + Black Tassel .
Rating: 3/5

C5 - Compassionate
Increases the Level of Moonjade Descent by 3. Maximum upgrade level is 15.
Adds 3 levels to her Elemental Burst. Just like her skill, this Constellation just increases her healing and damage output slightly. As with her C3, the healing portion can be somewhat relevant as it allows you to gain more healing in Bloom teams if needed.
Rating: 2/5

C6 - Beneficent
For every 2 White Jade Radishes Yuegui: Throwing Mode throws out, it will also throw a Mega Radish that will have a larger AoE than the standard White Jade Radish and have the following effects upon exploding: ·Deals AoE Dendro DMG based on 75% of Yaoyao’s ATK. ·Restores HP for the active character based on 7.5% of Yaoyao’s Max HP. Every Yuegei: Throwing Mode can throw out a maximum of 2 Mega Radishes.
For every 2 White Jade Radishes Yuegui: Throwing Mode throws out, it will also throw a Mega Radish. This Constellation increases Yaoyao’s healing and damage output. The Mega Radish not only heals, but can also provide more Dendro applications for your team. Depending on the team, this can be a decent boost for her supporting capabilities. In Nilou Bloom, this allows her to build more EM assuming the Radish hits more than one enemy at the same time.
Rating: 3/5
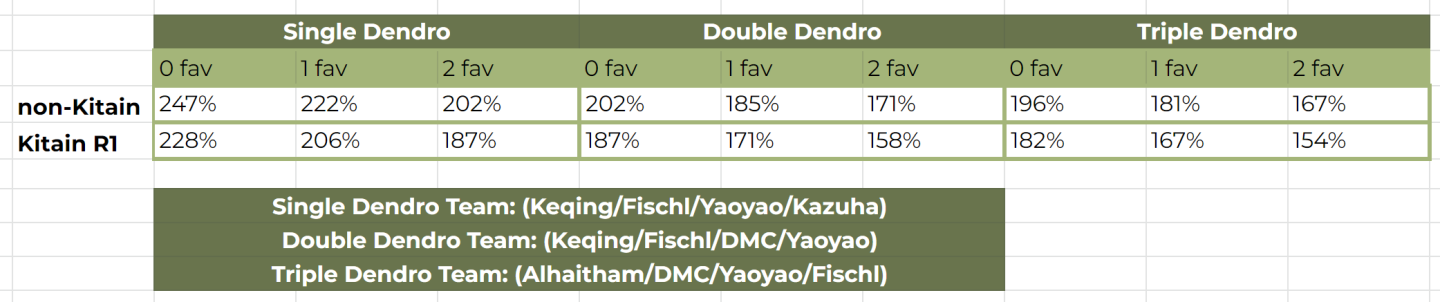
Energy Recharge Requirements
Authored by EduLis
The table assumes Yaoyao Bursting every rotation. If she is Bursting every other rotation instead, she would not need to specifically build ER; in the worst case scenario she would need around 150% ER. C2 gives her 18 Flat Energy, which lowers her ER requirement by 30-40%.
Artifacts
Authored by EduLis
Overview
Sands of Eon:
- For Healer: HP%, ER(Only if Bursting every rotation)
- For Off-field DPS: EM
Goblet of Eonothem:
- For Healer: HP%
- For Off-field DPS: Dendro DMG Bonus, EM
Circlet of Logos:
- For Healer: Healing Bonus, HP%
- For Off-field DPS: CRIT Rate, CRIT DMG, EM
Substat Priority:
- For Healer (Non-Bloom): ER (Only need to be considered if Bursting every rotation) > HP% > Flat HP
- For Off-field DPS (Non-Bloom): CRIT Rate/CRIT DMG > EM
- For Bloom: 30% CRIT Rate (For Proccing Favonius Lance if it is equipped) > ER > HP% > EM
For Bloom, even though building as much EM as possible would increase her Bloom DMG, it is not significant enough in the overall team’s damage contribution to be considered over building her to heal. For detailed comparison between builds, please refer to Yaoyao Mastersheet in the Artifacts - Burst Focused section.
Notable Sets
 4pc Deepwood Memories [Non-Bloom][Bloom]
Yaoyao’s BiS artifact for all of her damage applications with a caveat. While she has excellent uptime for the set, the small AoE from Radish explosions means that coverage in a heavy multi-target situation will suffer. In Nilou Bloom teams, it is highly recommended for another Dendro unit to equip this set and free Yaoyao to equip a more healing-centric set instead due to the above-mentioned reason and the very high demand for survivability.
 4pc Maiden Beloved [Non-Bloom][Bloom]
Yaoyao’s BiS artifact for her healing applications. The set’s effect uptime perfectly covers the entirety of her Elemental Skill’s duration, and it could be refreshed to boost the team-wide healing from her burst. If the player is looking to farm this set, getting the correct main stat will be good enough and grinding substats here is not recommended.
 4pc Tenacity of the Millelith [Non-Bloom]
An excellent support set in non-Bloom teams. She has great uptime on this set and the HP from this set’s 2pc effect helps with healing. In non-Bloom teams, the ATK will be appreciated by the entire team. It is worth noting that Yaoyao’s Burst will transform all Radish DMG into Burst DMG, meaning the set’s 4pc effect will not be active during that time.
 4pc Instructor [Non-Bloom][Bloom]
A very good option for boosting the entire team’s reaction damage. Non-Bloom teams and especially Bloom teams will enjoy the EM boost. The frequency Yaoyao applies Dendro also ensures that the set has good uptime. As Instructor is a 4-star artifact set, the lower base stats will result in less healing, though it’s not far off on a full healer build.
Honorable Mentions
 2pc HP/HB/EM/Dendro DMG Bonus mix and match
To achieve the most amount of healing, Healing Bonus is preferred over HP and to achieve the most amount of damage, Dendro DMG Bonus is preferred over EM. Generally 2+2pc are solid performers on Yaoyao and not far off from her BiS artifacts in each build scenario.
 4pc Gilded Dreams [Non-Bloom]
A good set for Yaoyao’s personal damage. However, she is not going to be the main damage dealer from the team, therefore the opportunity cost here is quite high. Slotting in sets with support capabilities is preferred.
 4pc The Exile [Bloom]
A set catered to easing the team’s ER requirement, which can be especially handy in ER-hungry teams like Nilou Bloom. However, it does require Yaoyao to Burst consistently, which might be undesirable in teams with less ER requirement and pressure for survival.
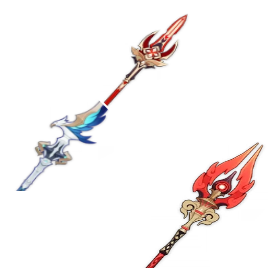
Weapons
Authored by Seima
Since Yaoyao is a character who has heavy role consolidation and benefits from many different stats based on her teams, this leaves her with numerous build paths, and it can be confusing to players when deciding what the best option is. As such, when picking Yaoyao’s weapon, players should pay attention to what team she’s going to be played in, her field time in said team and what type of content they’re facing. Generally:
[Nilou Bloom] are weapons that have a specific value in Nilou Bloom teams, be it Energy for frequent Bursts and/or high EM for her own Bountiful Core DMG.
[Spread] are options specialized in providing Yaoyao with personal Spread DMG and are recommended in Spread/Aggravate teams (and some Hyperbloom teams), where Quicken aura has high uptime and her Burst has lower value. These usually boast offensive stats like CRIT Rate/CRIT DMG, EM, DMG Bonus or ATK.
[Support] signifies Polearms that are highly flexible picks for most of Yaoyao’s teams, where she is used primarily for heals and Dendro application but can provide additional support value.
Additionally, Notable Options will go over a selection of Yaoyao’s most competitive weapons while Other Options includes viable but situational ones.
Notable Options
 Favonius Lance - [Nilou Bloom] [Support]
A flexible option that extends Yaoyao’s support capabilities by supplying the whole team with Energy through clear particles and enhances her with its ER secondary stat. It should be noted that the passive only triggers while the holder is on-field and requires them to build CRIT Rate, so generally, aim to perform Skill → N2 in teams where Yaoyao does not use her Burst frequently.
 Kitain Cross Spear - [Nilou Bloom] [Spread]
Yaoyao can virtually utilize every facet of this weapon, from the EM secondary stat and Skill DMG Bonus to the Flat Energy generation. Most notably, the Energy generation passive lets Yaoyao Burst every rotation even with lower-ER builds. Contrary to its description, Kitain does not drain any Energy when the holder has none, but this does not affect Yaoyao’s rotations given Yuegui’s Radish hit delay after Skill usage. Overall, Kitain’s performance is amicable for Yaoyao in most situations and an exceptional one for Nilou teams.
 Black Tassel - [Nilou Bloom] [Support]
As the highest HP%-stat Polearm in the game, it gives a direct boost to Yaoyao’s healing potency. Overall a capable weapon when it’s already leveled but can be substituted for HP% Sands + another ER weapon instead.
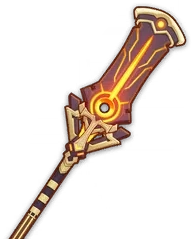
 Deathmatch|Staff of Homa|Missive Windspear - [Spread]
Competitive Spread-focused Polearms, all of which provide nearly unconditional stat-buffing passives. This alongside their high inherent stats makes them stable and reliable options as opposed to Staff of the Scarlet Sands. Note that Missive Windspear’s passive will only be snapshotted onto Yaoyao’s Skill from the 2nd rotation onwards given its 10s duration and Yuegui’s downtime.
Other Options
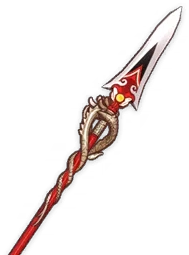
 Moonpiercer - [Support]
A unique spear capable of providing a hefty ATK% buff (16%-32%) to another party member while granting Yaoyao with its offensive stats. With the ATK% buff only benefiting a single character and high uptime (12s duration/20s cooldown), Moonpiercer becomes an immensely valuable option for ATK-scaling hypercarries. Even though the Leaf placement can be finicky to deal with, the passive trigger condition (off-field compatible) keeps rotations relatively simple and controlled. In spite of that, its value drops significantly for rotations that aren't 20s.
 Staff of the Scarlet Sands - [Spread]
Even for its 5-star status, this weapon boasts an extremely high CRIT Rate secondary stat (44.1%) and a stacking ATK passive that directly scales off Yaoyao’s EM, both of which make it one of her best options when built for Spread DMG on paper. But the value of this weapon becomes less impressive seeing as how Yaoyao is only able to gain the passive’s stacks while on-field and how her Skill/Burst snapshots. This means that in order for Yaoyao to gain maximum value from the passive, she would have to spend 4s on-field to gain full stacks then snapshot those stats onto her Burst. All things considered, Staff of the Scarlet Sands is usually not recommendable over more stable options, as Yaoyao is incapable of making full use of it, and the weapon should be in the hands of a more effective user in the team.
 Dragon’s Bane - [Nilou Bloom] [Spread]
As Quicken aura is not able to coexist with Hydro or Pyro aura and other Dendro reactions gain no value from DMG%, this weapon’s passive proves to be of no use to Yaoyao. Regardless, its high EM secondary stat makes it a usable stat stick when there are no better options.
Teambuilding
Authored by Seima
General Healer

Yaoyao’s unique disposition as a Dendro healer lets her play an important role in practically any Dendro-related teams or in teams where her Dendro application does not interfere with their intended reactions. Subsequently, as Yaoyao’s raw healing output is sufficient in most cases, her primary role will always be the healer of her teams—even when built offensively. Yaoyao’s Burst significance will shift as her teams’ healing needs change. There are a few factors that affect this:
- Team’s field-time distribution.
- Enemies’ team-wide DoT effects (e.g. Corrosion, Brand of the Abyssal Flame, etc.) or highly-damaging enemies like some bosses.
- Self-damaging effects from Dendro Cores (i.e. Nilou’s Bountiful Core, Hyperbloom, Burgeon).
Dendro Support
Quicken teams
Yaoyao-Electro-Electro/Dendro-Flex

Yaoyao as a solo-Dendro support in Aggravate teams provides rotation-tight Quicken aura uptime as well as her own damage through Spread, however insignificant it is. Her being the healer of said team will free up a slot for competitive Electro or Anemo picks—such as Yae, Kazuha, Sucrose, etc—which will naturally boost the Electro DPS slots’ performance.
With that said, in Spread-centric teams, she has various utilities: Dendro Resonance, C1’s Dendro DMG% buff and some minor battery capabilities. More importantly, in the same vein as Aggravate teams, Yaoyao as the healer opens up her teams’ potential—giving leeway for Electro Resonance, supporting Energy-hungry characters (e.g. Alhaitham, Yae, Beidou, etc). Not just that, she also has indirect synergy with ranged teams like Tighnari’s or Nahida’s teams, as Kuki’s or Dori’s Electro application is largely limited by range/placement.
Character Options
-
Dendro: Alhaitham, Collei, DMC, Nahida, Tighnari
-
Electro: Beidou, Cyno, Fischl, Keqing, Lisa, Raiden, Sara, Yae
-
Flex: (another Dendro/Electro unit) or Kazuha, Sucrose, Venti, Zhongli
Nilou Bloom teams
Yaoyao-Nilou-Hydro-Dendro

Since Nilou’s Bountiful Cores explode immediately and can deal lethal damage in their damage window, Yaoyao is one of Nilou’s teams’ essential picks with her Skill’s Yuegui off-field heals, A4 healing effect and on-field team-wide healing from her Burst (the personal Dendro RES will also help her survive during this phase). As such, Yaoyao when played in a Nilou Bloom team should be built with enough ER to consistently Burst every rotation for the teamwide healing and to lessen others’ burden by taking on some Bloom DMG herself. Artifacts featuring HP and Healing Bonus from a healing-centric set like 4pc Maiden are generally recommended unless there isn’t already a better holder of 4DW, in which case Yaoyao will use it herself instead.
With that said, since Yuegui’s priority switches to healing (as opposed to attacking) when the on-field character’s health goes under 70%, it is still recommended to use another Dendro character alongside Yaoyao, as her own Dendro application proves to be insufficient for creating enough Bountiful Cores to comfortably clear higher Abyss Chambers. In Nahida’s case, Yaoyao’s Dendro application triggers her Tri-Karma Purification and allows her to be used off-field so that another on-field Hydro DPS (Ayato or Tartaglia) can take the reins instead, reinforcing the team’s AoE potential. Furthermore, with Yaoyao as the main healer of the team, this lets Kokomi (with her high Bloom ownership) be built with full EM on 4OHC and become the team’s consistent source of Core generation. At the same time, having Kokomi in the team will help with team’s survivability against the high Bloom count, in which case Yaoyao’s own healing output won’t be enough without sacrificing team’s rotation time to Burst. Barbara using the same build instead of Kokomi will largely serve the same function but as a less effective substitute with her overall lower Bloom count and restrictive range.
Character Options
-
Dendro: Alhaitham, Collei, DMC, Nahida
-
Hydro: Ayato, Barbara, Candace, Kokomi, Tartaglia, Xingqiu, Yelan
Hyperbloom /Burgeon teams
Yaoyao-Hydro-Electro/Pyro-Flex

Although not as a crucial slot, Yaoyao serves as a perfectly viable healer for Hyperbloom and Burgeon teams. Her main advantages (aside from healing) are Dendro Resonance and the ability to open up space for other characters, increasing options and flexibility when choosing teams. Something to note when fitting Yaoyao into these teams is that her Dendro application will likely not be enough for Burgeon teams, as Burning may interfere with Dendro Core generation. As such, slotting in another Dendro character with a strong Hydro applier will help solve this problem.
Character Options
-
Hydro: Ayato, Candace, Kokomi, Tartaglia, Xingqiu, Yelan
-
Electro/Pyro: Dori (C6), Fischl, Kuki, Raiden, Yae, Amber, Thoma, Yanfei(Fischl will need an Anemo trigger)
-
Flex: Alhaitham, Collei, DMC, Nahida, Sucrose, Heizou
 Edit this page on GitHub
Enable hardware acceleration for the best site performance | Built using  and
and 
Wangsheng Funeral Parlor is in no way sponsored, endorsed or administered by or associated with miHoYo Co., Ltd.
