Collei
Emiliabyss#1641, Raikh
Last updated for 3.0 on Apr 6, 2024

I'm starting to feel like... I'm finally a better person than I used to be."
Abstract
Click here for the Extremely Short Version: Collei Mastersheet
Levelling
Level to 90 for reaction. Level Skill and Burst to 9+. Burst > Skill > Normals
Constellations
C1 +3.38%| C2 +6.69% | C3 +2.42% | C4 +0.00% | C5 +7.65% | C6 +7.20%
Recommended Combos at C0
Skill, Burst, Swap (.... Swap Back, Skill, Swap)
Artifact Set
- Default Build
4pc Deepwood; 4pc Noblesse Oblige; 4pc Tenacity of the Millelith; 4pc Instructor; 4pc Exile (ER/ATK/EM; DMG; CRIT)
- Bloom Trigger Build
4pc Deepwood; 4pc Noblesse Oblige, 4pc Gilded Dreams (ER/EM;EM;EM)
Weapons
- Elegy for the End- Limited 5-star weapon - Overall BiS
- Polar Star / Aqua Simulacra- Limited 5-star weapons - For Spread Builds Only
- R5 Sacrificial Bow - Unlimited 4-star gacha weapon
- R5 Stringless > R5 Mouun's Moon - For Spread Builds Only
- Favonius Warbow
Teammates
- Dendro: Tighnari, Dendro Traveler
- Pyro: Thoma, Bennett, Xiangling
- Hydro: Yelan, Xingqiu, Tartaglia, Ayato, Kokomi, Mona
- Anemo: Kazuha, Venti, Sucrose, Jean, Sayu
- Electro: Most of them, but notably Shinobu, Fischl, Keqing, Yae Miko, and Raiden Shogun
- Cryo: Ayaka, Ganyu, Rosaria, Kaeya
- Other: Zhongli
Character Overview
Collei is a 4-star Dendro bow-user who offers support in off-field Dendro applicator and off-field damage. She is able to be either the 'Aura' in any team focused on Dendro reactions or the 'Trigger' in Quicken, Bloom/Rupture, and Burning teams. Collei, however, depends on these reactions in order to bring respectable damage to the team. Luckily, she can do this while also equipping strong support weapons like Elegy for the End or Favonius Warbow. Alternatively, she can focus on personal damage with Polar star, R5 Sacrificial Bow, R5 Stringless, or R5 Mouun's Moon.
Her niche, at time of release, is off-field application for Pyro-focused Dendro reactions, namely Burgeon and Burning. Tighnari is an on-field unit and Dendro Traveler's off-field Burst prematurely ends when affected by Pyro. Collei is bound by voracious Energy Recharge requirements: 200% without adequate batterying, 170% with Favonius Warbow, and 160% with Sacrificial Bow.
| Pros | Cons |
|---|---|
| Niche in Burgeon and Burning. | Hungry for constellations 2, 5, 6. |
| One-size-fits-all off-field applicator. | May need to swap between builds. |
| Adequate personal damage. | Dendro Traveler often outclasses. |
| Favonius Warbow is free. | Needs upwards of 200 Recharge. |
| Flexible artifact options. | Needs help for competitive damage. |
| Is a confirmed Amber-liker. | Deserves better from the world. |
Collei's Application and Reactions
Elemental Application Rate
| C0 Applications, Level 90 | C6 Applications, Level 90 | ||
|---|---|---|---|
| Burst | 3-4 | Burst | 4-5 |
| Skill | 2 | Skill | 2 |
| Sprout | 1 | Sprout | 1 |
| Total | 6-7 | Total | 8-9 |
Equipping an Energy Recharge weapon like Favonius Warbow allows us to test full EM sets for damage. If you are to use an EM build for Collei, it is strongly recommended you stick to either Elegy of the End, Favonius Warbow, or another powerful Energy Recharge or Elemental Mastery Bow. The other bows will not be as useful.
Keep in mind that full EM builds don't require talent leveling! While ADC Collei can perform a satisfactory role for all Dendro reactions, specializing in EM for more specific use-cases will result in more damage.
Each instance of burning is four ticks per second. Two full seconds of Burning is the exact same damage as a single Overload/Bloom-Rupture. 12 seconds of Burning is achievable, but 10 seconds is safest to assume, putting Burning (typically) only barely behind Bloom. Please remember that Collei can only reach the numbers below on EM builds if there is a reliable way to ensure Collei owns each elemental reaction.
However, unless a character is released in which Blooms explode automatically, the lengthy time delay between generating a Bloom and the damage it deals may be a turn-off. The most consistent option outside of this hypothetical character is Burning teams, and if 12s Burning can be reached, it matches Bloom's damage exactly.
Elemental Reaction Trigger Comparison
Favonius Warbow; 4pc Deepwood; 20s Rotation; E, Q, Swap; 30% Crit Rate for Fav passive; C0
| ATK / DMG / CRIT | EM / EM / EM | DMG Difference | Best Main Stat Choice | Overall Ranking | |
|---|---|---|---|---|---|
| No Reactions | 100% | 100.00% | 160.78% | ATK / DMG / CRIT | 100% |
| Total w/ 6 Spread | 131.98% | 245.04% | 40.46% | ATK / DMG / CRIT | 131.98% |
| Total w/ 6 Bloom | 139.04% | 531.86% | 46.68% | EM / EM / EM | 203.95% |
| Total w/ 10s Burning | 132.54% | 459.89% | 33.06% | EM / EM / EM | 176.35% |
Energy Recharge Requirements
When establishing Energy Recharge needs for a character, it almost entirely depends on the team composition the character is in, along with how many Skill uses are in a rotation per character, and whether or not they are equipped with a Favonius or Sacrificial weapon. It's advised to use an Energy Recharge Calculator.
Energy Recharge Expectations
| Weapon | ER % |
|---|---|
| Without Fav/Sac | 200% |
| Favonius Warbow | 170% |
| Sacrificial Bow | 160% |
| 24+s 2E rotations/Energy-rich teams | 160%-170% |
The main benefit of finding creative ways to lower Energy Recharge requirements is to be able to focus more on offensive stats while still being able to Burst off cooldown.
Active Talents
Priority: Burst > Skill > Normal Attacks
Normal Attack - Supplicant's Bowmanship

Talent Priority: #3 or N/A
Normal and Charged Attacks
Collei's Normal Attacks perform up to four consecutive strikes, dealing Physical damage based on her ATK. Her Charged Attack, like all 4-star bow users, charges up with an application of the character's element.
There is little worth mentioning about Collei's Normal Attack talent; it's about as typical or middle-of the road as it gets, an has little competitive use other than adding stacks to Polar Star if she's equipped with it.
For those insistent on using Normal Attacks, N2C (two Normal Attacks followed by a cancel, either by aim, jump, or dash) is the go-to. In a pinch, since Collei depends on her Dendro application to generate respectable damage, Collei can use her Charged Attacks for extra applications.
Collei Frame Data
Recorded in 60 FPS
| Attack Type | Number of hits/input | Multiplier at T9 | Execution Frame |
|---|---|---|---|
| N1 | 1 | 80.10% | 25 |
| N2 | 1 | 78.40% | 32 |
| N3 | 1 | 99.40% | 49 |
| N4 | 1 | 125.00% | 28 |
| Charged Attack | 1 | 210.80% | 94 |
Elemental Skill - Floral Brush
 Talent Priority : #2
Using Collei's Skill makes her throw her Dendro boomerang, dealing Dendro damage twice: once closer to the time of throwing, and once on the way back to Collei.
While the Skill can do adequate damage, you are mainly using her Skill for Dendro application. The fact the Dendro application delays as the Boomerang continues its path is advantageous, especially when coupled with her Burst. You generally want her application to be spaced out for consistency, as most of the time, Collei is a Dendro Aura and not a Trigger (unless you are deliberately building a team around being a reaction Trigger, or using Spread).
Keeping a consistent Dendro aura on an enemy will ensure more reactions from herself or other party members, as many applications at once might interfere with other kinds of ICD on other characters or in reactions.
In-Depth Attributes
Frames are recorded in 60 FPS
| Attributes | Data | Attributes | Data |
|---|---|---|---|
| Multiplier (T9) | 257.00% (x2) | Particle/cast | 3 |
| Execution frames | 64 | Particle/min | 12 |
| Max Hold Duration | N/A | Elemental Gauge | 1U Dendro on hit |
| Cooldown | 12 seconds | ICD | None |
Elemental Burst - Trump-Card Kitty
 Talent Priority: #1
Collei's Burst throws her mascot (reminiscent of Amber's Baron Bunny) to repeatedly deal Dendro damage within a circular area highlighted in green. While the Burst can hit upwards of 19 times, it's heavily hampered by its ICD of three seconds (with no reset on hit count), meaning that even when fully extended with the help of her passives, the Burst will apply Dendro between three and four times. Four is often a safe assumption.
Despite this downside, in typical ATK/DMG/CRIT builds, Collei's Burst is the vast majority of her damage, making it a priority for her investment.
In-Depth Attributes
Frames are recorded in 60 FPS; single-target only
| Attributes | Data | Attributes | Multiplier @ T9 | |
|---|---|---|---|---|
| Initial DMG | 343.10% | Total Hits | 12-18 | |
| Burst Tick DMG | 73.50% | Burst Tick Rate | 2/second (12-18 hits) | |
| Execution Frames | 44 | Energy Cost | 60 | |
| Duration | 6-9 seconds | Elemental Gauge | 1U Dendro on hit | |
| Cooldown | 15 seconds | ICD | 3 seconds / _ no hit _ |
Passive Talents

First Ascension Passive: Floral Sidewinder
Triggering a Dendro reaction grants a Sprout effect on Collei's Skill when her boomerang returns, dealing a small amount of Dendro damage equal to 40% of her ATK as Skill damage to closely surrounding enemies for 3 seconds. (2 hits, 1 application) |
Essentially staples an extra Dendro application to Collei's Skill. The damage is negligible. Sprout instances do not stack: only override.

Fourth Ascension Passive: Languid Wood
Each Dendro reaction triggered during Collei's Burst uptime increases the duration by 1 second, up to 3 seconds. This passive is practically mandatory for Collei's functionality, and forces Collei to focus on reactions to maximize her damage. It's a 50% extension to her Burst duration and easy to trigger. It also grants an extra application. Without this, her Burst only applies Dendro 2-3 times.

Utility Passive: Sumeru Gliding Champion
Decreases gliding Stamina consumption for your own party members by 20%. Not stackable with Passive Talents that provide the exact same effects.
Collei learned to glide from her "good friend", Amber. ;)
Combos
The notation we'll be using to describe pieces of the combo will go as such:
| Notation | Translation |
|---|---|
| N#* | Number of normal attacks in a single combo. |
| E | (Elemental) Skill |
| Q | (Elemental) Burst |
| D | Dash |
| C | Cancel (quick aimed shot, jump, dash, etc.) |
| A | Aimed Shot |
| t (lower case) | Tap |
The Default Off-Field Combo:
There isn't much variety to this character's playstyle. The optimal, but most complex combo is:
E > Q > Swap
Or, with Polar Star-
N1 > tA > E > Q > Swap
As an off-field DPS, Collei's combos is an easy default; simply use her Skill and Burst and swap. When focusing on personal damage with Polar Star, in order to get max stacks on the weapon, it's recommended to get your Normal and Aimed/Charged shot out of the way as fast as possible, as they don't add anything to DPS on their own. Thus, a quickly tapped A is enough.

Constellations
Constellations for 4-star units are inevitable. However, getting high constellations on a character's release is often more expensive than rolling for 5-stars. 4-stars, also, require most of the constellations to compete with C0 5-star units.
Please only roll for constellations only based on your financial situation and level of disposable income. Collei benefits most from C2, C5, an C6, but the damage difference between C0 and C6 is only 30%. There is some "invisible power" involved, as these constellations also grant extra Dendro application for other teams to exploit, so the usefulness in practice is likely greater than a 30% damage increase.
Constellation 1: Deepwood Patrol

When in the party and not on the field, Collei's Energy Recharge is increased by 20%.
DPS increase from C0: ~3%
This constellation is deceptive. You would think that you' require 20% less Energy Recharge, right? Wrong. Characters need to be on-field in order to collect the most energy from their own skills, and C1 only operates while off-field. This means Collei's own Dendro particles will not be enhanced by C1's Energy Recharge buff.
In reality, this is more like a 15% Energy Recharge buff. Still not bad – but it's important to understand this, as while off-field, characters generate less energy when receiving the same particles.
Constellation 2: Through Hill and Copse
 Collei's Sprout effect on her First Ascension Passive is updated: if a Dendro reaction is triggered during Collei's Sprout duration, it is extended by 3 seconds
(max one instance per Sprout).
DPS increase from C1: ~7% || from C0: ~10%
One extra Dendro application is gained through this constellation. The damage from Sprout is, as usual, insignificant, though the application itself proves useful nonetheless.
With highly technical Sacrificial Bow play, you can possibly even draw out another application from her Sprout, but this would be challenging to pull off. You would need to use her Skill, Swap back as the boomerang returns and creates a Sprout, then use the Skill again with Sacrificial Bow's passive to trigger the second Sprout as soon as the first one ends.
Keep in mind, an extended Sprout lasts for 6 total seconds, and Collei can only proc Sacrificial Bow's passive while on-field, meaning your timing has to be impeccable to not ruin the rotation's momentum.
Constellation 3: Scent of Summer
 Increases the Level of Collei's Skill by 3. Maximum upgrade level is 15.
DPS increase from C2: ~2% || from C0: ~13%
Boomerang, now with extra wood for harder hits.
Constellation 4: Gift of the Woods
 Using Trump-Card Kitty will increase all nearby characters' Elemental Mastery by 60 for 12s (not including Collei herself).
DPS increase from C3: ~0% || from C0: ~13%
C4 does nothing for her personal damage, but her team will be happy with the free EM to further exploit reactions that Collei enables.
Constellation 5: All Embers
 Increases the level of Collei's Burst by 3. Maximum upgrade level is 15
DPS increase from C4: ~8% || from C0: 22%
Since so much of Collei's damage comes from her Burst, C5 ends up being one of the most useful constellations for increasing damage.
Constellation 6: Forest of Falling Arrows
 When the Floral Ring hits, it will create a miniature Cuilein-Anbar that will deal 200% of Collei's ATK as Dendro DMG.
DPS increase from C5: ~7% || from C0: ~30%
The biggest highlight from this constellation is the extra instance of Dendro application. Sadly, her constellations aren't very interesting, even if they're useful.
Equipment & Gear
The full list of assumptions can be found here : Collei Mastersheet

Official Art by Hoyoverse
As always, it is recommended to use the Genshin Optimizer for artifact-gearing choices.
| Artifact Sets | Notes |
|---|---|
 4pc Deepwood Memories All-Purpose Option | The overall best artifact set for Collei. It increases her own Dendro damage, including Spread Damage, and lowers Dendro resistance, which can amplify bloom and other types of Dendro damage from any character. If you don't know if you'll want to specialize Collei in EM or not, Deepwood is always safe. |
 4pc Gilded Dreams For Bloom/Burning (Trigger) Builds | Gilded Dreams needs three Non-Dendro team members in order to excel. Two to compete. A hyper-specialized set for when you only want Collei to trigger reactions. This set does not benefit Collei when acting as an aura. In ideal cases, expect 20% dmg > Deepwood. |
 4pc Noblesse Oblige For General Support Builds | Noblesse Oblige is a support set that nearly every team can benefit from. It also enhances Collei's Burst damage. With builds focused on Bloom and Burning triggers, Noblesse provides nearly the same personal damage as Deepwood, making it mainly a choice between what the team needs. |
 4pc Tenacity of the Millelith For General Support Builds | Collei's Sprout damage counts as Skill damage, which means she is likely to be able to keep Tenacity of the Millelith up during the important damage windows. At higher constellations, this gets even better. Mostly an alternative to Noblesse Oblige for quickswap teams and Deepwood (perhaps if you're running both on the same team already?) |
 4pc Instructor For Pure Support Builds | For dedicated support only ; you are not trying to do damage with Collei if you're equipping this. The Team-wide EM buff is certainly worth mentioning, considering what Collei exists to do: facilitate Dendro reactions. |
 4pc Exile For Pure Support Builds | For dedicated support only; you are not trying to do damage with Collei if you're equipping this. Useful when the team is in desperate need of energy, even after Favonius Warbow is equipped, and you don't mind sacrificing personal damage. |
Mainstats and Substats
The Different Build Types
Collei has two different approaches to build her.
-
Aura/Spread - Focuses on either Spread damage or being able to facilitate all reactions as a Dendro Aura equally. Under a generalist build, all three reactions Collei can Trigger do nearly identical damage: within 250 DPS of each other. This build is best when you just want an easy-functioning Dendro character.
- ER/EM/ATK - Dendro DMG - CRIT
- Useful for any generic team composition supporting another character.
-
Trigger/Bloom-Burn - Focuses on Elemental Mastery more than anything else, and focuses on Collei's personal damage with the reactions she can enable. This build is best for squeezing every ounce of personal damage out of Collei for a price.
- ER/EM - EM - EM
- Useful only in niche circumstances, but powerful in those circumstances, at the cost of being borderline irrelevant in cases where someone else wants ownership of reactions.
Sands: ER%, EM, or ATK%
If Collei's energy needs are not met, you must do one of the following:
- Equip an Energy Recharge% weapon and acquire enough substats.
- Equip an Energy Recharge% sands and acquire enough substats.
- Equip both an Energy Recharge% sands and weapon,without needing to worry about substats.
At lower energy requirements in an energy-rich team full of functional batteries, or teams with longer rotations, such as 160%-170%, you can safely equip an ATK% or EM sands, depending on your preferred angle for Collei.
On Aura/Spread builds, EM and ATK% are roughly equal in terms of damage (within 2%). Just pick what has better substats.
Goblet: Dendro DMG% or EM
This is fairly straightforward. For regular and Spread damage, use DMG%. For triggering reactions, use EM.
Circlet: Crit Rate%/ Crit DMG% or EM
In Aura/Spread builds, Crit is king. For CRIT circlet, choose whatever Crit main stat that helps you balance a 1:2 crit ratio, and take substat into consideration as well. Normally the choice depends on the weapon and substats.
- If you have a Crit Rate% weapon, then usually Crit DMG% is the correct choice
- If you have a Crit DMG% weapon, then usually Crit Rate% is the correct choice.
- If the character's weapon gives Energy Recharge, then go with whatever will get you to a 1:2 ratio of Crit Rate%:Crit DMG%. Start by aiming for 70CR% : 140CD%. Crit rate is technically stronger, in these cases, but only barely.
Substats priority is as follows:
- ER% (160% Sac Bow; 170% Fav Bow; 160-170% if long rotations or energy-rich teams, 200% otherwise)
- Crit DMG%/Crit Rate%
- ATK% or EM% depending on chosen build.
In-Depth Weapon Analysis
PLEASE READ: These weapon standings assume you are playing the Aura/Spread build for now. Attention will be brought to weapons best for Reaction Trigger builds, but it's easy to remember to just pick the EM and ER weapons in about the same order from this list.
Assume 6 Spread instances. E > Q > Swap. 4pc Deepwood. 20s rotation
| Weapon | Notes |
|---|---|
Polar Star (118%) Aura/Spread Builds Only | Elemental Skill and Elemental Burst DMG increased by 12%. Using NA's, CA's, Skills, and Bursts offers an ATK% buff, maxing at 48% [608 ATK || 33.1% Crit Rate] While this deals the most personal damage in Spread builds, it is not the Best-in Slot. One reason is it requires you to extend field time to N1tA to build stacks. If it extends a rotation, this hurts DPS, and you must be able to aim-cancel well to grab these stacks in a short time. |
Elegy for the End (108%) Overall Best-in-Slot | Increases Elemental Mastery by 60. On Skill or Burst hit, gain a stack, even if off-field. Consume 4 stacks to grant 100 EM and 20% ATK for 20s. [608 ATK || 55.1% Energy TRecharge] This weapon not only supercharges Collei's kit, but the rest of her teammates who synergize with her as well. Team buffs are often more valuable than slightly more personal damage. The only reason not to use this is if someone else on the same team also has an Elegy (and needs it more). |
Aqua Simulacra (108%) Aura/Spread Builds Only | Holder's MAX HP +16%. When opponents are nearby, wielder DMG% +20%, even when off-field. [ 542 ATK || 88.2% CRIT Damage ] While Collei doesn't care about her HP stat much, the massive CRIT Damage bonus and the DMG% Bonus are welcome additions to Collei. However, it's just an expensive stat-stick, which doesn't help Collei's supportive capabilities. Elegy does similar damage, plus team-buffing. |
Sacrificial Bow (R5) (107%) All-Around Personal DMG | On Elemental Skill hit, 60-80% (R3-R5) chance to end its own CD. Can only occur once every 22-16s (R3-R5). [565 ATK || 30.6% Energy Recharge] Collei's default energy requirement falls from 200% to 160% with this weapon, allowing investment into other offensive stats. This also gives at least one extra application of Dendro, up to three depending on the sacrifices willing to be made. CAUTION: Must be R4 or R5 to not delay rotation. |
Mouun's Moon (R5) (107%) Aura/Spread Builds Only | For every point of the entire party's combined maximum Energy capacity, the Elemental Burst DMG of the character equipping this weapon is increased by 0.24% (R5). A maximum of 80% (R5) increased Elemental Burst DMG can be achieved this way. [ 565 ATK || 27.6% ATK **]**Assumes 280 total team energy. While this is rated with the same percentage of Sac Bow, Sac Bow actually has a higher damage ceiling due to its ability to create additional reactions. This is also a limited gacha weapon and difficult to refine. |
The Stringless (R5) (107%) Best on Aura/Spread Build | Increases Elemental Skill DMG by 48%.__Increases Elemental Burst DMG by 48%. [510 ATK || 165 Elemental Mastery] See Mouun's Moon for Aura/Spread build information. Note that Stringless's passive does not apply for reactions, so it can still benefit full EM builds, but not as much. |
Thundering Pulse (101%) Aura/Spread Builds Only | The passive doesn't really do anything for Collei [608 ATK || 66.2% Crit Damage] With a mostly wasted passive that grants ATK% and Normal Attack DMG, this should only be used as a raw Crit Damage stick and nothing more. It is put to better use on other characters. |
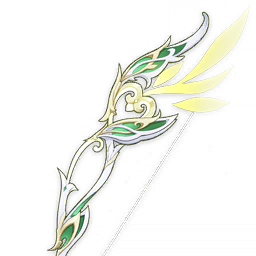 Hunter's Path (100%) Craftables Match This | 12% all Elemtnal DMG bonus. Charged Shots give later Charged Shots an additive bonus of 160% of Elemental Mastery. [542 ATK || 44.1% Crit Rate] Sadly, Collei does not use Charged Shots. The time it would take her to utilize this passive is nowhere near close enough to warrant spending money on this weapon when even R1 Prototype Crescent (post-headshot) matches this damage. |
Favonius Warbow (100%) Best 4* Support Option | CRIT Hits have a 60-100% (R1-R5) chance to generate 6 Energy for the character, once every 12-6s (R1-R5). [454 ATK || 61.3% Energy Recharge] Collei's default energy requirement falls from 200% to 160% with this weapon, allowing investment into other offensive stats. Everyone gets one by clearing Mondstadt, making it free. Solves all ER requirements for herself and helps her team as well. |
Other (roughly) 100% Weapons Stringless(R1) Mouun's Moon (R1) Prototype Crescent (R1) Skyward Harp | A high-refinement Prototype Crescent can, on paper, match top-tier options in terms of damage after one headshot, but it's not listed due to the difficulty being extremely high to manage. Most of these are for Spread builds only. Use Skyward only for an esoteric Physical-Only build like many do for Amber. |
 R5 King's Squire (87%) Better for Reaction Trigger | Once per 20 seconds, when unleashing Elemental Skills and Bursts, +140 Elemental Mastery for 12s. Removed when switching characters. When the effect ends, deal 180% of ATK to 1 nearby opponent. [454 ATK || 55.1% ATK] I really, really wanted this weapon to work. It looks awesome and fits her, but the drip itself is not strong here. In Reaction Trigger builds, the damage roughly matches Fav Warbow, but doesn't fuel the party's energy. Sorry folks. |
Team Composition

Official art from Hoyoverse
The Anatomy of a Collei Team
Collei can fit into any team that utilizes Dendro reactions. Start a team with an intended reaction, and then fill the team with characters who exploit that reaction.
For Quicken teams, the best candidates for DPS units are characters that have extremely high Electro application, like Fischl or Keqing. This is because Aggravate is an additive buff, much like Shenhe and Yunjin's buffs they give to characters. Additive buffs are best when there are multiple hits, rather than high multipliers. From there, you focus on sustaining the reaction or shredding elemental resistance, often with an Anemo character or Zhongli.
A helpful tip : Zhongli is the only other character at this point who can shred enemy Dendro resistance without the use of 4pc Deepwood. He also shreds Electro resistance at the same time.
Quicken/Aggravate/Spread Teams
 Collei (Dmg/Crit) | |||
 Collei (Dmg/Crit) | |||
 Collei (Dmg/Crit) |
If Collei is meant to support another Dendro DPS for Spread while holding 4pc Deepwood Memories, then Tighnari is the default (and only) On-Field Dendro DPS available. The Traveler can also be paired to add more bountiful Dendro application for an Electro DPS to abuse.
Most Electro units who care about damage and crit stats benefit from Aggravate. Fischl is a top-tier option, due to her ability to loop Quicken and Aggravate reactions. Keqing probably benefits the most from Dendro reactions, and this becomes her default team. If you need a healer and didn't bring Jean or Sayu, then Kuki Shinobu will be your default option for a healer. Yae Miko is able to reap double benefits from Elemental Mastery bonuses with her ascension passive, giving her damage a healthy boost. Sara helps boost Electro damage even higher after Anemo shreds resistances and Quicken gives its additive bonus.
You mainly want to bring a Viridescent Support to enhance the damage of your Electro party members. Kazuha is the clear best option in many cases, and can be substituted for Venti when the team needs lots of crowd control for something like Yae Miko's Burst. Sayu and Jean are prime options, due to being able to heal and shred resistances at the same time. Sucrose is also a powerful support option due to her ability to share Elemental Mastery with the team and pass on the 48% ATK buff from 3-star Thrilling Tales of Dragon Slayer. Team members for Quicken teams.
 Tighnari Tighnari On-Field DPS |  Traveler TravelerApplication Support |  Fischl FischlOff-Field DPS |  Keqing KeqingDPS |
 Raiden Shogun Raiden Shogun On-Field DPS |  Yae Miko Yae Miko DPS |  Kujou Sara Kujou Sara Buffing Support |  Kuki Shinobu Kuki Shinobu Healing Support |
 Kazuha KazuhaViridescent Support |  Sayu SayuViridescent Support |  Jean JeanViridescent Support |  Sucrose SucroseViridescent Support |
From here, we can move onto Bloom, Burgeon, and Hyperbloom teams. These teams prefer to maximize the Trigger's Elemental Mastery in order to deal loads of damage through transformative reactions.
To remind readers, applying Dendro and Hydro creates a seed.
-
If no element interacts with that seed for a few seconds, the seed Ruptures, hitting everyone caught in the blast. To enemies, this damage is _ exactly equal _ to Overloaded.
-
If Electro is applied, the seed becomes a single-target projectile in Hyperbloom, dealing 1.5x the damage of Overloaded.
-
If Pyro is applied, it Burgeons, dealing 1.5x the damage of Overloaded in a large explosion that hurts everyone caught in the blast.
We'll start first with Hyperbloom and Burgeon first, as Bloom is an odd case. The goal, then, is to have plenty of Hydro application to make sure Burning and Quicken do not occur, enough Dendro application to consistently create Bloom seeds, then an Electro or Pyro character with slow elemental application on their attacks to guarantee ownership of the reaction.
Hyperbloom/Burgeon Teams
 Collei (Aura) | Electro (Trigger) | Hydro (Application) | Flex |
 Collei (Dmg/Crit) | Pyro (Trigger) | Hydro (Application) | Flex |
Your flex spot will usually be dedicated to filling whatever gap your team has. The best generic flex spot choices are usually Viridescent Supports and Zhongli, due to their rare ability to shred resistances, which is almost universally useful. Other times you may need a second pyro to battery the first, and so on. Do note that Anemo cannot Swirl Dendro.
The characters most benefit from Hyperbloom and Burgeon are Kuki Shinobu and Thoma respectively. Both characters used to be considered weak picks, but these reactions finally gave them a chance to shine.
For Kuki to take advantage of Aggravate, she has to sacrifice most of her healing effectiveness. However, Kuki Shinobu only loses 15%-20% of her healing potential on a full EM set, and can carry a variety of support artifact options too.
Thoma can utilize a full EM artifact set as well, and provides a defensive option in the form of his shield, though Thoma will often want a Pyro battery like Bennett.
Hydro characters need a lot of application to fit into these teams, but it doesn't matter if it's on or off-field as long as your Pyro or Electro character secures the reactions. Tartaglia has the most Hydro application of any character in the game, and is a strong On-Field DPS who likes playing with Electro and Pyro reactions. Yelan and Xingqiu serve similar roles, and together can carry most other 2-character combinations in the game.
Team members for Burgeon/Hyperbloom teams.
 Kuki Shinobu Kuki Shinobu Reaction (EM) DPS |  Yae Miko Yae Miko DPS |  Thoma ThomaReaction DPS |  Bennett Bennett Role: Bennett. |
 Tartaglia Tartaglia On-field DPS |  Kokomi Kokomi Healing Support |  Yelan Yelan DPS |  Xingqiu Xingqiu Off-Field Support |
 Zhongli Zhongli Shielder, Debuffer |  Lisa Lisa Debuff/Buff Support |  Traveler Traveler Reaction Support |  Venti Venti Viridescent Support |
Bloom teams come next. Occasionally, these are called "Fridge" teams when including a Cryo character. Using a Cryo character is useful for using Freeze reactions with Dendro. The saying goes, "you preserve your veggies when you refrigerate them," and what this means in mechanical terms is that Freeze reduces the 'amount' of elemental aura depleted. When reactions deplete less elemental auras, you can create more reactions with less application.
The Bloom/Rupture Formula is identical to the Overload formula, so consider Bloom the "tropical" flavor of it. The concept is similar; reduce Dendro resist and create as many transformative reactions as possible.
Bloom/Fridge Teams
  Collei Collei (Either Build) |
The flex slots can be more Dendro or Hydro characters. Anemo is useful when your On-Field DPS is Hydro and not the Trigger for reactions. In these cases, you want your Dendro character to carry Elemental Mastery gear. It's not recommended to run other elements besides Zhongli for his universal resistance shred. Choose Dendro or Hydro based on balancing the amount of application for whoever you decide to be your trigger DPS.
The Trigger should be Dendro or Hydro, running a full EM set, and should have slower application than the application of the other element.
Yelan and Xingqiu provide lots of Hydro while also being generically strong units. Kokomi is a candidate for being a Hydro Trigger, as her Skill has slow, but consistent application. This will take away much of her healing potential, though depending on your skill level, that might be forgivable for her. Ayato and Tartaglia are strongest while focusing on their CRIT stats instead of EM, but both have high Hydro application, and Ayato can play on-field or off-field roles.
For Dendro, basically any current Dendro character can have a try at being the Trigger for Bloom/Rupture. As for Cryo, the character will usually want to be off-field while consistently applying Cryo. Exceptions can be made if your Bloom Aura and Trigger both do their job off-field (like Collei or Kokomi).
Team members for Bloom/Fridge teams.
 Tighnari TighnariOn-Field DPS |  Traveler TravelerApplication Support |  Ayato DPS |  Mona Buffing Support |
 Tartaglia On-field DPS |  Kokomi Healing Support |  Yelan DPS |  Xingqiu Off-Field Support |
 Kazuha Viridescent Support |  Sayu Viridescent Support |  Jean Viridescent Support |  Sucrose Viridescent Support |
 Jesse Off-Field DPS |  James Off-Field DPS |  Zhongli Shielder, Debuffer |  Venti VentiViridescent Support |
 Ayaka AyakaDPS |  Ganyu GanyuDPS |  It Is A Mystery It Is A Mystery |  It Is A Mystery It Is A Mystery |
Finally, there are Burning Teams, which focus on providing as much Dendro application as possible with Pyro in order to afflict enemies with damage-over-time, much like Electro-Charged strategies. Dendro application demands are generally higher because Dendro acts as the "fuel" for Burning. 1U of Dendro with Burning lasts about 2-seconds. Collei is the best at keeping this application up while off-field. Dendro Traveler, however, is ineligible for Burning teams, due to her Burst's premature explosion.
Burning Teams
 Collei Collei Aura or Trigger | Pyro Aura or Trigger | Dendro or Pyro Support/Flex | Anemo/Flex Support/Flex |
Thoma returns as a strong Pyro Trigger for Burning. Most Pyro characters generally do not run full Elemental Mastery investments, so most other Pyro characters will probably just focus on raw power and just be happy that Burning is extra damage for the team. In these cases, either Collei or Tighnari should be the Trigger.
Bennett is an obvious first pick for a flex slot, especially if using a Pyro carry with high energy requirements like Thoma or Xiangling. Anemo units also tend to run full Elemental Mastery investment anyways, and swirling Pyro onto Dendro would be another way to channel high amount of EM into Burning damage
Team members for Burgeon/Hyperbloom teams.
 Amber AmberGirlfriend Support |  Xiangling XianglingOff-Field DPS |  Thoma ThomaReaction (EM) DPS |  Bennett Bennett He's Bennett. |
 Tighnari TighnariOn-Field DPS |  Traveler TravelerHyperbloom Only |  Kazuha KazuhaViridescent Support |  Venti VentiViridescent Support |
 Sayu SayuViridescent Support |  Jean JeanViridescent Support |  Sucrose SucroseViridescent Support |  Zhongli ZhongliShielder, Debuffer |
Collei Resources
Collei Mastersheet by Emiliabyss, Raikh, Rockidayo, Noir, Jrm.spirit
100% of artwork used is official Genshin Impact promotional art.


